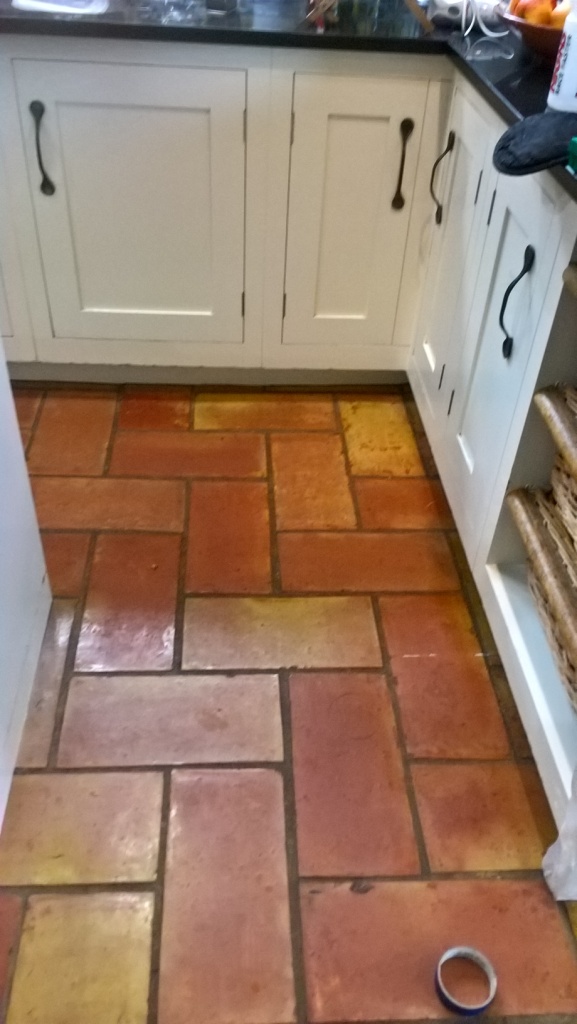
Stripping Varnish off Terracotta Kitchen Tiles and Resealing in Bristol
Terracotta tiles are always a popular choice for Kitchens but being made from clay they are porous and need to be sealed to prevent dirt from becoming ingrained in the tile. Once sealed though you need to remember Kitchens are high traffic areas, so you can expect the sealer to wear off quicker than it would elsewhere.
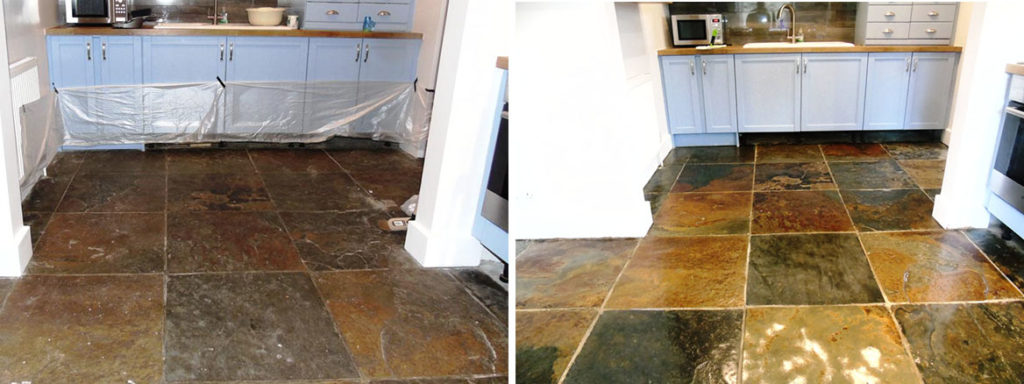
I mention this as a customer from Bristol asked me to do a survey on her Varnish Sealed Terracotta Kitchen Tiles where the seal had worn down and were now dull, and the grout had darkened. I surveyed the floor and completed a test clean on a section of the floor which came out well impressing the customer who was happy for me to proceed with cleaning and sealing the floor.
 |
 |
Traditionally Terracotta tiled floors have been sealed with a number of products over the years including Wax, Linseed Oil and on this occasion Varnish however all these products have their disadvantages and don’t compare to modern sealers which are designed for the job.

Cleaning a Dirty Terracotta Tiled Kitchen Floor
The first day was spent trying to get the Varnish off the floor which somebody had used on the floor as a sealer; Varnish is easily scratched by furniture, so I certainly wouldn’t recommend it. I worked out however that it could be scrubbed off once coated in a combination or Tile Doctor products Pro-Clean, Remove and Go and Nano-Tech HBU which would be left to soak in for a while and then softened with steam.
Mechanical assistance from a buffing machine fitted with a large black scrubbing pad helped reduce the amount of elbow grease that was required and once I was happy the tiles were clean the now soiled solution was rinsed off with water and extracted using a wet vacuum.
The next day and with the floor now clear I was able to see those areas that needed further re-treatment and also turn my attention to the grout which was cleaned using more cleaning solution worked in with a stiff narrow grout brush that gets into the grout lines. Once I was completely happy with the floor its was given a final rinse with water to remove any trace of cleaning products and then dried with a wet vacuum to remove as much moisture as possible.

Sealing a Dirty Terracotta Tiled Kitchen Floor
It’s important that the tiles are dry before sealing so I left the floor to dry out for three days before returning to seal them. No Varnish this time of course, Tile Doctor has a range of sealers for every type of situation and what I find works best on Terracotta tiles is a single coat of Tile Doctor Colour Grow topped off with multiple coats of Tile Doctor Seal and Go.

 |
 |
As you can see from the final photographs the floor looked really good and the customer gave me top marks for feedback.

Professional Terracotta Tiled Kitchen Restoration in Gloucestershire
Stripping Varnish off Terracotta Kitchen Tiles and Resealing in Bristol Read More »