Bristol Tile Cleaning

Bristol Tile Cleaning

Welcome to my Work History archive where you will find examples of the cleaning and renovation of tiles carried out in Bristol.

Stripping Varnish off Terracotta Kitchen Tiles and Resealing in Bristol

Stripping Varnish off Terracotta Kitchen Tiles and Resealing in Bristol

Terracotta tiles are always a popular choice for Kitchens but being made from clay they are porous and need to be sealed to prevent dirt from becoming ingrained in the tile. Once sealed though you need to remember Kitchens are high traffic areas, so you can expect the sealer to wear off quicker than it would elsewhere.

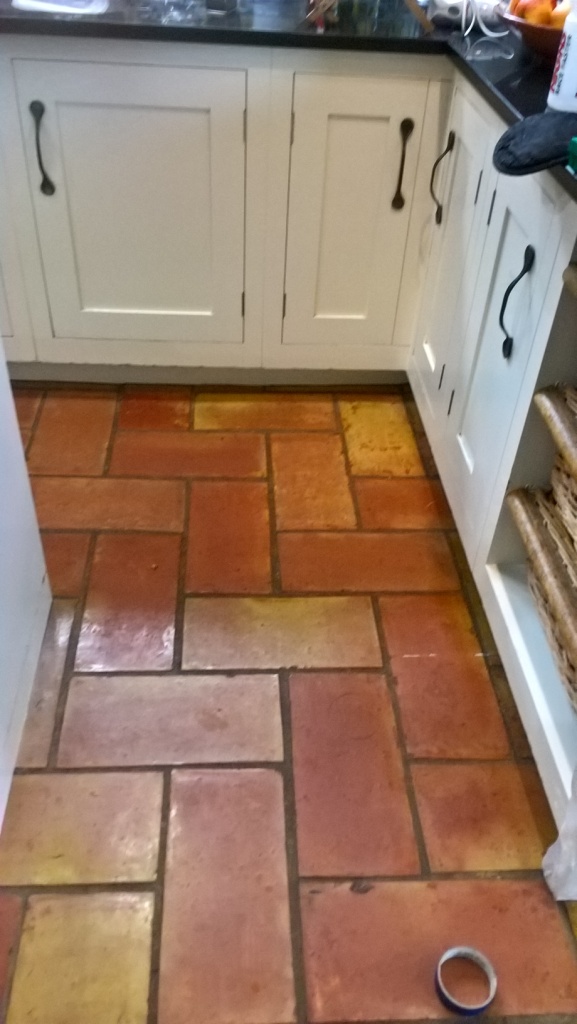
I mention this as a customer from Bristol asked me to do a survey on her Varnish Sealed Terracotta Kitchen Tiles where the seal had worn down and were now dull, and the grout had darkened. I surveyed the floor and completed a test clean on a section of the floor which came out well impressing the customer who was happy for me to proceed with cleaning and sealing the floor.
Terracotta Kitchen Floor Tiles in Bristol Before Cleaning Terracotta Kitchen Floor Tiles in Bristol Before Cleaning

Traditionally Terracotta tiled floors have been sealed with a number of products over the years including Wax, Linseed Oil and on this occasion Varnish however all these products have their disadvantages and don’t compare to modern sealers which are designed for the job.

Terracotta Kitchen Floor Tiles Bristol Before Cleaning

Cleaning a Dirty Terracotta Tiled Kitchen Floor

The first day was spent trying to get the Varnish off the floor which somebody had used on the floor as a sealer; Varnish is easily scratched by furniture, so I certainly wouldn’t recommend it. I worked out however that it could be scrubbed off once coated in a combination or Tile Doctor products Pro-Clean, Remove and Go and Nano-Tech HBU which would be left to soak in for a while and then softened with steam.

Mechanical assistance from a buffing machine fitted with a large black scrubbing pad helped reduce the amount of elbow grease that was required and once I was happy the tiles were clean the now soiled solution was rinsed off with water and extracted using a wet vacuum.

The next day and with the floor now clear I was able to see those areas that needed further re-treatment and also turn my attention to the grout which was cleaned using more cleaning solution worked in with a stiff narrow grout brush that gets into the grout lines. Once I was completely happy with the floor its was given a final rinse with water to remove any trace of cleaning products and then dried with a wet vacuum to remove as much moisture as possible.
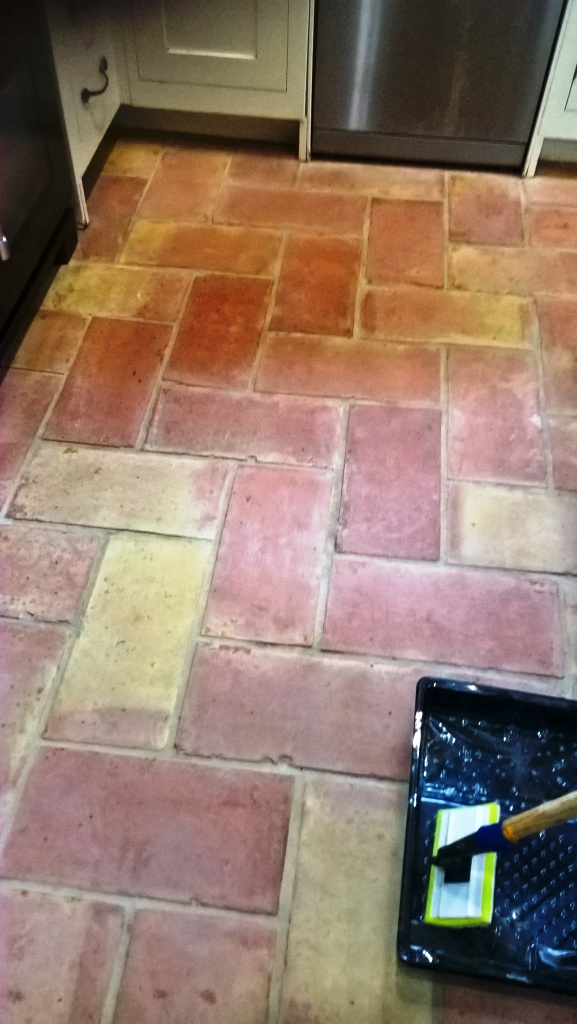
Terracotta Kitchen Floor Tiles in Bristol After Cleaning

Sealing a Dirty Terracotta Tiled Kitchen Floor

It’s important that the tiles are dry before sealing so I left the floor to dry out for three days before returning to seal them. No Varnish this time of course, Tile Doctor has a range of sealers for every type of situation and what I find works best on Terracotta tiles is a single coat of Tile Doctor Colour Grow topped off with multiple coats of Tile Doctor Seal and Go.
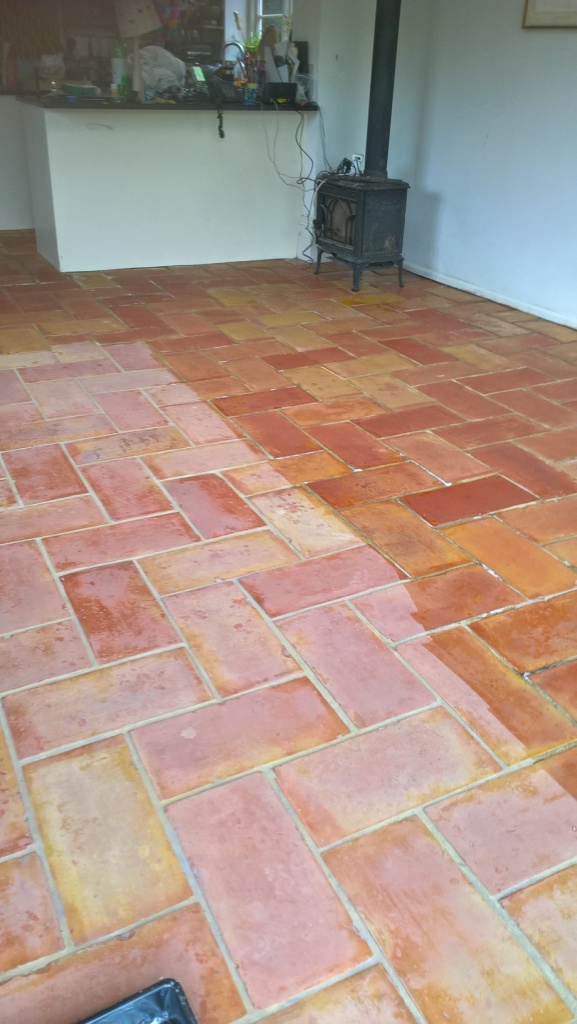
Terracotta Kitchen Floor Tiles in Bristol During Cleaning
Tile Doctor Colour Grow is an impregnating sealer that penetrates into the pores of the clay protecting it from within whilst enhancing colour whilst Seal and Go completes the sealing process and adds a nice sheen to the look of the tile.

Terracotta Kitchen Floor Tiles in Bristol After Cleaning and Sealing Terracotta Kitchen Floor Tiles in Bristol After Cleaning and Sealing

As you can see from the final photographs the floor looked really good and the customer gave me top marks for feedback.
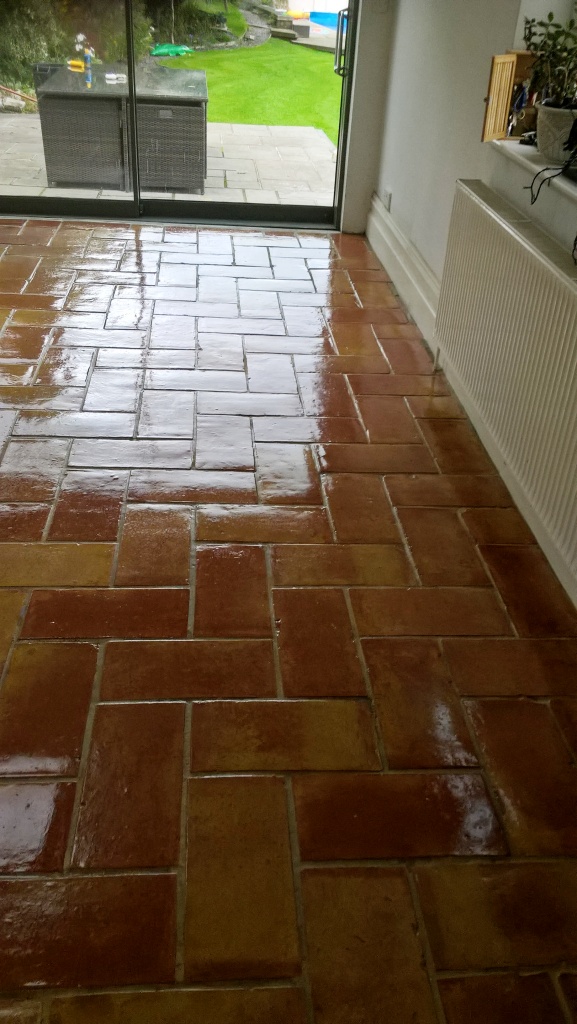
Terracotta Kitchen Floor Tiles in Bristol After Cleaning and Sealing
 

Professional Terracotta Tiled Kitchen Restoration in Gloucestershire

Stripping Varnish off Terracotta Kitchen Tiles and Resealing in Bristol Read More »

Burnishing and Sealing Works Wonders for Limestone Tiles in Yate

Burnishing and Sealing Works Wonders for Limestone Tiles in Yate

Limestone is known on the international market for its premium toughness, durability and aesthetic characteristics. This can make it difficult to maintain however, especially if the stone has been polished and lustre on the stone has started to wear down which is inevitable with use.

The traditional method of getting a the shine back on polished stone is called honing which is expensive however at Tile Doctor we have worked out a much more affordable process called burnishing which utilises different grades of diamond encrusted pads to clean and then bring up the polish.

I recently undertook the restoration of a large area of Limestone tiles in the kitchen and lounge of a property in Yate, Gloucestershire. The floor as a while had become dull and dirty – and was long overdue some professional attention.

Limestone Tiled Lounge Floor Before Cleaning in Vale Gloucestershire

Burnishing a Limestone Tiled Floor

Before starting I removed the kick boards from the underneath the kitchen units so they wouldn’t get affected by the cleaning process. Once prepped I started the burnishing process which is a chemical free process that uses a small amount of water for lubrication and a quick rinse between the use of each pad. I started with the first of the four burnishing pads which is a coarse 400 grit pad that designed to grind away the dirt and old sealer on the surface of the floor.

After applying the first pad, I moved my way through the medium 800 and fine 1500 grit pads to gradually build up the shine. As the floor became cleaner it became apparent the grout lines were not in particularly good condition as well so I opted to clean these using a stiff grout brush and Tile Doctor Remove and Go which is specially formulated to remove old sealers whilst tackling dirt and stains.

After completing the clean and giving the floor a final rinse I extracted as much moisture from the floor as possible using a wet vacuum and left the tiles to dry off overnight.

Sealing a Limestone Tiled Floor

Returning to the property next day, I tested to check tiles were dry and then proceeded to buff the tiles once over using the last of the four pads which is a 3,000 grit burnishing pad that finished off the polishing process.

Finally, I applied two coats of Tile Doctor Ultra Seal, which is an impregnating dealer designed to provide maximum stain production with a natural look finish. I buffed further in between each coat to ensure the best possible polish was achieved.

Limestone Tiled Lounge Floor After Cleaning in Vale Gloucestershire
This was a tricky floor to photograph due to the sunlight streaming through the windows on both days but hopefully you can appreciate the difference as much as the customer can.

Professional Limestone Floor Polishing and Sealing in Gloucestershire

Burnishing and Sealing Works Wonders for Limestone Tiles in Yate Read More »

=================================

Gloucester Tile Doctor

================================= Read More »

Scroll to Top