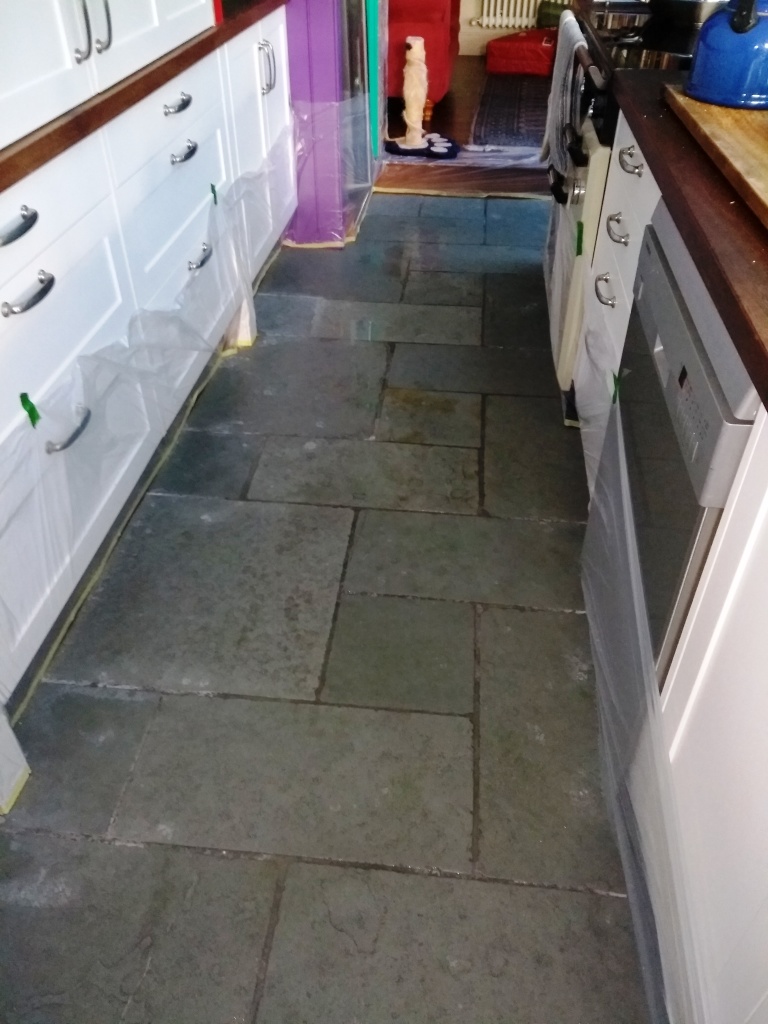
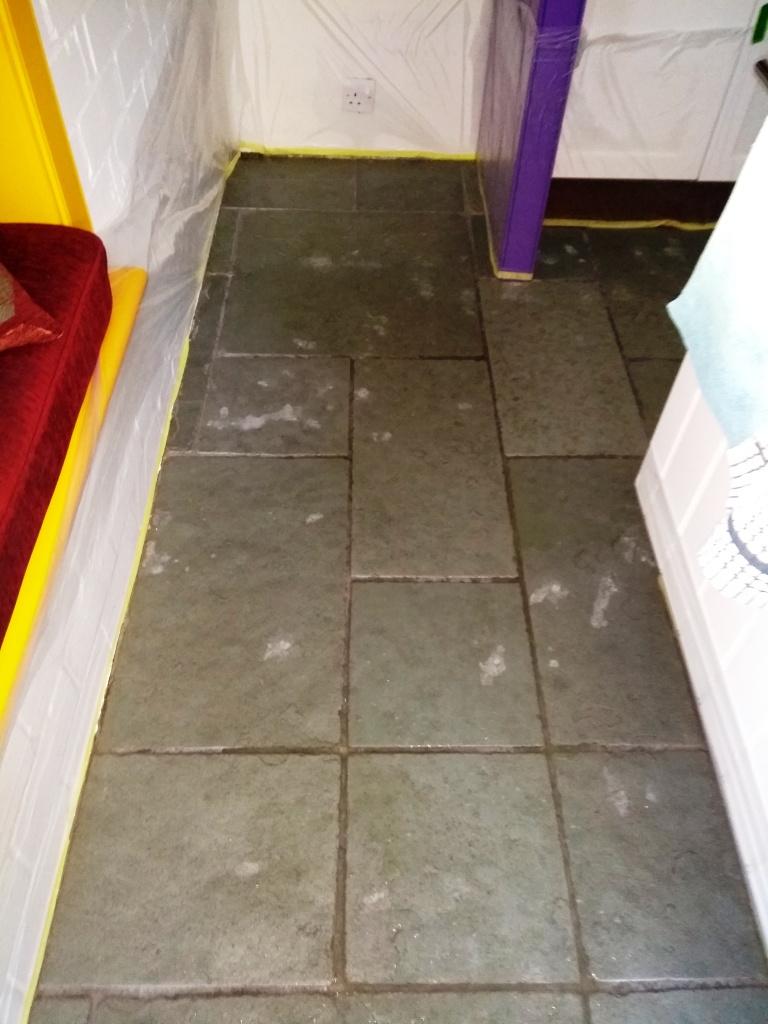
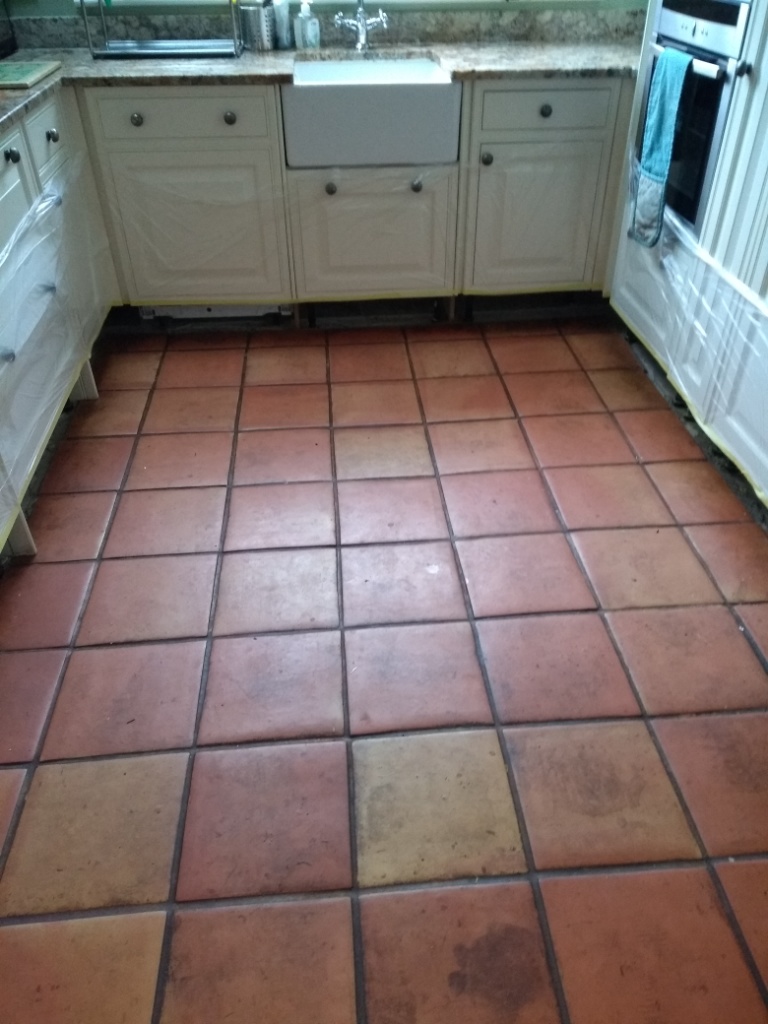
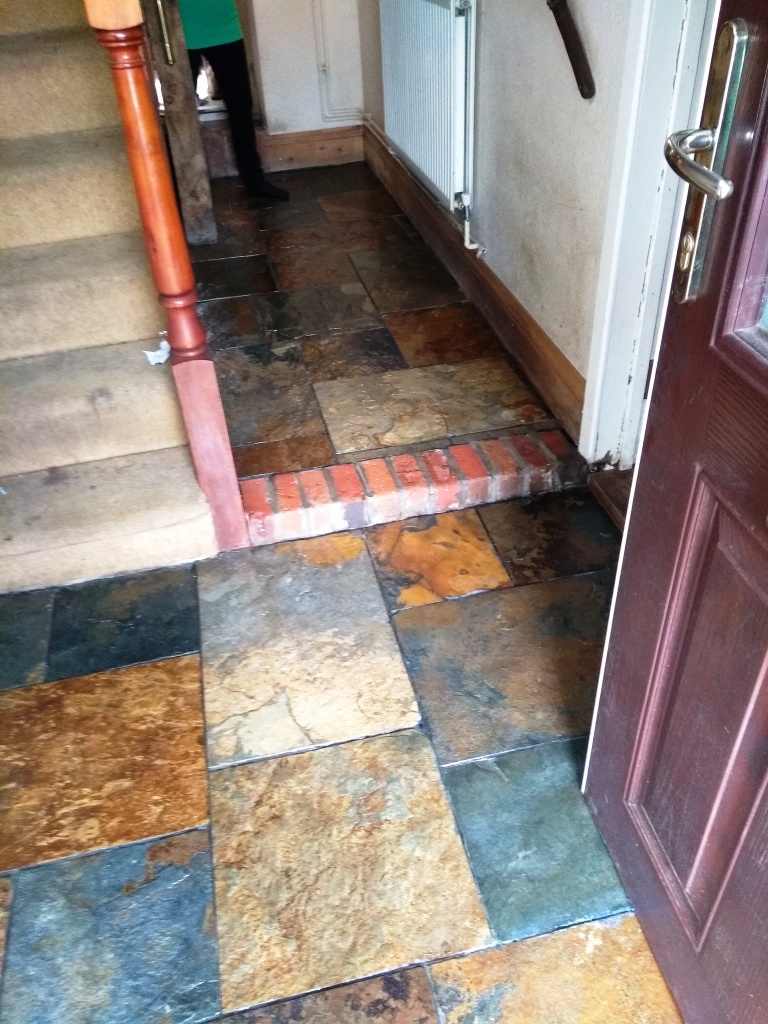
Work by Location

Gloucester-Tile-Doctor

Welcome to my Work History archive where you will find detailed examples of Tile, Grout and Stone Cleaning and renovation work carried out within Gloucester.

I have organised the posts by the most populous locations throughout Gloucester, if I haven’t listed your location do get in touch, Tile Doctor covers the whole country so if I can’t cover it there’s a good chance one of my colleagues can.

Local towns and villages I cover include: Acton Turville, Adlestrop, Alderley, Alderton, Aldsworth, Almondsbury, Alveston, Alvington, Ampney Crucis, Ampney St. Mary, Ampney St. Peter, Andoversford, Arlingham, Arlington, Ashchurch, Ashleworth, Ashley, Aust, Avening, Avonmouth, Awre, Barnsley, Barton, Batsford, Bedminster, Berkeley, Beverstone, Bibury, Birdlip, Bishops Cleeve, Bisley, Bitton, Blakeney, Bledington, Blockley, Bourton-on-the-Hill, Bourton-on-the-Water, Bream, Brimpsfield, Brimscombe, Brislington, Bristol, Broadwell, Brockworth, Bromsberrow, Brookthorpe, Buckland, Bulley, Cam, Cambridge, Chaceley, Chalford, Charfield, Charlton, Charlton Abbots, Charlton Kings, Chedworth, Cheltenham, Cherington, Chipping Campden, Chipping Sodbury, Church End, Church Honeybourne, Churchdown, Cinderford, Cirencester, Clapton, Claypits, Clifton, Coaley, Coates, Coberley, Cold Ashton, Coleford, Colesborne, Coln Rogers, Coln St. Aldwyns, Coln St. Dennis, Condicote, Coombe Hill, Corse, Cowley, Cromhall, Cutsdean, Daglingworth, Deerhurst, Didmarton, Dowdeswell, Down Ampney, Down Hatherley, Doynton, Drybrook, Dudbridge, Dumbleton, Dursley, Dymock, Dyrham, Eastleach, Eastleach Martin, Eastleach Turville, Ebrington, Edgeworth, Elberton, Elkstone, Elmore, Evenlode, Ewen, Fairford, Falfield, Farmington, Filton, Fishponds, Flaxley, Framilode, Frampton Cotterell, Frampton on Severn, Frenchay, Frocester, Gloucester, Golden Valley, Great Badminton, Great Barrington, Great Rissington, Great Witcombe, Gretton, Guiting Power, Hallen, Hambrook, Hampnett, Hardwicke, Harescombe, Haresfield, Hartpury, Hasfield, Hatherop, Hawkesbury, Hawling, Hempstead, Henbury, Hewelsfield, Hill, Hillsley, Hinton, Horsley, Horton, Hucclecote, Huntley, Innsworth, Iron Acton, Kemble, Kempley, Kempsford, Kineton, Kingscote, Kingswood, Lasborough, Lassington, Lechlade, Leckhampton, Leigh, Leighterton, Little Barrington, Little Dean, Little Rissington, Little Washbourne, Little Witcombe, Littleton-upon-Severn, Llandogo, Long Newton, Longborough, Longhope, Longney, Lower Cam, Lower Lemington, Lower Oddington, Lower Slaughter, Lower Soudley, Lower Swell, Lydbrook, Lydney, Maisemore, Mangotsfield, Marshfield, Matson, Meysey Hampton, Mickleton, Minchinhampton, Miserden, Mitcheldean, Moreton-in-Marsh, Morton, Nailsworth, Naunton, New Passage, Newent, Newland, Newnham, North Cerney, North Nibley, Northleach, Norton, Notgrove, Nymphsfield, Oakle Street, Oldbury on the Hill, Oldbury-on-Severn, Olveston, Painswick, Parkend, Patchway, Pauntley, Pilning, Poulton, Preston, Purton, Quedgeley, Quenington, Randwick, Rangeworthy, Redmarley D’Abitot, Redwick, Rodmarton, Ryeford, Salperton, Sandhurst, Sapperton, Sea Mills, Sharpness, Sheperdine, Sherbourne, Shipton, Shipton Moyne, Shirehampton, Shurdington, Siddington, Siston, Slimbridge, Snowshill, Somerford Keynes, South Cerney, Southam, Southrop, St. Briavels, Standish, Stanton, Stanway, Staple Hill, Stapleton, Staunton, Staunton, Staverton, Stinchcombe, Stoke Gifford, Stone, Stonehouse, Stow-on-the-Wold, Stroud, Swindon, Syde, Teddington, Temple Guiting, Tetbury, tewkesbury, Thornbury, Tibberton, Tidenham, Tirley, Toddington, Todenham, Tormarton, Tortworth, Tredington, Turkdean, Tytherington, Uley, Upleadon, Upper Oddington, Upper Slaughter, Upper Swell, Warmley, Westbury-on-Severn, Westcote, Westerleigh, Westfield, Weston Subedge, Whelford, Whitecroft, Whittington, Wick, Wickwar, Winchcombe, Windrush, Winson, Winterbourne, Withington, Woodchester, Woolaston, Woolstone, Wormington, Wotton-under-Edge, Wyck Rissington, Yanworth, Yate

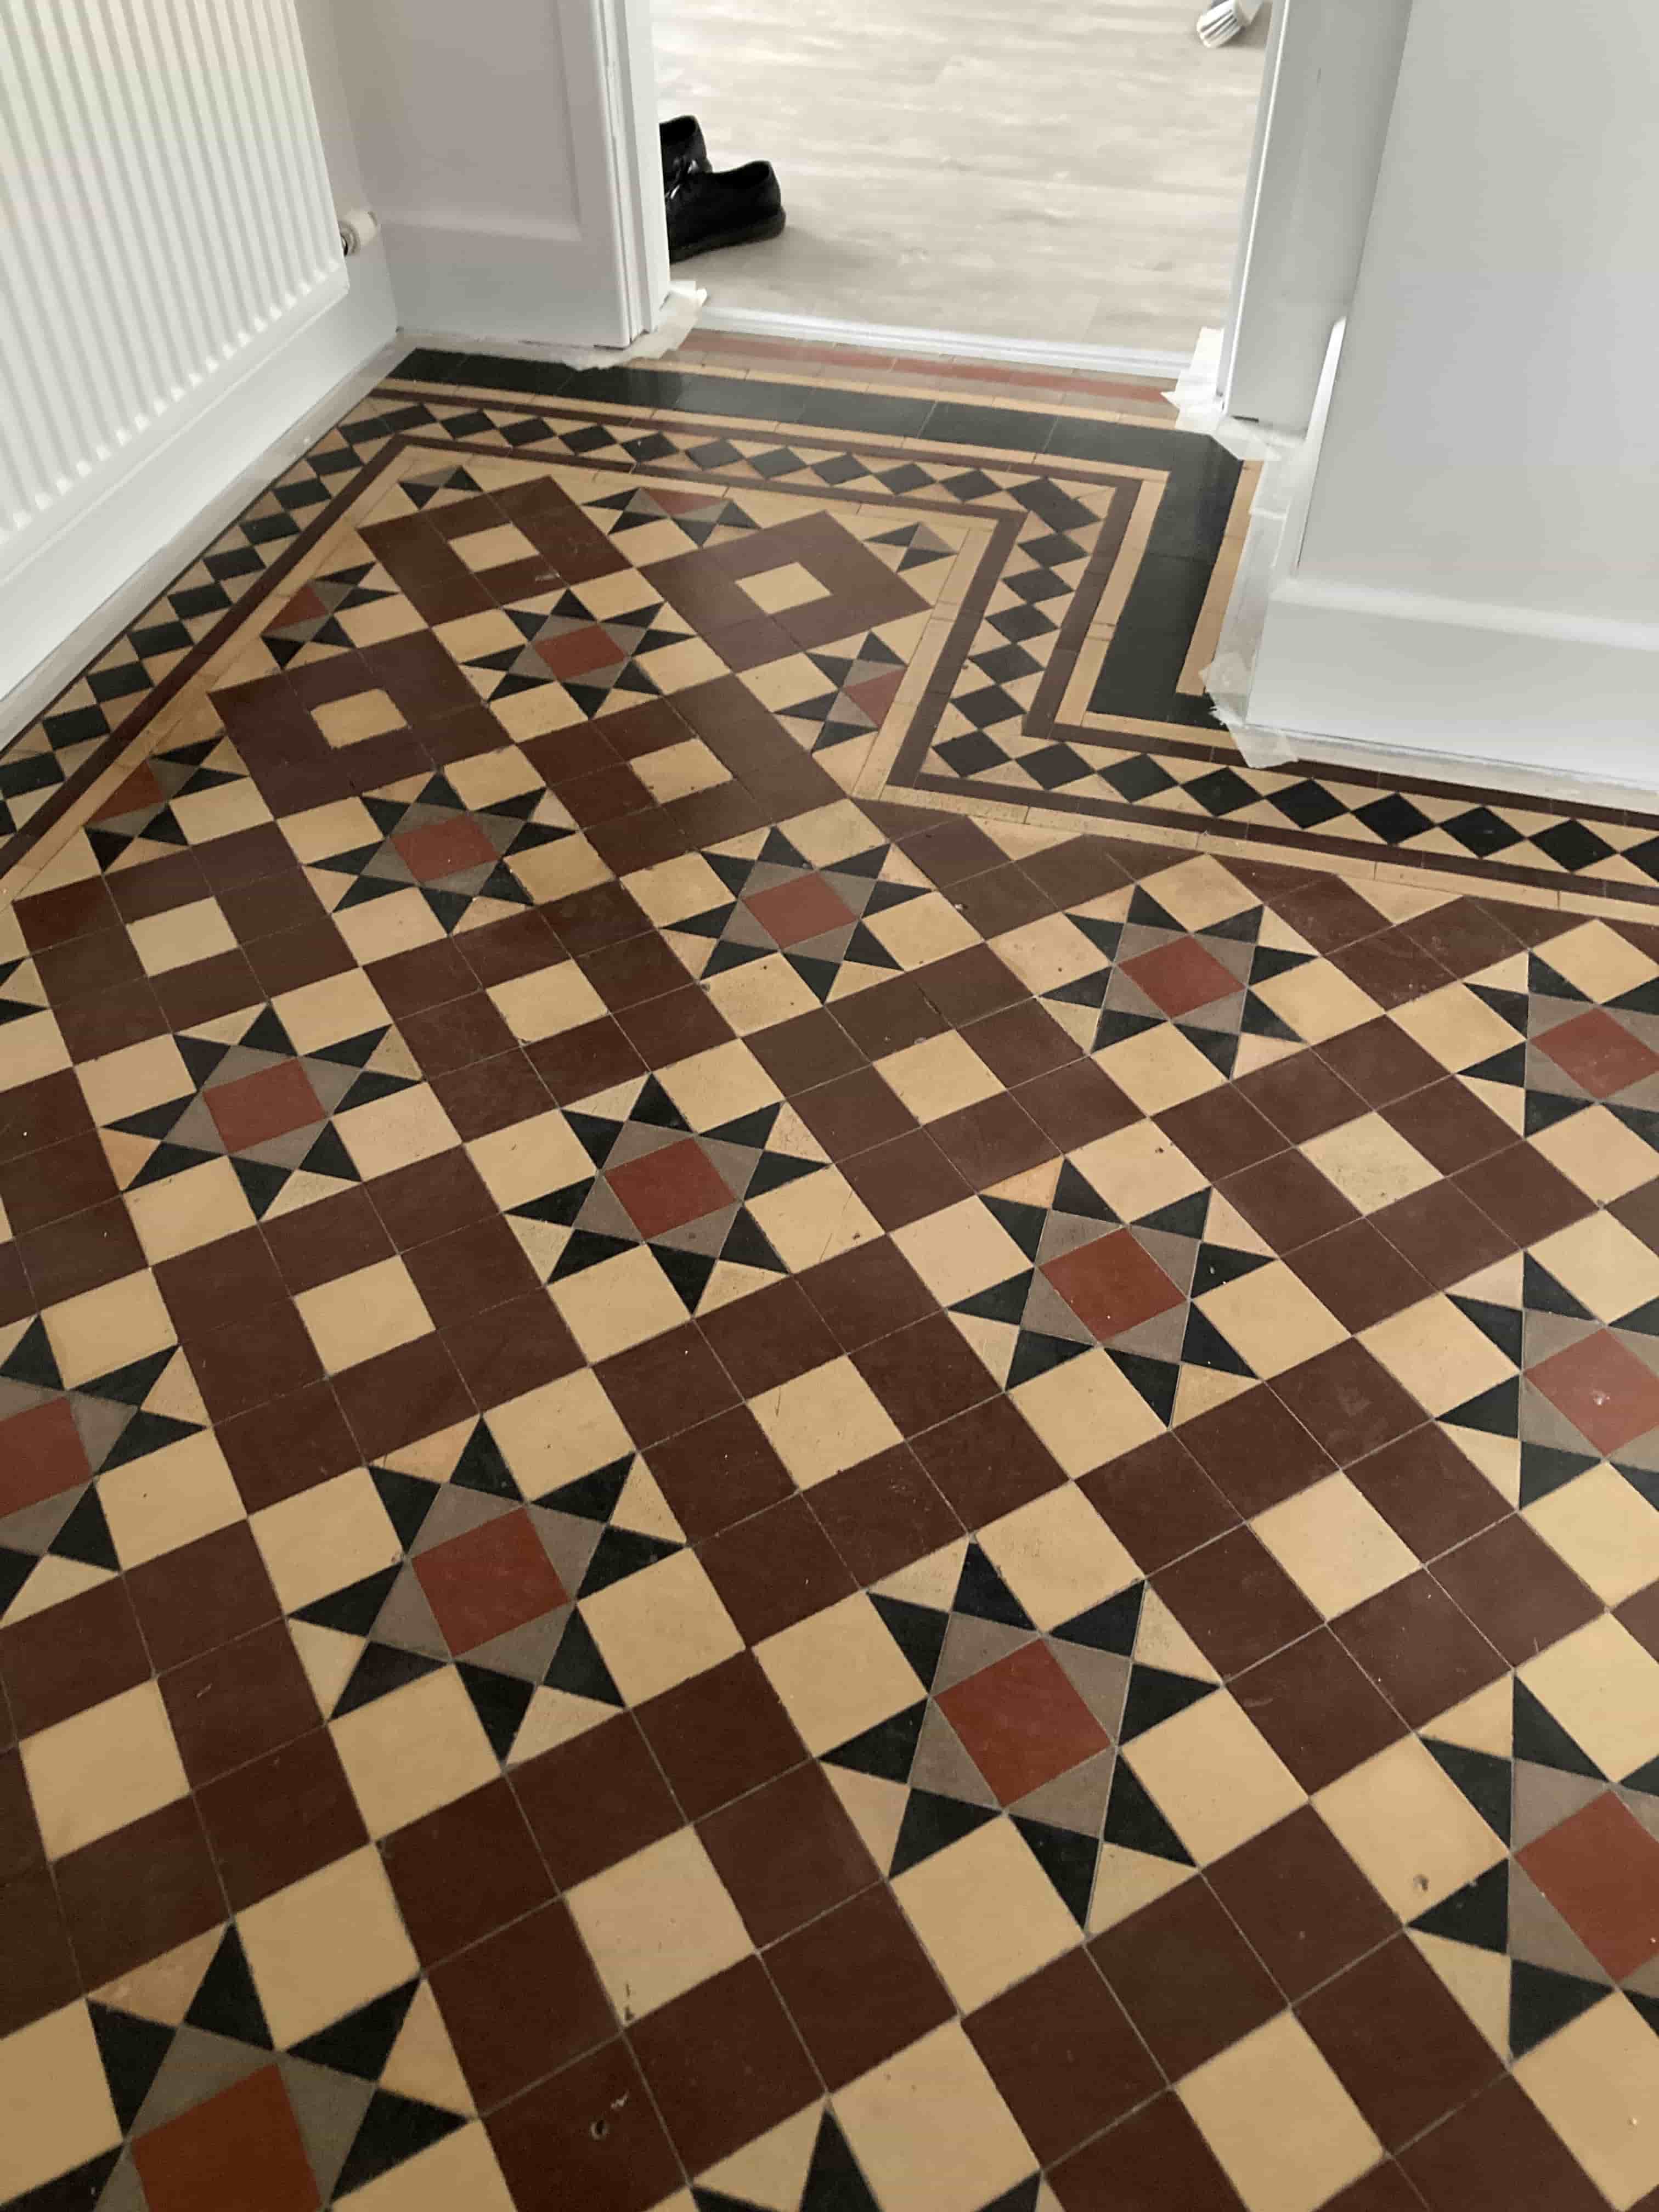
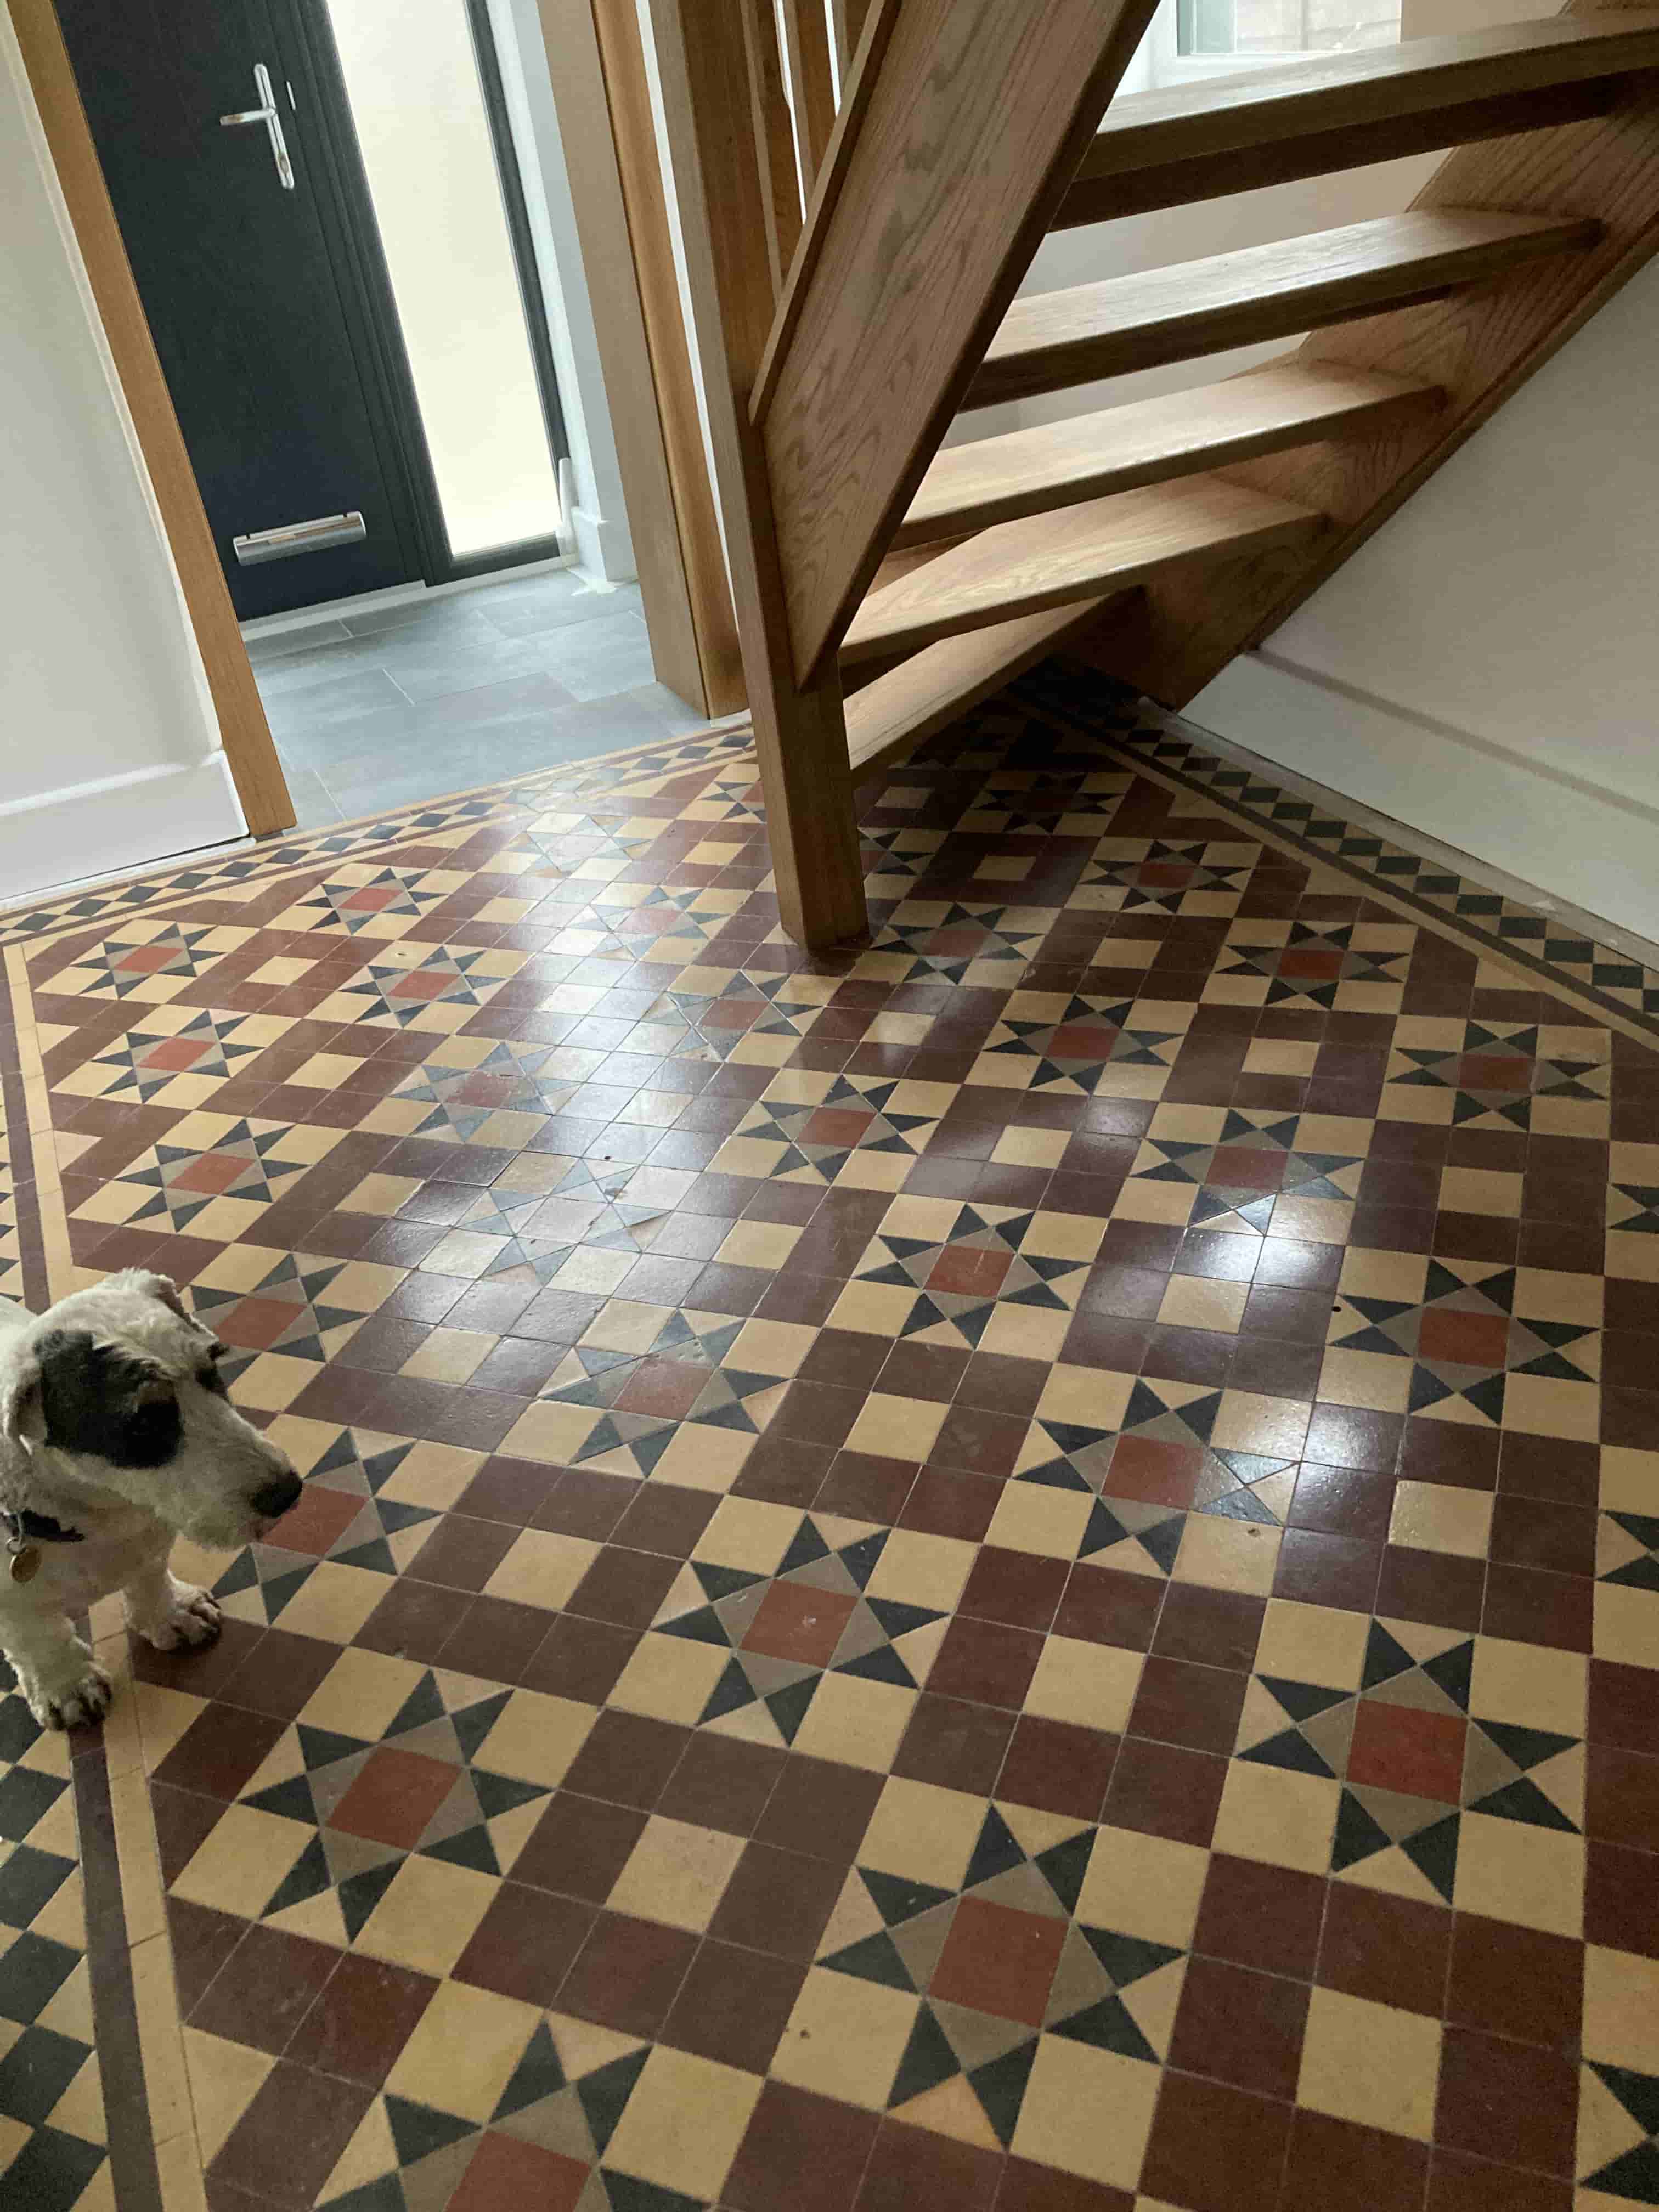
Edwardian Tiled Hallway Floor Restoration Dursley

Edwardian Hallway Floor Tile Restoration in Dursley

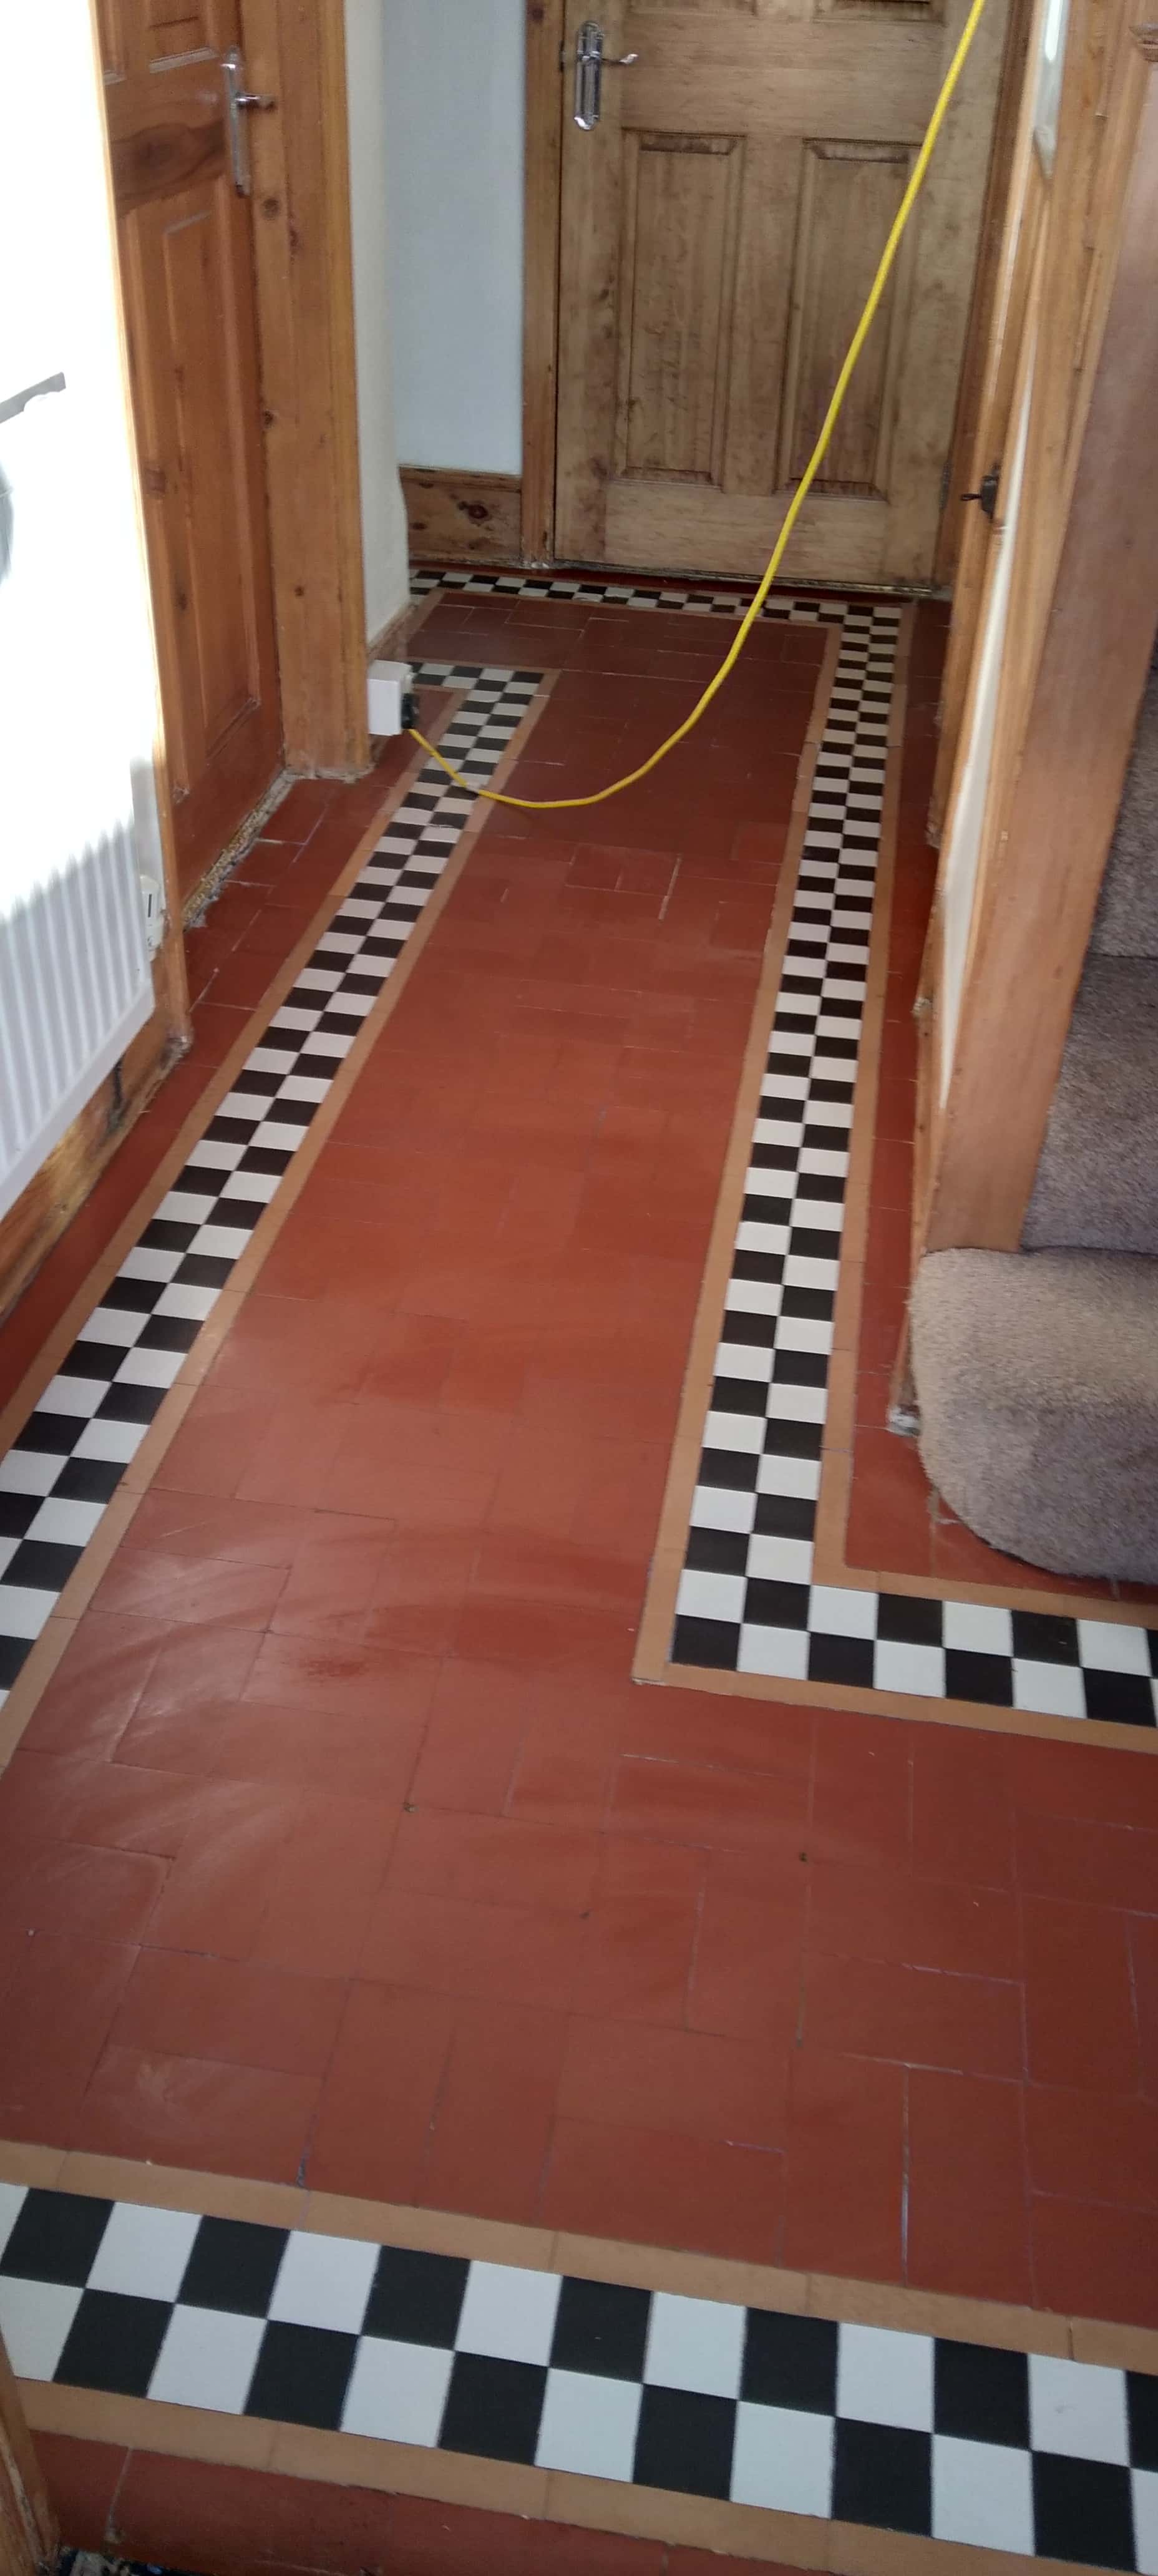
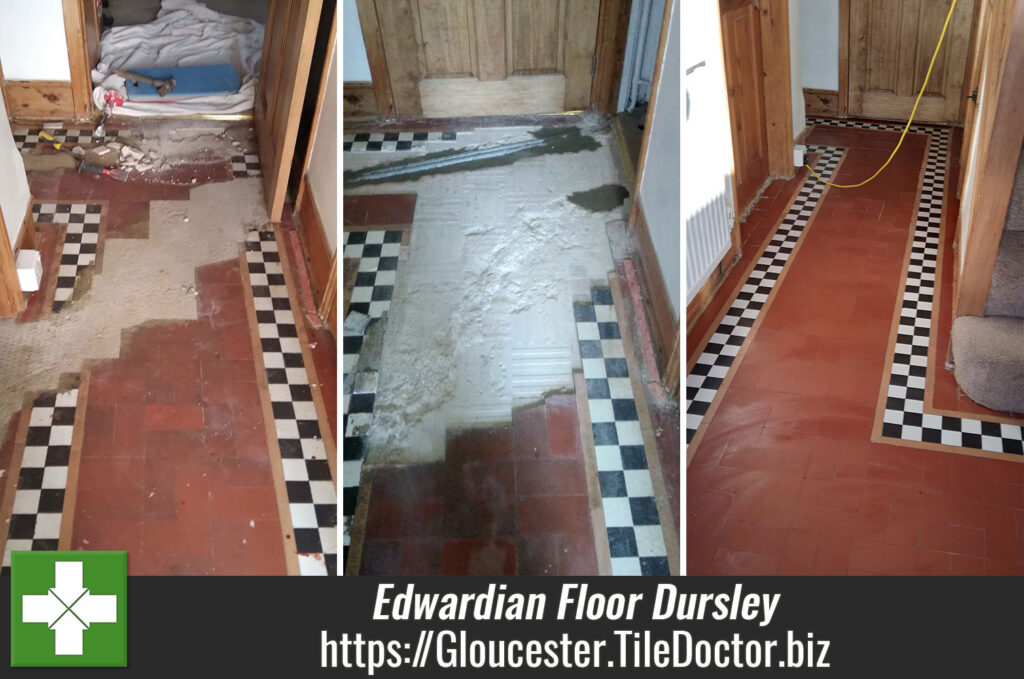
This client from Dursley got in touch regarding their hallway floor tiling which had been badly damaged in two sections during the installation of heating pipework. With the tile and base chopped out the pipes has been laid and backfilled with concrete up to the level of the original floor so it could be covered with laminate. The property was Edwardian and now unhappy with the laminate wanted the floor restored to its original state.

Edwardian Tiled Hallway Floor Before Restoration Dursley

I’m based in Dursley so it wasn’t long before I was able to head over to the property and recommend a way forward. Having inspected the problems first hand I was able to create an accurate quote that would involve removing the backfilled concrete, bringing up the base to the right level and then replacing the missing tiles with matching. The whole floor could then be deep cleaned and sealed to ensure the new tiles matched perfectly with the existing. My quote was accepted, and a date agreed for the work to commence which would take four days.

Cleaning and Repairing an Edwardian Tiled Hallway Floor

Before starting the work, I had managed to source replacements, sizing can be a problem with these older imperial sized tiles however they are usually not too difficult to find.

The first day started with the removal of concrete from the damaged area, this proved difficult as there were water pipes just under the surface and naturally, I didn’t want to disturb these. So with just the use of hand tools I moved slowly and carefully to remove the concrete. Before leaving I brought up the level of the exposed subfloor using self-levelling cement which covered the exposed pipework and formed a level flat base on which I could fix the replacement tiles

Day two was spent tiling, followed by grouting. It wasn’t a large area but there were some intricate cuts to manage and a black and white chequered border to replace. Needless to say, this took up most of the day.
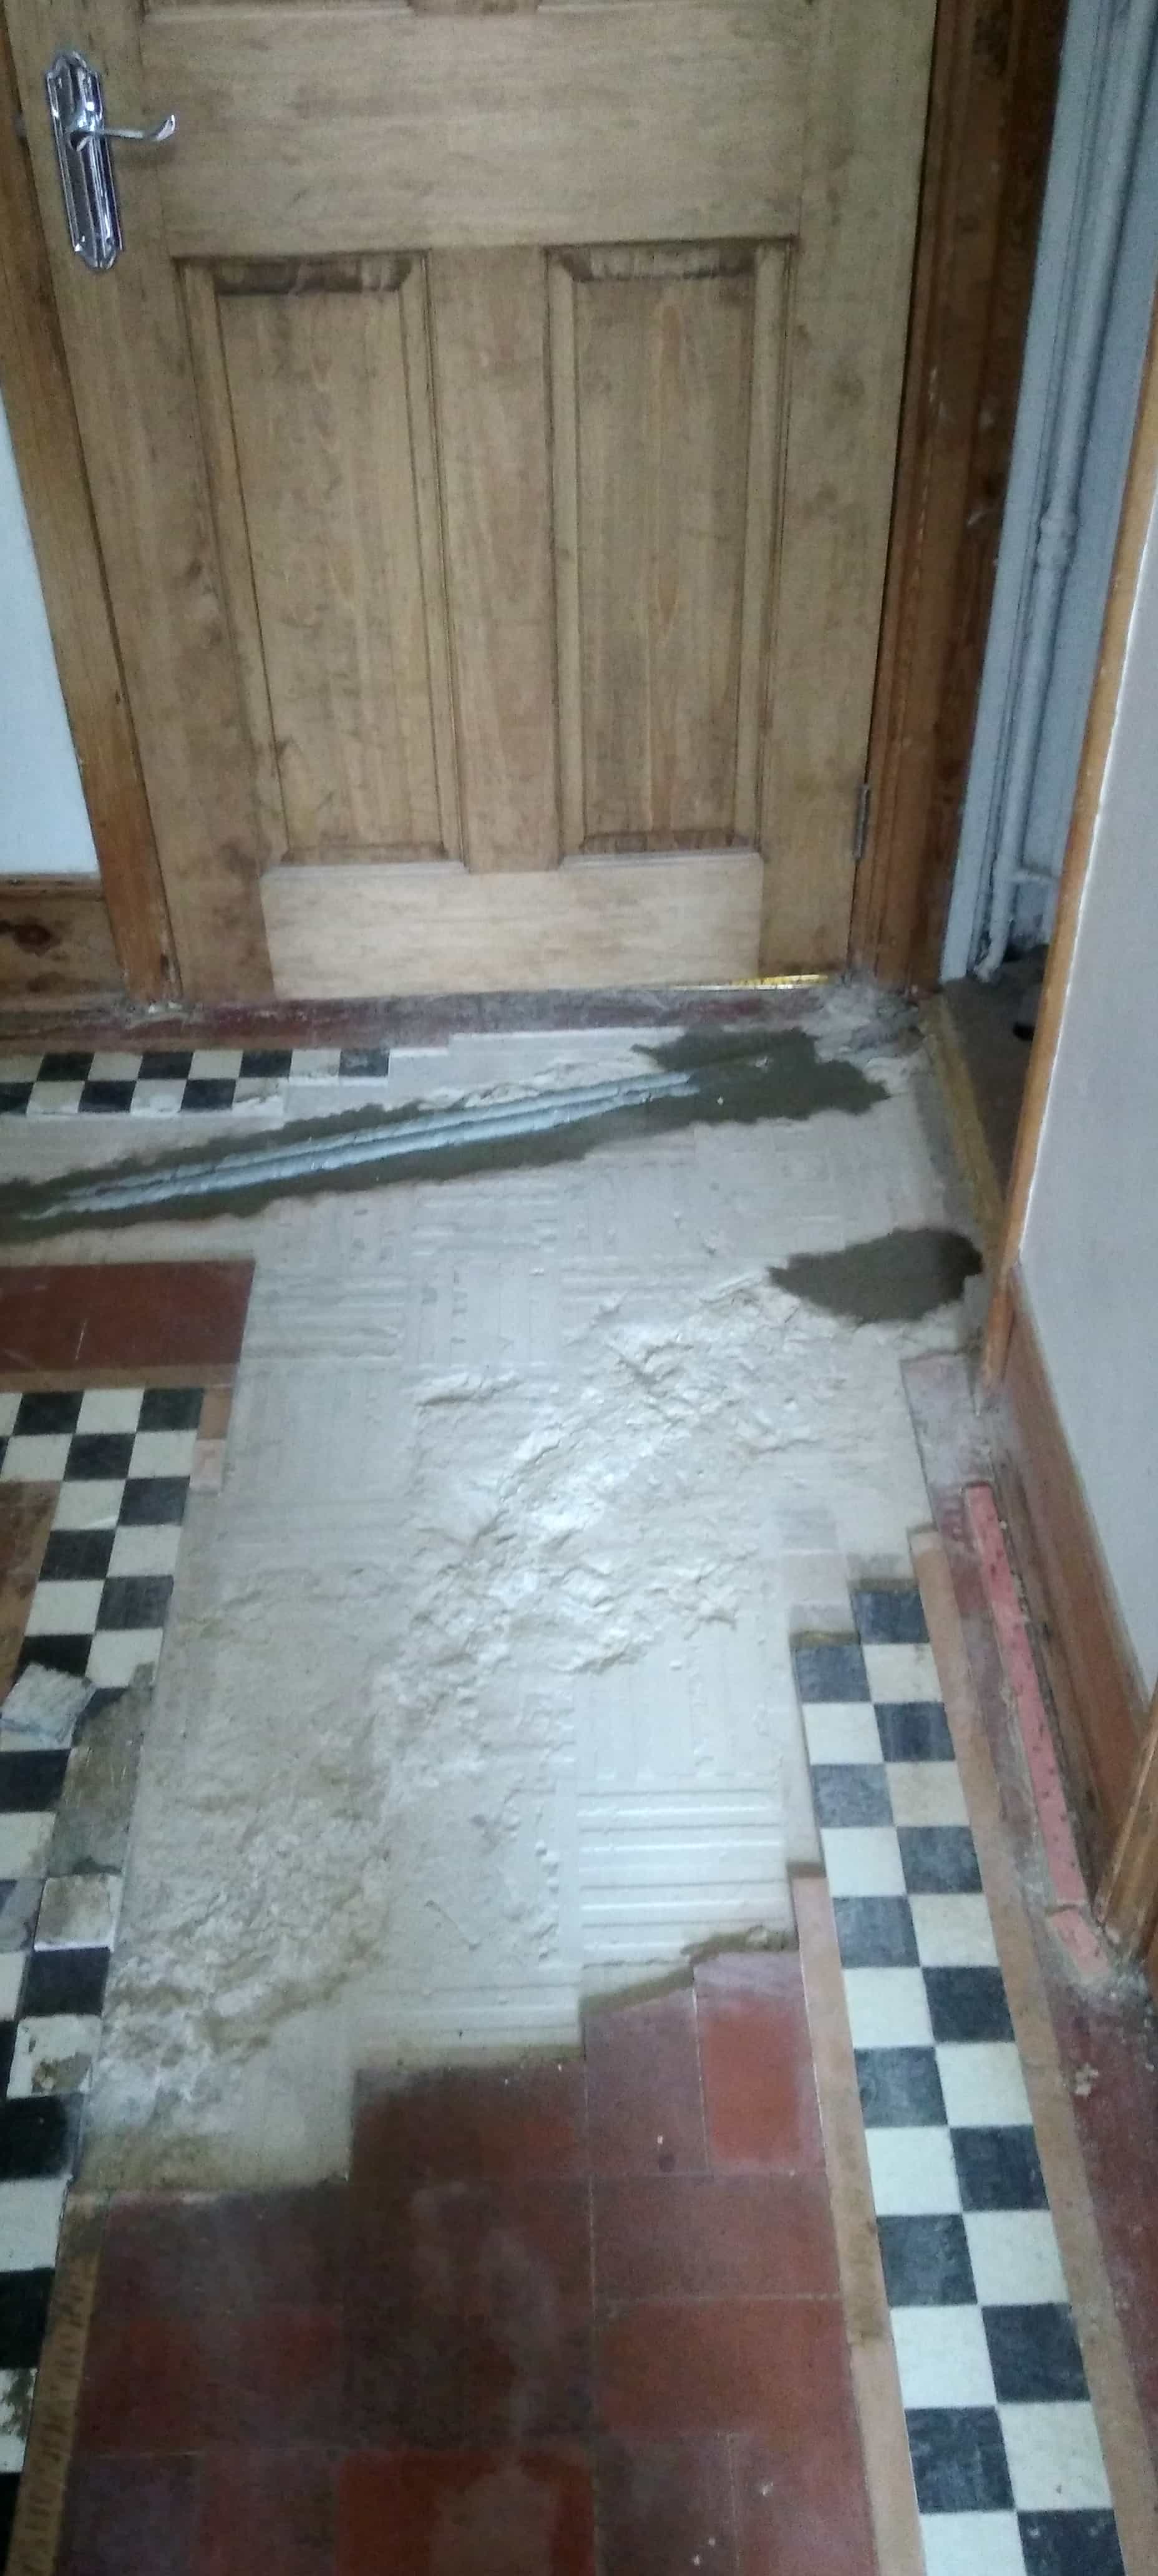
Edwardian Tiled Hallway Floor During Restoration Dursley Edwardian Tiled Hallway Floor During Restoration Dursley

I left the floor to settle a couple of days then returned to deep clean the hallway using Tile Doctor Acid Gel worked in with a 200-grit pad fitted to a buffing machine. This was then rinsed off with minimal water and extracted with a wet vacuum. The floor was inspected and any stubborn areas re-treated. After a quick final rinse and extract the floor was left to dry off fully.

You do have to be careful with these old floors which don’t have a damp proof membrane though as using too much water can take a long time to dry out, hence the use of a gel cleaning product and minimal water.

Sealing an Edwardian Tiled Hallway Floor

Once cleaned I left the floor to dry out for 2 days before returning. I know from experience its not a good idea to apply sealer to a damp floor as the results can be patchy so its always a good idea to allow plenty of time for this.

To seal the floor, I used multiple coats of Tile Doctor Seal and Go Extra which has a modern acrylic formula that will allow the floor to breathe and ensure any moisture can pass through the tile and evaporate at the surface. The sealer will protect the tiles from dirt becoming ingrained in its pores and enhance their appearance; the new sealer also makes it easier for the new and old tiles to blend better.

Edwardian Tiled Hallway Floor After Restoration Dursley Edwardian Tiled Hallway Floor After Restoration Dursley

My client was very pleased with the transformation and so happy that the floor had been restored to its original condition. Before leaving I took time to discuss aftercare and for this floor I recommended the use of Tile Doctor Neutral Tile Cleaner, it’s a mild but effective cleaner that is ideal for maintaining sealed tiles.


Professional Restoration of an Edwardian Tiled Hallway in Gloucestershire

Edwardian Hallway Floor Tile Restoration in Dursley Read More »

Old Victorian Red Quarry Tiled Kitchen Floor Restoration Gloucester

Original Quarry Tiled Floor Restored at a Victorian Property in Gloucester

This customer had purchased an older property in Gloucester and while fitting a new kitchen had the Ceramic tiled floor removed only to discover an original Quarry tiled floor underneath. Realising the value an original floor can add to a property as a period feature, they contacted Tile Doctor to see if it could be restored.

I made a visit to the property to survey the Quarry tiles and ascertain if it could be restored after being hidden for so long. I could see the tiles were in reasonable condition and it looked like they had tile adhesive on most of the tiles which I had experienced before. I was therefore confident that it would be possible to remove this and clean them up and they were reassured that I should be able to restore them to a good standard.

Old Victorian Red Quarry Tiled Kitchen Floor Before Restoration Gloucester Old Victorian Red Quarry Tiled Kitchen Floor During Restoration Gloucester

Happy with my quote and confident in my ability to get the job done I was booked in to complete the work.

Cleaning and Repairing a Victorian Red Quarry Tiled Kitchen Floor

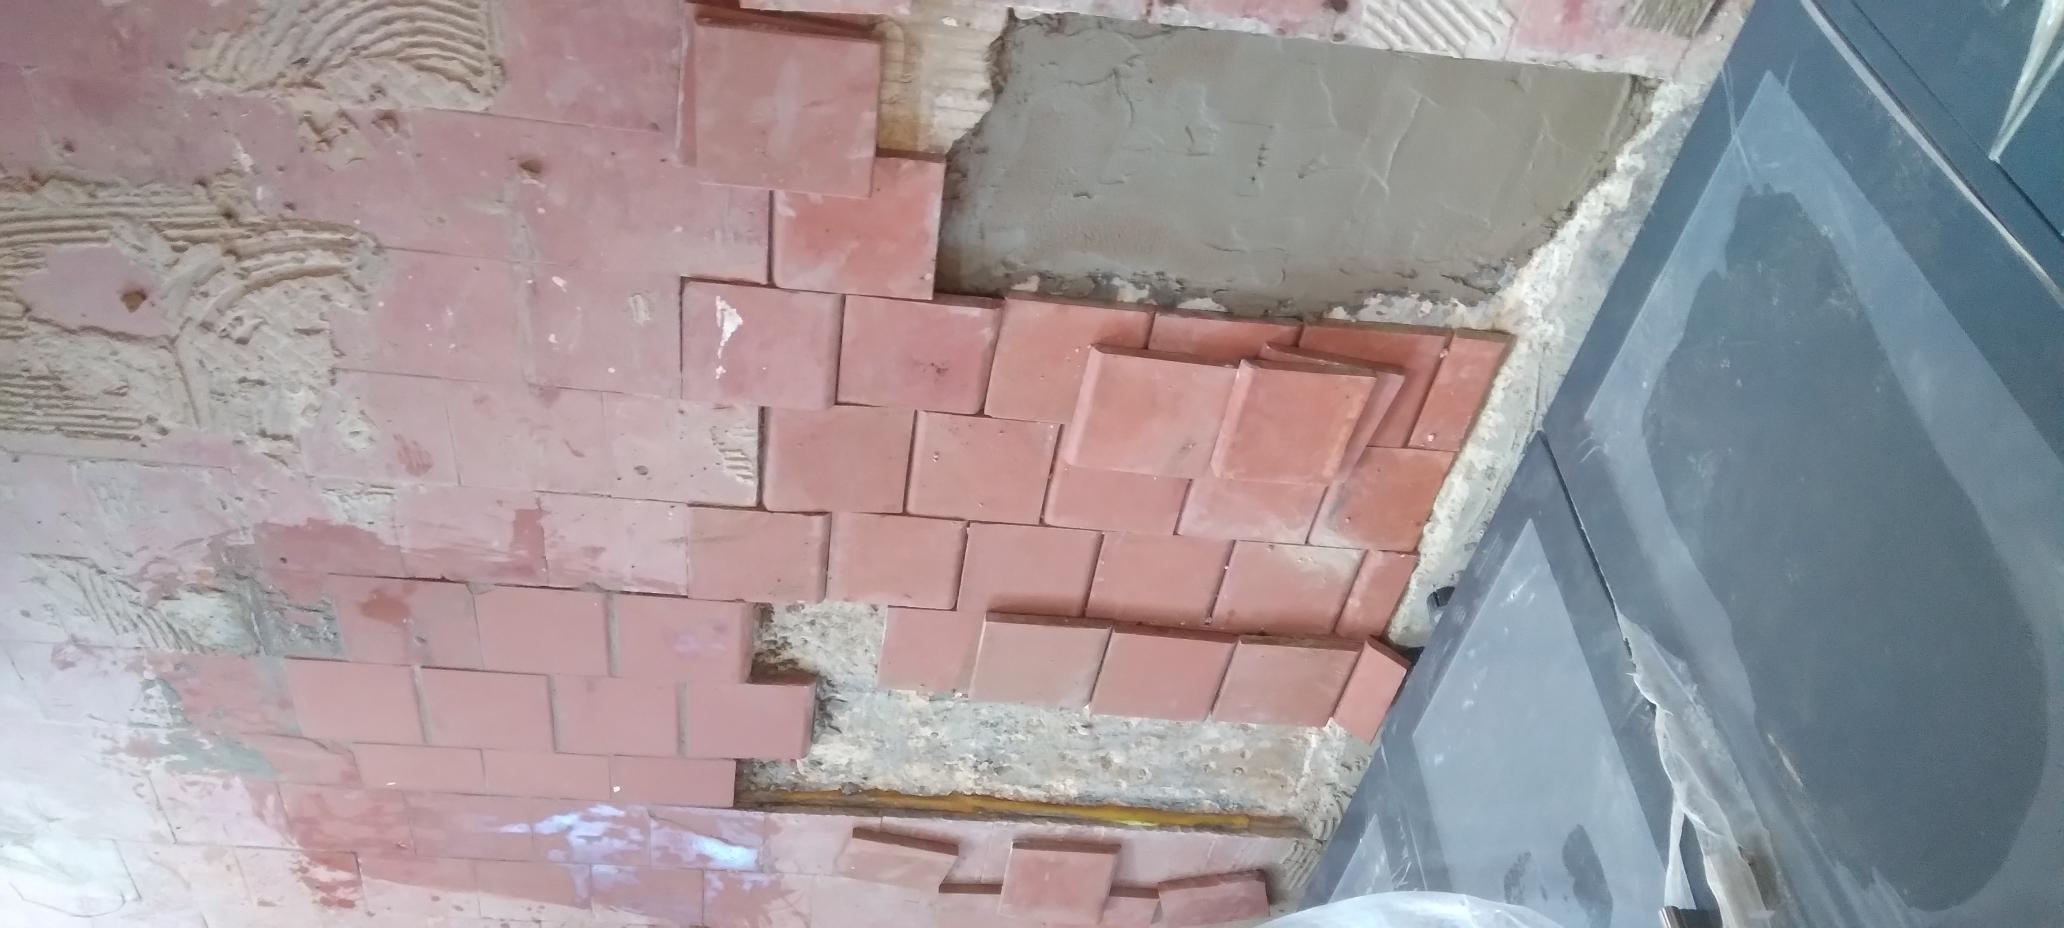
With a date set to commence work I arrived on the agreed date to do the work and made a start on cleaning up the tiles. I soon realised at this point I had made a mistake by not completing a test clean when I came round to do the survey. As it turns out it wasn’t just tile adhesive on the quarry tiles but there was also a large section of concrete that I can only assume had been used to level the floor and fix the tiles.

I had no choice but to dig out the concrete and following that it would need replacing with self-levelling screed and replacement tiles. It took four painful days to remove the adhesive and rebuild the concreted section of flooring with replacement tiles.

Old Victorian Red Quarry Tiled Kitchen Floor During Restoration Gloucester

Once done I was able to move on and deep clean the tiles with a strong dilution of Tile Doctor Remove and Go scrubbed in with a black pad fitted to a rotary floor machine. The soiling was rinsed off with water and extracted with a wet vacuum and the whole process was then repeated until I was satisfied with that the quarry tiles were clean.

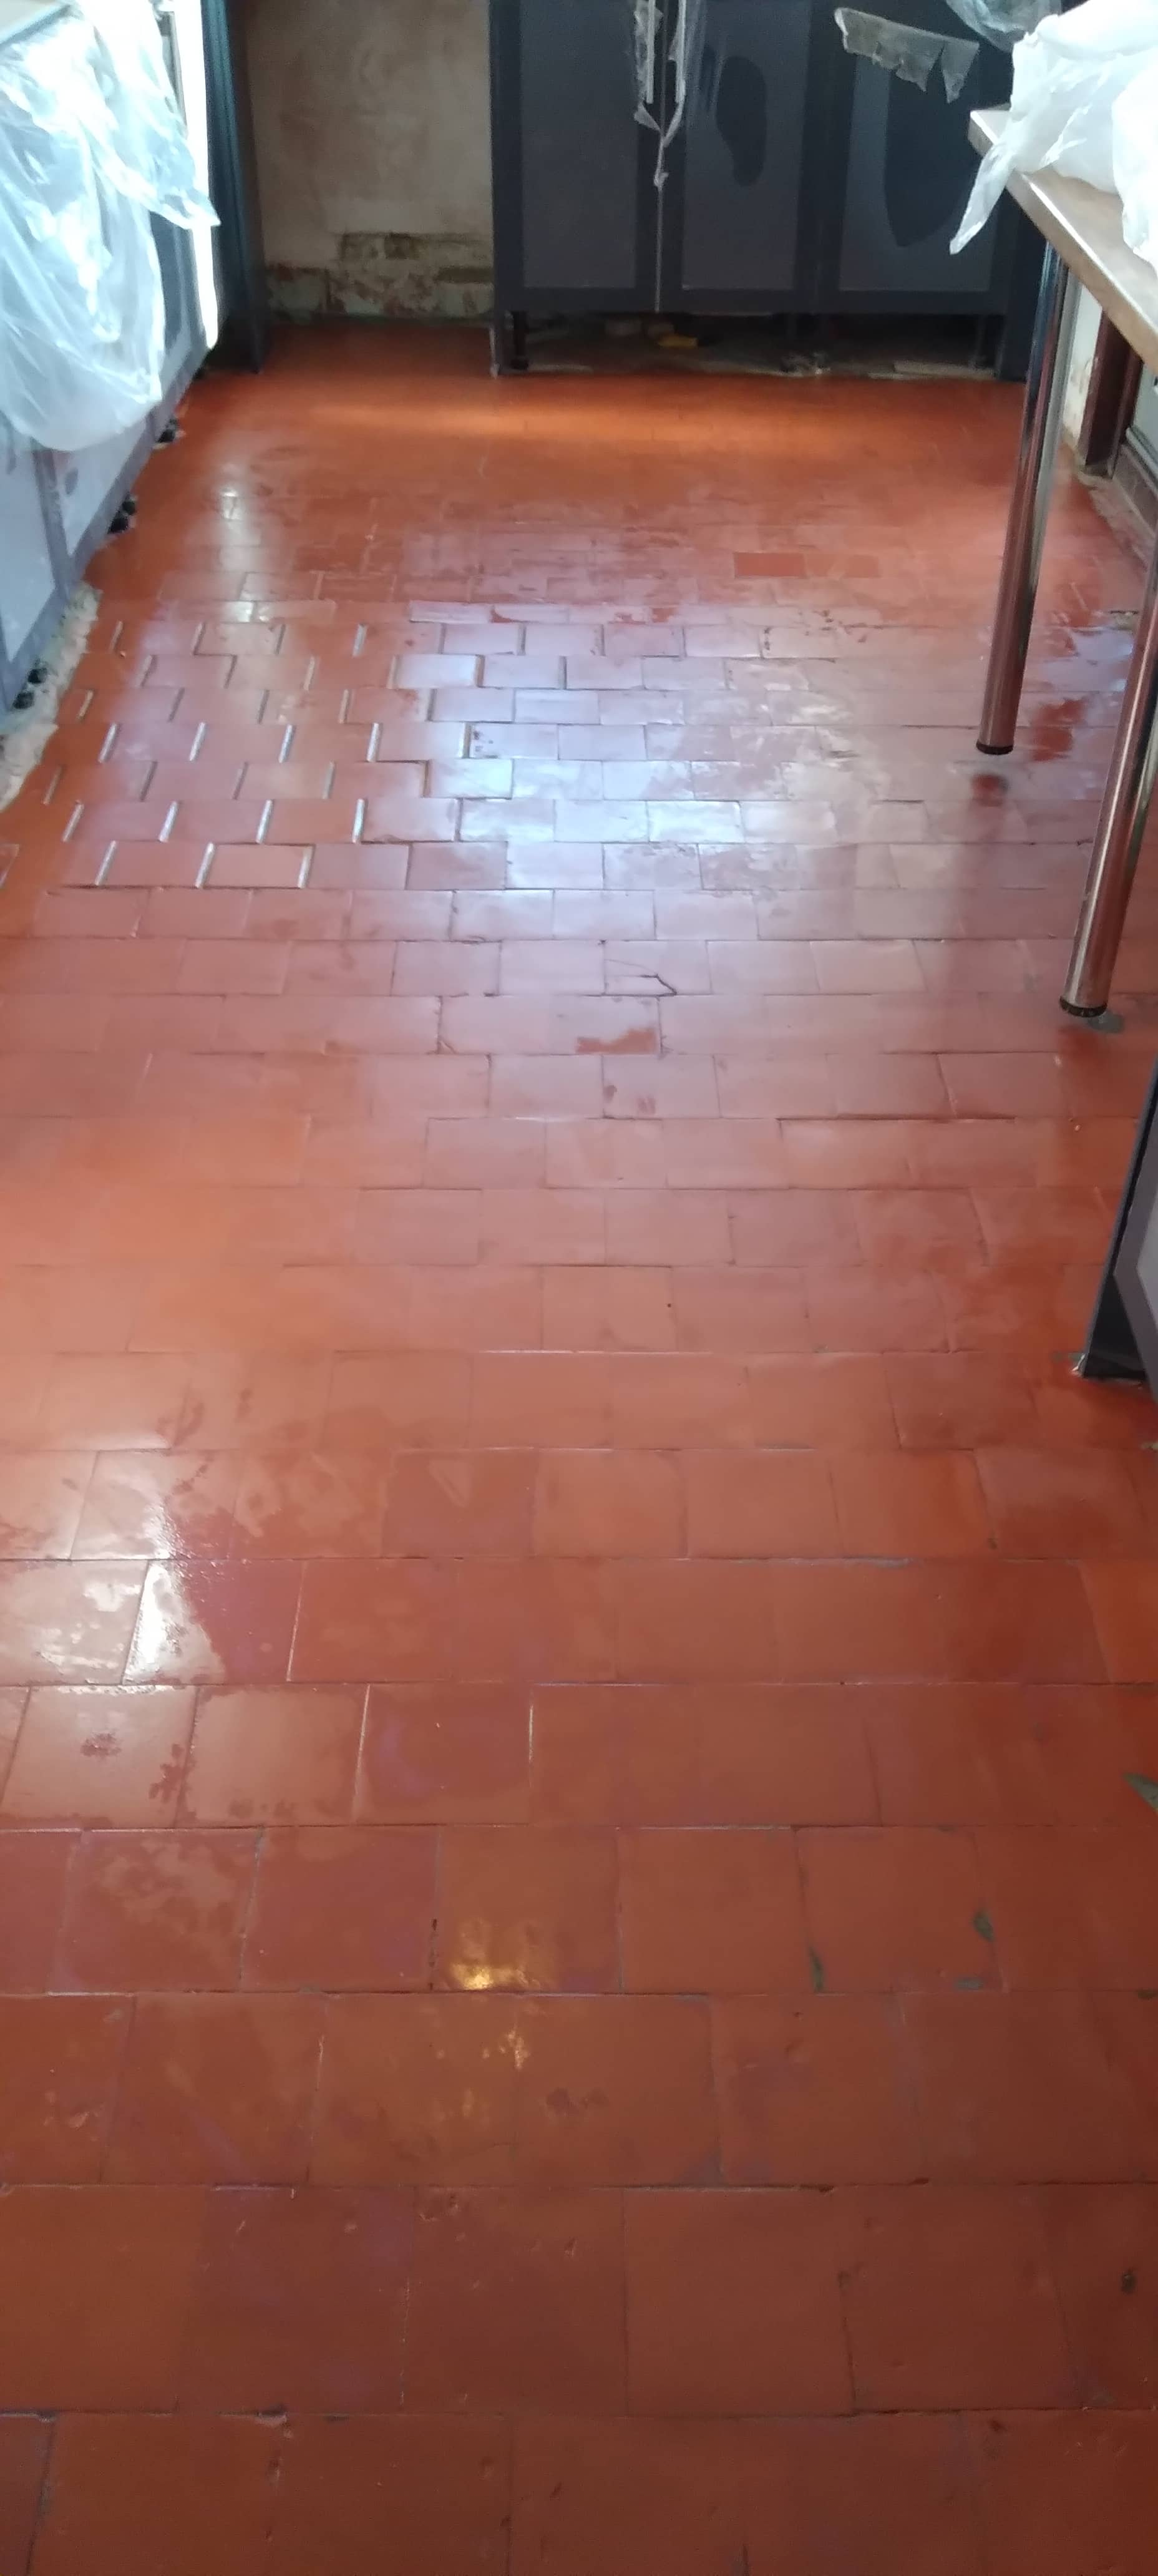
Old Victorian Red Quarry Tiled Kitchen Floor After Cleaning Gloucester Old Victorian Red Quarry Tiled Kitchen Floor After Cleaning Gloucester

Sealing a Victorian Red Quarry Tiled Kitchen Floor

I then left the floor to dry for 3 days and then return to seal with to a low satin finish using Tile Doctor Seal and Go Extra which works well on old Quarry tiles. Additionally it’s has a breathable formula which is important feature for an old floor like this one which won’t have a damp proof membrane fitted. Being breathable allows moisture to rise through the tile and evaporate at the surface.

Old Victorian Red Quarry Tiled Kitchen Floor After Restoration Gloucester Old Victorian Red Quarry Tiled Kitchen Floor After Restoration Gloucester

The customer was pleased with results despite the job taking 7 days, having only allowed 4 but the results were worth my hard work. Sometimes jobs do not go quite to plan, but as a Tile Doctor we are experienced at getting over any challenges we face.

For aftercare I recommended the use of Tile Doctor Neutral Tile Cleaner which is a pH neutral cleaner that will keep the floor in tip top condition for the future and will ensure maintenance of this lovely feature is easy for them.


Professional Restoration of a Victorian Red Quarry Tiled Kitchen in Gloucestershire

Original Quarry Tiled Floor Restored at a Victorian Property in Gloucester Read More »

Plaster Stained Victorian Hallway Floor Tile Renovation Stonehouse

Plaster Stained Victorian Tiled Hallway Renovated in Stonehouse

This client from the town of Stonehouse near Stroud contacted us about their Victorian tiled hallway following a recommendation by a neighbour. She wanted to get the floor renovated and had been struggling to find someone to complete the work. They had tried to clean the floor themselves but had little success and decided it was time to call in the experts.

Plaster Stained Victorian Hallway Floor Tiles Before Cleaning Stonehouse

The whole house was being renovated and unfortunately the contractor working on the hallway had not taken care to cover up the floor and it has subsequently become covered in all sorts of mess including a lot of plaster. I explained that it would not be an issue and was confident we could remove the plaster and renovate the floor back to health.

Happy with my quote we scheduled a date for our return which was following conclusion of the remaining renovation works.

Plaster Stained Victorian Hallway Floor Tiles Before Cleaning Stonehouse

Cleaning a Victorian Tiled Hallway Floor

Before starting the renovation of her floor, the first job was to cover the walls and skirting with masking film to protect the newly plastered walls from splashing during cleaning. Next and with a focus on removing the plaster a strong dilution of Tile Doctor Remove and Go was sprayed onto the tiles and left it to dwell for 10 minutes. Then using a Black scrubbing pad fitted to a rotary buffing machine the solution was scrubbed into to remove as much of the plaster and old coatings etc as possible. Once done the resultant slurry was vacuumed away using a wet extraction vacuum.

The next step was to treat the floor to an Acid Wash using Tile Doctor Acid Gel which was left for 5 minutes and then worked in with a coarse 100-grit pad. This treatment has a lot of benefits for tiled floors and is great for removing old grout smears and other contaminates such as salt staining. The floor was then wet vacuumed again and the process repeated with a finer 200-grit pad.

After another wet vacuum to extract the slurry, the floor was rinsed with water and extracted again. The floor was then left for two days to allow it to fully dry off.

Sealing a Victorian Tiled Hallway Floor

On our return the floor was tested with the damp meter to check it was dry. The moisture readings were good, so I was happy to go ahead with the sealing process.

I had discussed a desired finish with the customer earlier and as a result Tile Doctor Seal and Go Extra was chosen. This is a modern product that provides high stain resistance and is perfect for a hallway. It has a low sheen finish so does not make the floor too shiny, but allows the lovely colour of the tiles to shine through. Two coats of sealer were applied leaving each one to dry before the next was applied.

Plaster Stained Victorian Hallway Floor Tiles After Renovation Stonehouse

My client was amazed how well it came up and delighted that the contractors had not ruined her floor! For aftercare cleaning I recommended the use of Tile Doctor Neutral Tile Cleaner to maintain the floor going forward, this is an effective yet gentle tile cleaning product that won’t damage the sealer.

Plaster Stained Victorian Hallway Floor Tiles After Renovation Stonehouse


Professional Restoration of a Victorian Tiled Hallway in Gloucestershire

Plaster Stained Victorian Tiled Hallway Renovated in Stonehouse Read More »

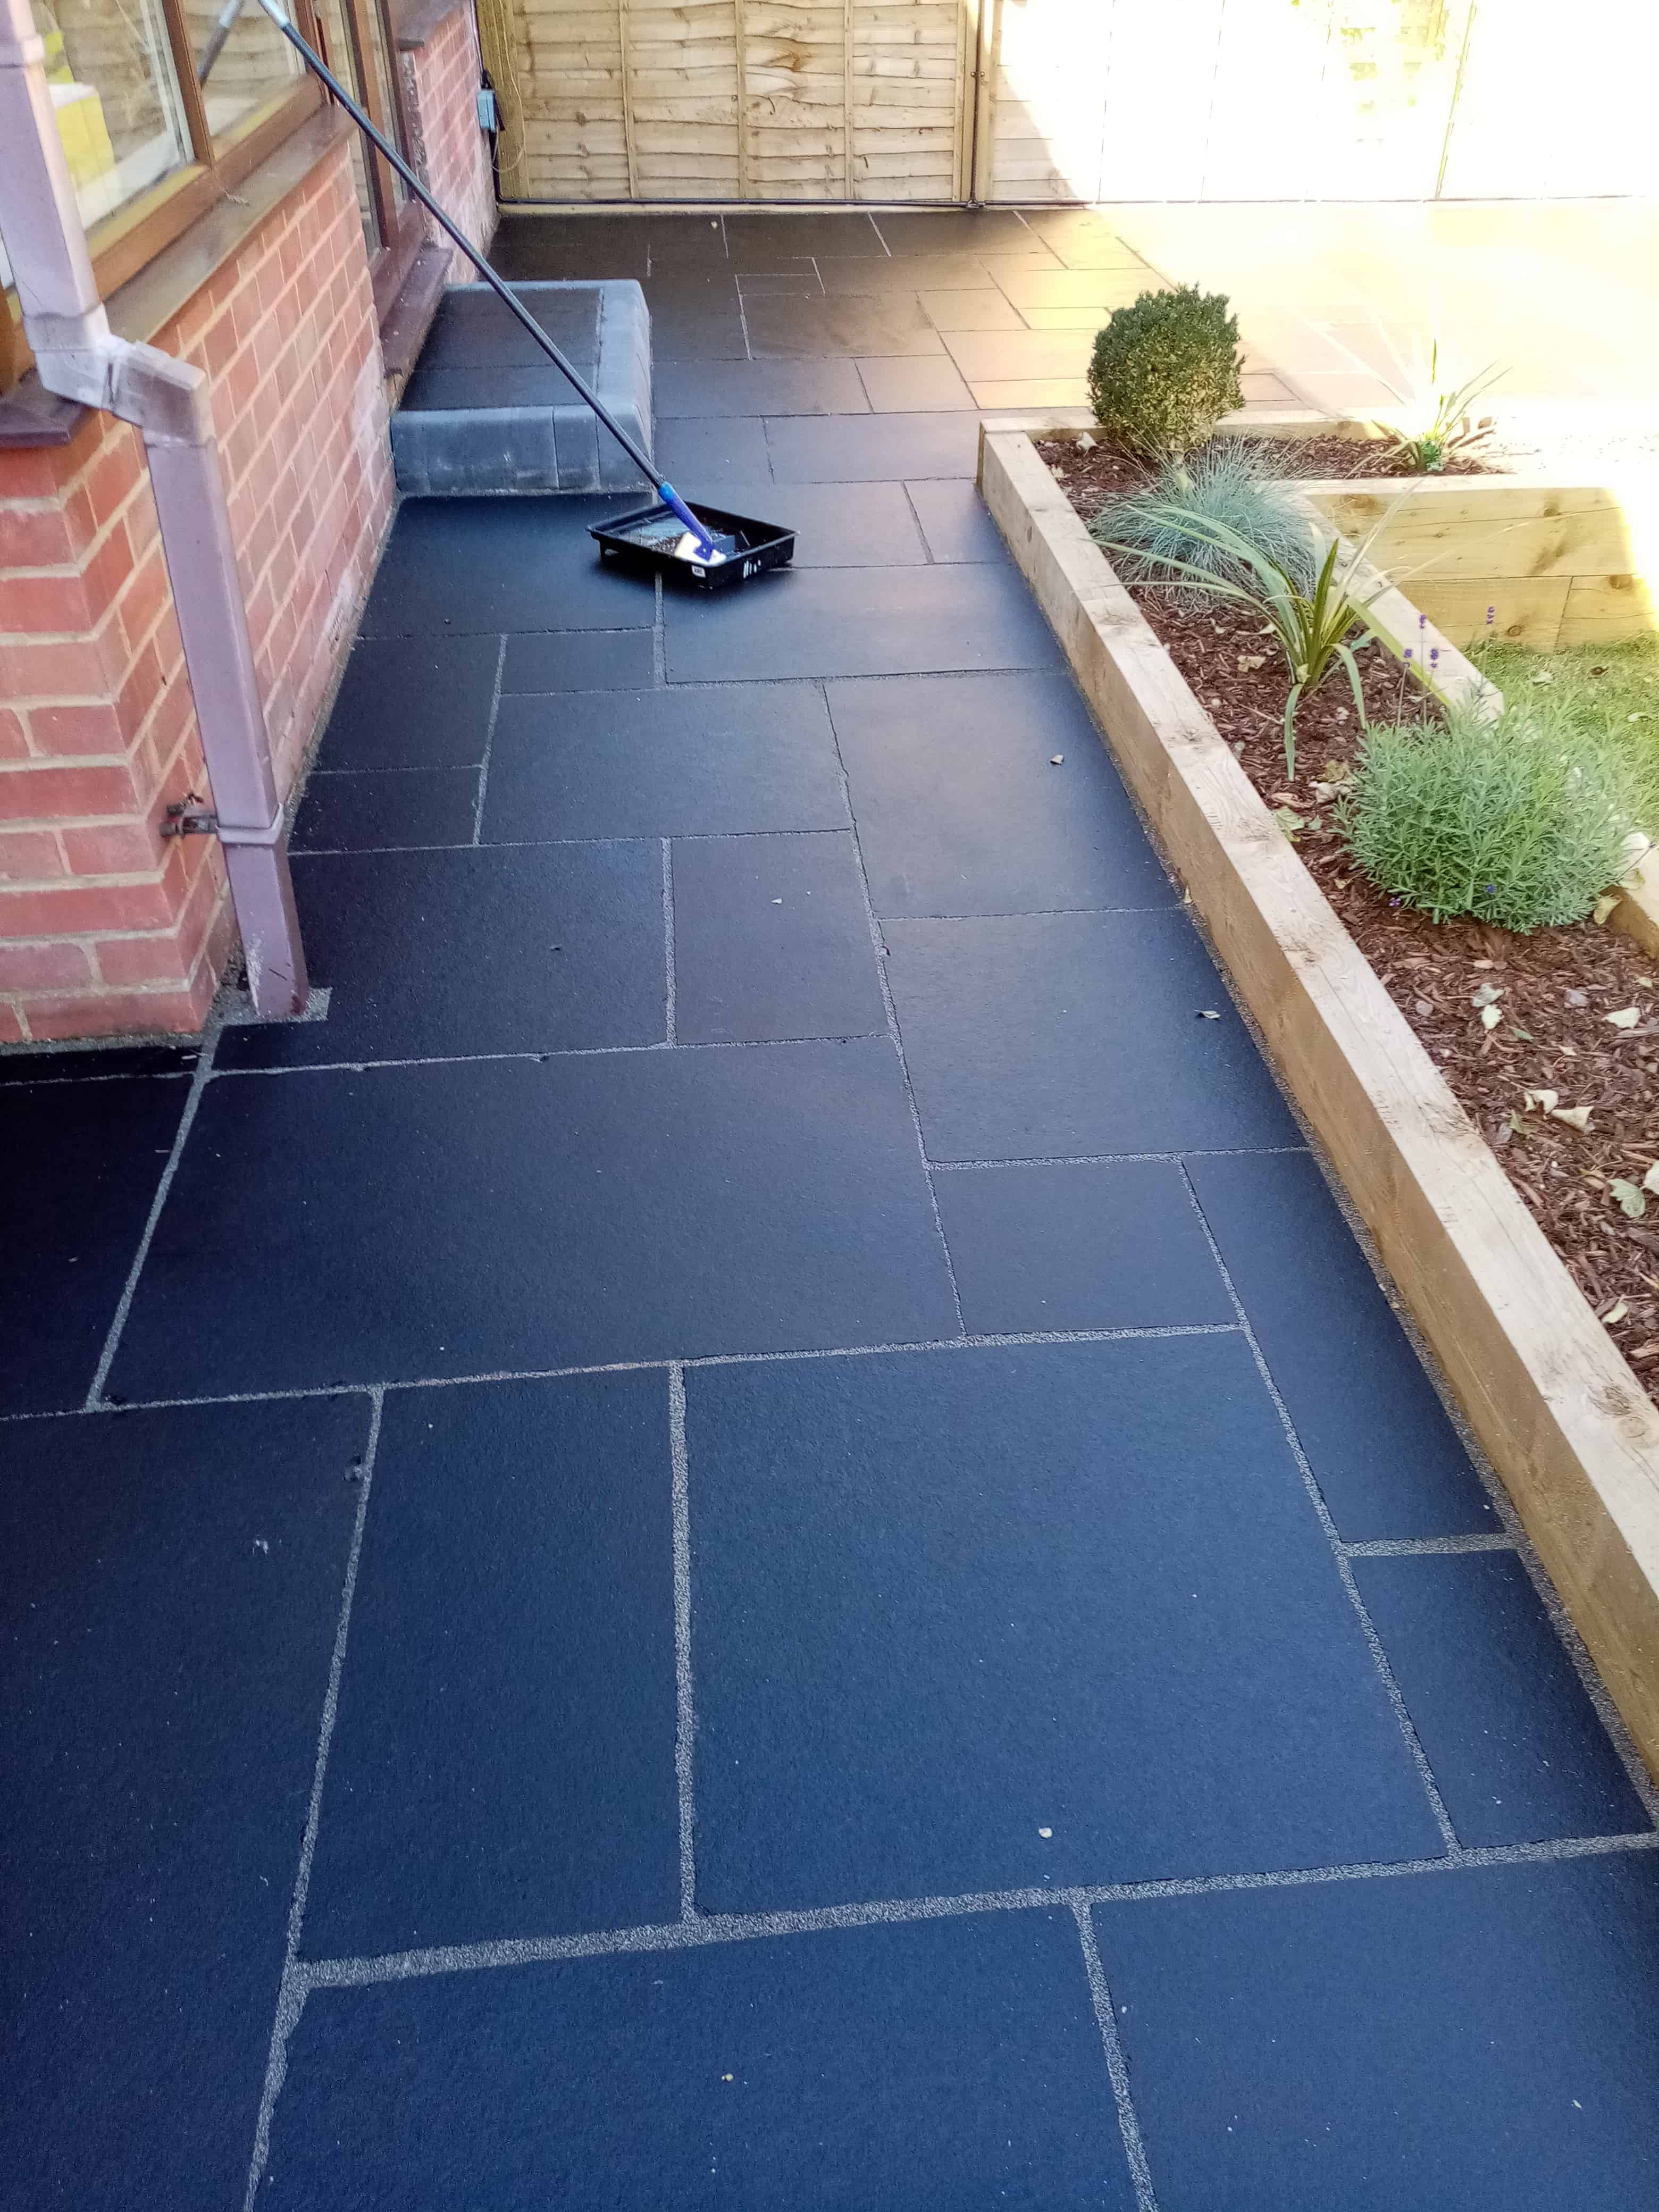
Black Limestone Patio Restoration Dursley

Ruined Black Limestone Patio Restored in Dursley

Earlier this year a client from my home town of Dursley phoned Tile Doctor in an emotional state having just had a Black Limestone patio laid and then immediately ruined when the tiler tried to clean it with brick acid. Limestone is a sedimentary rock composed primarily of calcium carbonate which can be dissolved in acid, so using acid on Limestone is never a good idea.

Black Limestone Patio Before Renovation Dursley Black Limestone Patio Before Renovation Dursley

I went along to survey the patio and could immediately see that the stone had been bleached white by the acid and looked terrible. Whilst there I completed a test clean to work out the best method for renovating the patio. Much to the relief of the owner the results were very encouraging and so she was happy to accept my quote and I was booked in to do the work.

Black Limestone Patio Before Renovation Dursley

I needed a couple of warm and dry days to do the work but fortunately the weather this summer was exceptional, so it wasn’t long before an opportunity arrived.

Cleaning a Limestone Tiled Patio Floor

I spent the first day burnishing the tiles with 200, 400 and 800-grit diamond pads using the rotary machine in sequence, these pads renovate the surface of the stone and remove the etching caused by the acid. Water was used to lubricate the process and the floor was rinsed with fresh water after each pad and the soil extracted with a wet vacuum.

Sealing a Limestone Tiled Patio Floor

The patio was left to dry off overnight and I returned the next day to finish the renovation checking first that the stone was dry with the use of a damp meter. The readings were good, so I went ahead and applied a single coat of Tile Doctor Stone Oil which puts the oil back in the stone.

Black Limestone Patio During Sealing Dursley

The Stone Oil was left to dry for an hour and then this was followed up with two coats of Tile Doctor Colour Grow sealer to add protection. Tile Doctor Colour Grow is a colour intensifying impregnating sealer that allows the surface to breath and enhances the colour as well as providing durable protection. The patio will now be able to withstand the outside weather and the stone will be protected from the elements. For maintenance we recommend the patio to be cleaned and resealed annually which will keep it in great condition and extend its’ life.

Black Limestone Patio After Renovation Dursley

The results were amazing, you would not have thought it was the same patio, needless to say, my client very pleased by the transformation. Apparently, she has now managed to squeeze in a few late summer barbeques with friends to show off her lovely new patio.

Black Limestone Patio After Renovation Dursley


Professional Restoration of a Limestone Tiled Patio in Gloucestershire

Ruined Black Limestone Patio Restored in Dursley Read More »

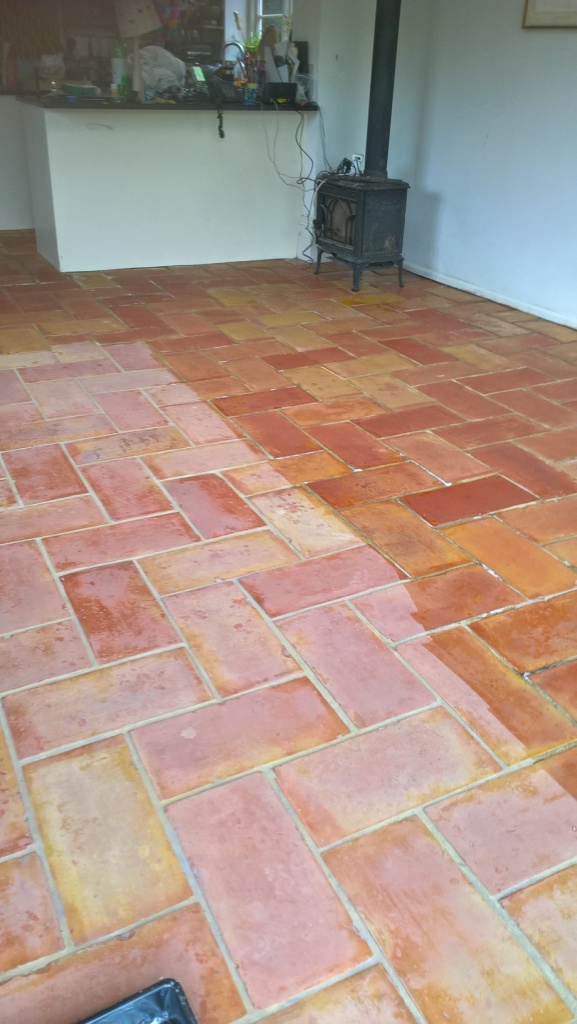
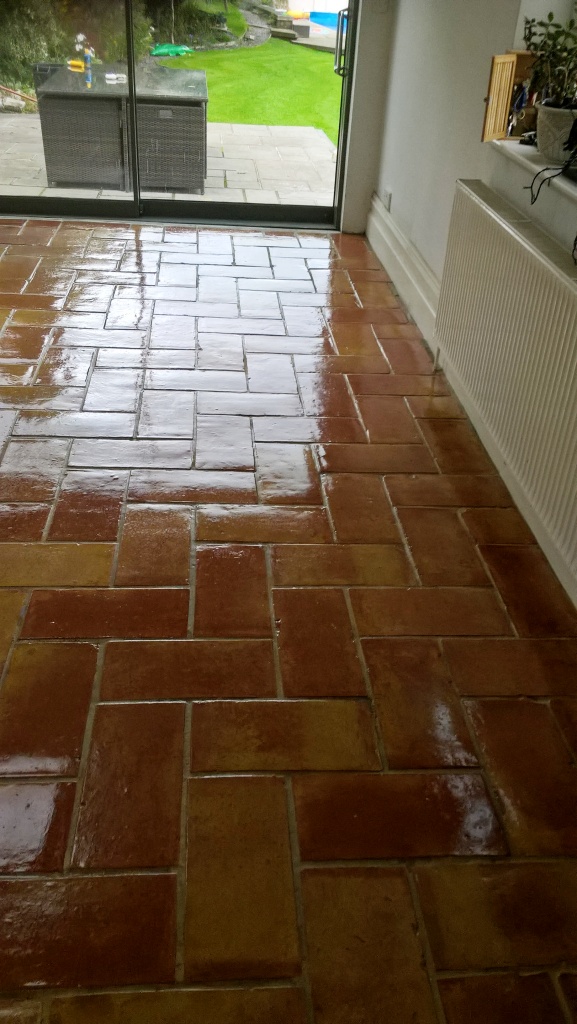
Terracotta Flooring Before After Renovation Dursley

Removing Wax from 30-Year-Old Terracotta Flooring in Dursley

Our client contacted us to find out if anything could be done about his Terracotta tiled floor which has been laid thirty years prior in the Conservatory and Kitchen of his house in Dursley. I went over to survey the floors and conduct a test clean on part of the floor to see what would be needed to renovate it. Fortunately, the customer knew the maintenance history of the floor and had told me for the last thirty years they had been applying wax which can be tricky to remove.

Terracotta Conservatory Floor Dursley Before Cleaning Terracotta Conservatory Floor Dursley Before Cleaning

The test clean went well and he was amazed how clean I managed to get the tile so confident in a good result a date was booked in for us to return to do the whole floor. We find surveying the floor before pricing is the most accurate way to provide a quotation as there are no surprises for all concerned.

Cleaning a Terracotta Tiled Conservatory Floor

On arrival the first task was to cover all the skirting boards, walls, and units to protect them. The floor was really dirty, and I could see we would need to conduct a lot of rinsing with water to remove the soiling. Having been informed about the wax covering from my earlier visit I was able to start stripping off the old layers of wax using a Tile Doctor product called Wax-Away which is made for this type of work. The product was mopped onto the floor, left to soak in for ten minutes and then scrubbed in with a black burnishing pad fitted to a rotary floor buffing machine. The soil was then rinsed away with water and extracted with a wet vacuum.

This process was repeated until I was happy the wax had been removed and then I turned my attention to the grout which was really ingrained with dirt. For this I sprayed on Tile Doctor Remove and Go, left it to dwell for ten minutes as before and then set about scrubbing it clean. Once this was complete and I was happy with the results the floor was washed with fresh water twice to remove any trace of product and the floor dried with the wet vacuum.

The floor was then covered with dust sheets so the customer could carry on using the floor as normal whilst we left it to dry out for three days. Terracotta is very porous and needs to be bone dry before sealing to achieve the best result.

Sealing a Terracotta Tiled Conservatory and Kitchen Floor

On our return 3 days later, I did a moisture test to ensure the floor was dry. The results were good, so I set about sealing the Terracotta with Tile Doctor Seal and Go which was the best sealer for this type of floor. I applied seven coats which takes some time as you need to ensure each coat has dried before applying the next. This sealer leaves a nice sheen but also allows the Orangey/Red colour in the Terracotta to come through.

Terracotta Conservatory Floor Dursley During Sealing Terracotta Kitchen Floor Dursley During Sealing

Once complete it was clear the deep clean and fresh seal had given the rooms a new lease of life and my client could not believe how well it had come up. For aftercare I recommend the use of Tile Doctor Neutral Tile Cleaner which is designed for the day to day cleaning of sealed tiles.

Terracotta Conservatory Floor Dursley After Sealing Terracotta Conservatory Floor Dursley After Sealing


Professional Renovation of a Terracotta Tiled Conservatory and Kitchen Floor in Gloucestershire

Removing Wax from 30-Year-Old Terracotta Flooring in Dursley Read More »

Renovating a Flood Stained Terracotta Kitchen Floor in Gloucester

Earlier this year a customer from Gloucester got in touch with Tile Doctor through Home Services following a flood that had affected his Terracotta Kitchen floor. It’s difficult to tell from the pictures but the Terracotta floor was badly stained and marked following the flood, it now looked flat and dull and my customer wanted its appearance restored to the way it looked before.

Flood Stained Terracotta Floor Before Cleaning Gloucester

I visited site to survey the tiles a recommend a was way to improve the appearance of the floor. Although now completely dry the floor was not looking its best, but there was nothing we couldn’t remedy. To resolve, I recommended deep cleaning the floor, stripping off any dirt and what was left of old sealers and then applying a new sealer. I gave them a formal quote which they could pass on to their insurance company and a not long after we received a call to say they were able to go ahead with the work.

Deep Cleaning a Terracotta Tiled Kitchen Floor

My first job was to prepare the floor for cleaning by removing the kickboards under the kitchen units and sweeping away any grit. Next the floor was deep cleaned using a strong dilution of Tile Doctor Pro-Clean which was left to soak into the Terracotta tiles for ten minutes. This gives time for the Pro-Clean to get to work breaking down the old sealers and dirt trapped in the pores of the tile. The Pro-Clean was then scrubbed into the tile using a black buffing pad fitted to a rotary machine.

After scrubbing the floor soiled cleaning solution was rinsed away with water and extracted from the floor using a wet vacuum. The tiles were then inspected to see if more work was required, there were a few areas I was not happy with, so the process was repeated where needed.

I then turned my attention to the grout lines which were really ingrained with dirt. I cleaned these with Tile Doctor Remove and Go which is a stronger product that is really designed for removing stubborn sealers but is also a powerful cleaning agent in its own right. Again, I left the product to soak into the grout for ten minutes before scrubbing it by hand with a stiff brush to really get the grout clean.

After rinsing and extracting one more time the Terracotta and Grout were as clean as they could be, and I left the floor to dry off fully for four days. Terracotta is very porous, so it absorbs the water and takes longer to dry than other tiles.

Flood Stained Terracotta Floor After Cleaning Gloucester

Sealing a Terracotta Tiled Kitchen Floor

On my return I first checked the floor for moisture using a damp meter taking several readings around the floor to satisfy myself it was dry. Applying a sealer to a damp tile would lead to an inconsistent result so it’s always best to be sure.

Eight coats of sealer were needed to ensure the floor was fully sealed, again Terracotta is very porous, and it can really drink the sealer. For this floor I chose Tile Doctor Seal and Go which works really well on Terracotta it added a nice subtle shine to the tiles and will ensure the floor is protected going forward. It’s also water based so you don’t get a smell as it dries.

Flood Stained Terracotta Floor After Cleaning Sealing Gloucester

Afterwards the floor looked great and the customer was very happy. They are just hoping there will not be a repeat of the floods that caused the previous damage.


Professional Restoration of a Terracotta Tiled Kitchen in Gloucestershire

Renovating a Flood Stained Terracotta Kitchen Floor in Gloucester Read More »

Victorian Tiled Hallway Floor Before and After Restoration Nailsworth

Restoring a Victorian Tiled Hallway in Nailsworth

This Victorian tiled hallway floor at a property in Nailsworth needed repairs to four areas and then required a deep clean and seal. The client was unsure if this was something, we would be able to help with but after speaking to him on the phone and review the photographs he sent over I reassured him it should be possible.

Victorian Tiled Hallway Floor Before Renovation Nailsworth Victorian Tiled Hallway Floor Before Renovation Nailsworth

The owner was keen to progress to I arranged an appointment to visit the property and survey the floor to get a better idea of the issues and provide a price for fully restoring the floor to the best condition possible. As the pictures show the Victorian tiles looked dull and washed out, there were also white paint spots on the tiles. I was confident the floor could be saved, and the owner was happy with my quote, so we scheduled a date for the work to start.

Repairing and Cleaning and a Victorian Tiled Hallway Floor

I spent the first day repairing the floor which in most cases requires carefully lifting the old tiles, scraping out the adhesive and cement and then re-fixing the original tile or a replacement back in place. We are usually able to source replacement tiles, either reclaimed or reproduction and we had managed to find some to match this floor. It’s a slow process and with four areas of Victorian flooring in need of attention so this step took up much of the first day. The floor was left to dry overnight so the adhesive would set.

On the second day I deep cleaned the tiles with a 200-grit diamond pad fitted to a rotary buffer using water to lubricate. The resultant slurry was then extracted with a wet vacuum and the process was repeated with a 400-grit burnishing pad. All the edges were done with water and small handheld diamond blocks as the rotary machine was too large to reach the corners and edges.

To finish the cleaning I treated the tiles to an acid wash using Tile Doctor Grout Clean Up which as well as removing any old grout smears would neutralise any efflorescent salts contained within the floor which can be problem on old floors like this that don’t have a damp proof membrane installed. Another advantage of doing this is that you achieve a stronger bond between the sealer and the tile.

Sealing a Victorian Tiled Hallway Floor

The floor was left to dry for 3 days after which I returned to seal it. Before starting thought I took some moisture readings with the damp meter. Once I was satisfied, I started applying the first of what would be five coats of sealer and for this floor I chose Tile Doctor Seal and Go Extra. There were several reasons for choice including the satin finish however my main thought was the age of the floor which meant it would not have a damp-proof membrane installed so any moisture would need to rise through the tile without being impeded, Seal and Go extra allows for this.

Victorian Tiled Hallway Floor After Repair Nailsworth Victorian Tiled Hallway Floor After Repair Nailsworth

My customer was really pleased with the result and happy to have the floor restored back to its original state.

Victorian Tiled Hallway Floor After Renovation Nailsworth


Professional Restoration of a Victorian Tiled Hallway in the Cotswolds

Restoring a Victorian Tiled Hallway in Nailsworth Read More »

Ceramic Tile End Of Tenancy Before After Cleaning Stroud

End of Tenancy Clean of a Ceramic Tiled Floor in Stroud

This customer from Stroud was soon to be re-letting her house but the Ceramic tiled floor and especially the grout had been left in a poor and dirty condition by the previous tenant. The ceramic tiled floor was installed throughout the Kitchen and through into the adjacent conservatory. Conscious this would affect future lettings she contacted Tile Doctor to see if we could help.

Ceramic Tiled Floor Grout Before Cleaning Stroud Kitchen

I paid a visit to the property to survey the floor and discuss how we would restore the Ceramic tiles and get them looking clean again. She was happy to hear we could help and agreed to my quote and we booked the work in for the following week. It would only take a day which suited her perfectly as she was keen to get the property back on the market.

Ceramic Tiled Floor Grout Before Cleaning Stroud Kitchen

Stroud is a lovely market town and in the centre of Gloucestershire. It is the main town in Stroud District and forms the centre for numerous surrounding market towns.
The Cotswold Area of Outstanding Natural Beauty surrounds the town, and the Cotswold Way path passes by it to the west, so it really is a desirable place to live with lots of lovely walks.

Ceramic Tiled Floor Grout Before Cleaning Stroud Kitchen

Cleaning a Ceramic Tiled Floor

The first job was to protect all the walls and units to ensure they did not get splashed by the products we would be using. I then sprayed Tile Doctor Remove and Go all over the floor and the grout lines, this was left for a short time to dwell and get to work breaking down the dirt. The floor was then scrubbed using a black buffing pad fitted to a buffing machine finishing off by scrubbing the grout lines with a stiff brush. The soil released from the floor was then rinsed off with water and extracted with a wet vacuum. Once I was happy with the result the floors were speed dried with a blow heater. The alternative was to leave the floor overnight, but as time was of the essence speed drying was the best option.

Sealing Grout on a Ceramic Tiled Floor

Later that day the floor was dry, and I was able to seal the grout lines with Tile Doctor Ultra Seal. I used a pipette to apply the sealer directly to the grout to ensure maximum coverage. The tiles themselves did not require any sealant as ceramic tiles are sealed at the factory when they are produced. Grout being cementitious however does attract dirt and so sealing it will keep it looking fresh for some time to come and make it easier to clean.

The client was very pleased with the results and relieved she could re-let the house again. Now the floor was clean and much more attractive it would ensure she could achieve the best rental value.

Ceramic Tiled Floor Grout After Cleaning Stroud Kitchen

I suggested she left a bottle of Tile Doctor Neutral Tile Cleaner for the new tenants as this would be the best product to keep the floor clean moving forward, you only need a small amount to dilute and it has a pleasant fresh fragrance. At least if the product is on site the tenant is more likely to keep the floor looking good and not resort to everyday household cleaners which eventually break down the grout and its’ seal. She thought this was a great idea.

Ceramic Tiled Floor Grout After Cleaning Stroud Kitchen


Professional Restoration of a Ceramic Tiled Kitchen Floor in Gloucestershire

End of Tenancy Clean of a Ceramic Tiled Floor in Stroud Read More »

Travertine Tiled Floor Renovation Bishops Cleave

Travertine Tiled Floor Renovated in Bishop’s Cleeve

The client in Bishops Cleave contacted me as she was so frustrated with her Travertine tiled floor she was thinking of having it taken up. The tiles had been laid throughout the Hallway and into the Kitchen many years prior. The appearance of the floor had slowly deteriorated over the years to the extent that she was now having real trouble getting it clean.

Travertine Tiled Kitchen Floor before polishing Bishops Cleave

I arranged to visit the property in Bishops Cleave which is a small village between Cheltenham and Tewkesbury. The floor was indeed in need of attention, the sealant had clearly broken down and dirt had become ingrained in the pores of the stone. I discussed with the client what could be done to restore the appearance and demonstrated the cleaning process on part of the floor. She was thrilled with the result and about the possibility of getting the floor restored. Better still she would avoid all the disruption of relaying the floor and of course the cost. We agreed a price to carry out the work and I arranged a suitable date to return and complete the work which would take two days.

Travertine Tiled Kitchen Floor before polishing Bishops Cleave

Renovating a Dirty Travertine Tiled Floor

Returning to the property the first task was to protect the kitchen units and wooden stairs with masking film. I then started cleaning with floor with a coarse 400-grit Diamond burnishing pad fitted to a rotary floor buffer using water to lubricate the abrasive process. The pad is run over each tile a few times and then once the section is completed the floor is rinsed with more water and fine slurry extracted with a wet vacuum.

This process is then repeated with the medium 800-grit pad and fine 1500 grit pads, again rinsing with water and extracting after each pad with the wet vacuum. it’s a slow process but burnishing the floor in this opens the pores in the stone so the dirt can be removed and then closes them up again so restore its appearance.

The grout lines were quite heavily soiled with dirt, so my next task was to scrub them with a strong dilution of Tile Doctor Pro-Clean. The area was then again rinsed, and the soil extracted leaving the floor to dry off overnight.

Sealing a Travertine Tiled Kitchen Floor

Returning the following morning, I then spray burnished the floor with a 3000-grit polishing pad to remove any residue that might have been left behind and to further bring up the polished appearance of the Travertine.

This final pad is applied dry with only a little water, so it leaves the floor nice and dry and ready for sealing. For the sealer I had selected Tile Doctor Ultra Seal which is a no-sheen, penetrating sealer which doesn’t change the appearance of the stone leaving a natural finish. It is formulated to provide maximum stain protection, so is particularly good in kitchens. It is also an excellent grout sealer. The sealer was applied and left to dry for an hour then buffed again with the 3000-grit pad. This gave the floor a lovely finish and the natural beauty of the Travertine was at last able to shine through. I was very pleased with this restoration.

Travertine Tiled Kitchen Floor after polishing Bishops Cleave Travertine Tiled Kitchen Floor after polishing Bishops Cleave

The client was delighted and very pleased the she had contacted Tile Doctor, the floor looked great. She was very happy she had not needed to replace the floor. I suggested to her to maintain the floor she should use Tile Doctor Stone Soap which is a pH balanced product which you dilute. It will ensure the seal is not compromised and will keep the floor in great condition.

Travertine Tiled Kitchen Floor after polishing Bishops Cleave


Professional Restoration of a Travertine Tiled Kitchen in Gloucestershire

Travertine Tiled Floor Renovated in Bishop’s Cleeve Read More »

Quarry Tiled Floor Before After Vinyl Removal Filton

Restoring Quarry Tiles Hidden Under Vinyl Flooring in Filton

This client who lives in Filton had been informed by the previous owner of his property that there was a Quarry tiled floor in the Kitchen but it had been covered up with stone effect Vinyl flooring. Keen to have it removed and have the original Quarry tiles brought back to life we were contacted to see if it could be done.

I visited the property to survey the floor and work out a plan for the restoration. The lino was heavily stuck in place with about 5mm of adhesive so I could see this was going to be no easy restoration. It would be necessary to remove, the floor, adhesive compound and cement beneath it.

Lino Covered Quarry Tiled Kitchen Floor Before Restoration in Filton Lino Covered Quarry Tiled Kitchen Floor Before Restoration in Filton

I discussed the project with the client the project, explaining it was difficult to ascertain how long it would take but anticipated it would be around three days. The process would involve stripping off the Vinyl tiles, removing the adhesive, deep cleaning the Quarry tiles and the apply a sealer to protect them. The client agreed my quote and we arranged a convenient date to return to make a start.

Stripping Stone Effect Vinyl from a Quarry Tiled Kitchen Floor

After removing the kickboards from underneath, the kitchen units, and taping up the surrounding areas to protect them, I set about restoring the floor. I used a variety of different methods to remove the adhesive compound and cement but mainly hand tools and hard labour! After three long days we had managed to remove the Vinyl and one once all adhesive was removed it was starting to look like a Quarry tiled floor. It was actually quite rewarding to see the Quarry tiles emerge as we progressed.

Lino Covered Quarry Tiled Kitchen Floor During Restoration in Filton Lino Covered Quarry Tiled Kitchen Floor During Restoration in Filton

Once the Quarry tiled floor was fully exposed, I applied Tile Doctor Acid Gel which was worked in using a large buffing machine fitted with a black scrubbing pad. The soil was rinsed off with water and the waste extracted with a wet vacuum. I repeated this procedure until I was satisfied the floor was as clear of old adhesives and residue and as clean as possible. Actually, we had uncovered a really nice-looking floor, which considering the covering was generally in good condition. The floor was left for a few days to ensure it was totally dry, ready for the sealing process.

Sealing a Quarry Tiled Kitchen Floor

We used a lot of water during the cleaning process, so I left the floor to try out for two days before returning to apply the sealer. I had chosen to use Tile Doctor Colour Grow for the sealer; it leaves a matt finish whilst intensifying the natural colours in the tile. It works by occupying the pores in the tile thus preventing dirt from becoming trapped resulting in durable protection. It also allows the surface to breathe which is important on a floor of this age. We applied 2 coats to the tiles allowing each to dry before applying the next, the lovely colours of the floor were now enhanced.

Lino Covered Quarry Tiled Kitchen Floor After Restoration in Filton Lino Covered Quarry Tiled Kitchen Floor After Restoration in Filton

Our client was amazed at the results and so happy they were finally rid of the old lino which was passed its best. For aftercare I recommended they should use Tile Doctor Neutral Tile Cleaner which is designed for cleaning sealed tile and stone.


Professional Restoration of a Quarry Tiled Kitchen in Gloucestershire

Restoring Quarry Tiles Hidden Under Vinyl Flooring in Filton Read More »

Black Limestone Patio Before After Renovation Cheltenham

Refinishing a Black Limestone Patio After Installation in Cheltenham

This client called Tile Doctor to see if anything could be done about the colour of their limestone patio which was laid about 6 months prior at their house in Cheltenham. It and had always looked grey rather than the black they had expected and with summer on the way felt it was time to get it resolved.

Black Limestone Patio Before Renovation Cheltenham

I went over to survey the Limestone paving and could see straight away that whoever had installed it had not cleaned off the cement and grout residue afterwards. Add on top of that the green algae and dirt build-up you get over winter and the Patio was now looking very sorry for itself.

I conducted a test clean on a small area to work out the best method for restoring the appearance of the stone. The Limestone responded well to the test and it gave the customer the results he was looking for. Happy with the potential result and my quotation a date was booked for the work, although this was weather dependent. The job would take 3 days to complete.

Black Limestone Patio Before Renovation Cheltenham Black Limestone Patio Before Renovation Cheltenham

Removing Cement and Grout from a Black Limestone Patio

We were quite fortunate with the weather and managed to find a few days without rain. Arriving on day one, the client had moved all the patio furniture out of the way, so we were able to get to work immediately starting with the application of a coarse 200 grit diamond pad fitted to a large buffing machine. The pad is applied to each paving stone in turn and lubricated with plenty of water. This action slightly mills the Limestone to remove all the old cement and grout that had been left of the surface. After rinsing with water and extracting the soil the process was repeated using a 400 and 800-grit burnishing pad to hone the stone and bring up its appearance. The area was quite large, so this took most of the first day.

Returning the following morning, we moved onto cleaning the grout lines using a strong dilution of Tile Doctor Pro-Clean. Then the whole patio was rinsed with water and scrubbed using a wet vacuum to extract all the soil generated. The patio was left overnight to dry out, the weather remained good, so we were able to come back the next day to seal it and complete the job.

Sealing a Black Limestone Tiled Patio

To seal the Limestone and restore colour I selected to use Tile Doctor Stone Oil, this is an easy to apply impregnating sealer, ideal for low porosity stone such as Limestone. Stone Oil is designed to enhance the colour and texture of stone, it also improves mechanical strength once it is cured.

One coat was applied to get the colour back in the stone, giving it the nice rich black it should have been. The stone was left to dry for two hours and then followed up with a coat of Tile Doctor Ultra-Seal to further seal the stone. Ultra-Seal is a no-sheen, natural-look, penetrating sealer formulated to provide maximum stain protection. It is also an excellent grout sealer.

Black Limestone Patio After Renovation Cheltenham

As you can see from the pictures the results were fantastic and the customer was very happy that the patio now looked how they had expected it to when it was installed. The sealant should give it adequate protection from the elements but would need to be reapplied in future years. They were looking forward to making the most of the sunny weather and getting the barbeque out to make use of their lovely newly restored patio.

Black Limestone Patio After Renovation Cheltenham


Professional Restoration of a Black Limestone Tiled Patio in Gloucestershire

Refinishing a Black Limestone Patio After Installation in Cheltenham Read More »

Stained Flagstone Tiled Floor Before After Renovation Dursley

Raspberry Stained Flagstone Floor Cleaned and Sealed in Dursley

I recently helped a homeowner from my home town of Dursley who got in touch about her kitchen Flagstone floor. The problem revolved around an accident she had with raspberries which had stained the flagstones and the problem became compounded when a house hold cleaning product was applied neat to clean up the mess. If you follow any of our Tile Doctor blogs, you will know that using strong household cleaning products can damage the sealer and, in this case, it had left white marks on the floor.

Flagstone Floor Before Cleaning Dursley

I called round to the property to survey the floor as was surprised to find out that the floor had been cleaned and sealed only four months prior by another company. I don’t like to comment on other people’s work, but I found the grout lines and flagstones were still badly ingrained with dirt, so it wasn’t a thorough job.

Flagstone Floor Before Cleaning Dursley Flagstone Floor Before Cleaning Dursley

I completed by survey and demonstrated the process I would follow to resolve the issues on one of the flagstone tiles. She could not believe the difference I was able to make and booked me in straight away to restore the entire floor.

Cleaning a traditional Yorkshire Stone internal floor

My first task was to protect the wooden kitchen units from splashing that can happen when cleaning the floor. Once that was done, I set about stripping the sealer from the floor and deep cleaning the tile and grout with a strong dilution of Tile Doctor Pro-Clean. Pro-Clean is a concentrated, multi-purpose high-alkaline cleaner, stripper and de-greaser which is safe to use on all types of tile, stone and grout including natural stone.

Working in sections across the Kitchen and adjacent dining room I diluted one part Pro-Clean to two parts water and mopped it onto the flagstones and grout where I left it to soak in for roughly fifteen minutes. Then using a rotary floor buffer fitted with a black scrubbing pad I scrubbed the solution into the floor into the old sealer and trapped dirt came away turning the cleaning fluid black in the process. The soil was then rinsed off with water and then extracted with a powerful 3,000 watt wet and dry vacuum. This process was repeated until I was satisfied the floor was clean and I ran a stiff grout brush along the grout lines to ensure they also received a good scrub. After I was satisfied the section was clean, it was rinsed thoroughly with water to neutralise the floor and remove any trace of product and then dried with the wet and dry vacuum.

The cleaning process took up the whole day, but the flagstones would need to be dry before sealing so after giving the owner an update I left the floor for two days, so it could dry out thoroughly.

Sealing a traditional Yorkshire Stone internal floor

On my return I tested the floor was dry in multiple places with a damp meter to ensure it was ready to be sealed. The readings showed that the wet and dry vacuum had done a good job in removing the moisture, so all was well. To seal I applied several coats of Tile Doctor Seal and Go allowing each coat to dry before applying the next, however with such a large area to cover I was able to work in sections around the floor.

Seal and Go works really well on Flagstones and leaves a very appealing sheen finish, also being water based it doesn’t leave a smell as it dries.

Flagstone Floor After Cleaning Dursley Flagstone Floor After Cleaning Dursley

The results were amazing, and the customer thanked me for making such a massive improvement on her floor. Before leaving I made sure to discuss after-care and to avoid the use of harsh cleaning products.

Flagstone Floor After Cleaning Dursley


Professional Cleaning and Sealing of Flagstone Floor in Gloucestershire

Raspberry Stained Flagstone Floor Cleaned and Sealed in Dursley Read More »

Mexican Terracotta Tiled Floor Before and After Renovation Stroud

Wax Sealed Mexican Terracotta Floor Stroud

We were called by a customer with a Mexican Terracotta floor who was looking at having it taken it up and replaced but before doing wondered what it would cost to have it renovated. I visited the property in the nearby market town of Stroud in the centre of Gloucestershire to survey the floor and advise on options. Stroud by the way is a lovely part of the county and sits within the Cotswolds which is an area of outstanding beauty.

Wax Sealed Mexican Terracotta Tile Before Cleaning Stroud
The customer had this floor laid thought the ground floor just five years earlier and had been was advised to seal it with wax. After three months the wax had broken down and started collecting dirt as you can see from the pictures. Unfortunately, he had not been advised the correct way to look after his floor and was now fed up with its appearance. Help was at hand and I was confident I could restore the floor for a lot less than replacing it, I explained what could be done, agreed a price which was accepted and agreed a date for carrying out the work.

Wax Sealed Mexican Terracotta Tile Before Cleaning Stroud

Stripping Wax Off Mexican Terracotta Tiles

So, the first job was to strip the layers of wax and sealant off using Tile Doctor Pro-Clean and Remove and Go. I combined the products together to make a very effective cleaner and coatings remover and left them to soak into the Terracotta tiles for ten minutes, before scrubbing them in with a black pad fitted to a rotary floor machine. This process released a lot of dirt and waxes from the floor which I extracted with a wet vacuum and then retreated areas that needed more work until I was happy it was as clean as it could be.

After the floor was clean I set about on grout lines these were also in a bad state, they needed a lot of manual scrubbing with Pro-Clean which was worked in with a narrow stiff brush to get them clean.

Wax Sealed Mexican Terracotta Tile After Cleaning Before Sealing Stroud
Afterwards, happy with the result, I rinsed the floor three times with water to remove any trace of the cleaning products and soil from the floor. Because I had to use so much water and cleaning products to achieve a good result I left the floor for nearly a week, so it could thoroughly dry out. Mexican terracotta is very porous, and it would need to be dry before sealing so I figured five days should be enough time.

Sealing Mexican Terracotta Tiled Floor

I returned after five days and checked that moisture levels of the floor were satisfactory with my moisture meter. Once I was satisfied I was good to go ahead with the sealing. I decided to use two different types of sealant on this job. For the first coat I used Tile Doctor Colour Grow which is an impregnator that soaks into the pores of the clay tile protecting it from with and enhancing the natural colours in the process. I then applied six coats of Tile Doctor Seal and Go letting it dry in between coats. Seal and Go is a water-based blend of acrylic polymers that provides both a stain resistant seal and a durable low-sheen finish, which the customer had requested on this job.

Wax Sealed Mexican Terracotta Tile After Cleaning Sealing Stroud
The customer was pleased with the result, he never expected it to look so good and had thought he was going to have to put a new floor down. Not only had we completed a great job for them, they had been saved significant expense too.


Professional Restoration of Mexican Terracotta Tiles in Gloucestershire

Wax Sealed Mexican Terracotta Floor Stroud Read More »

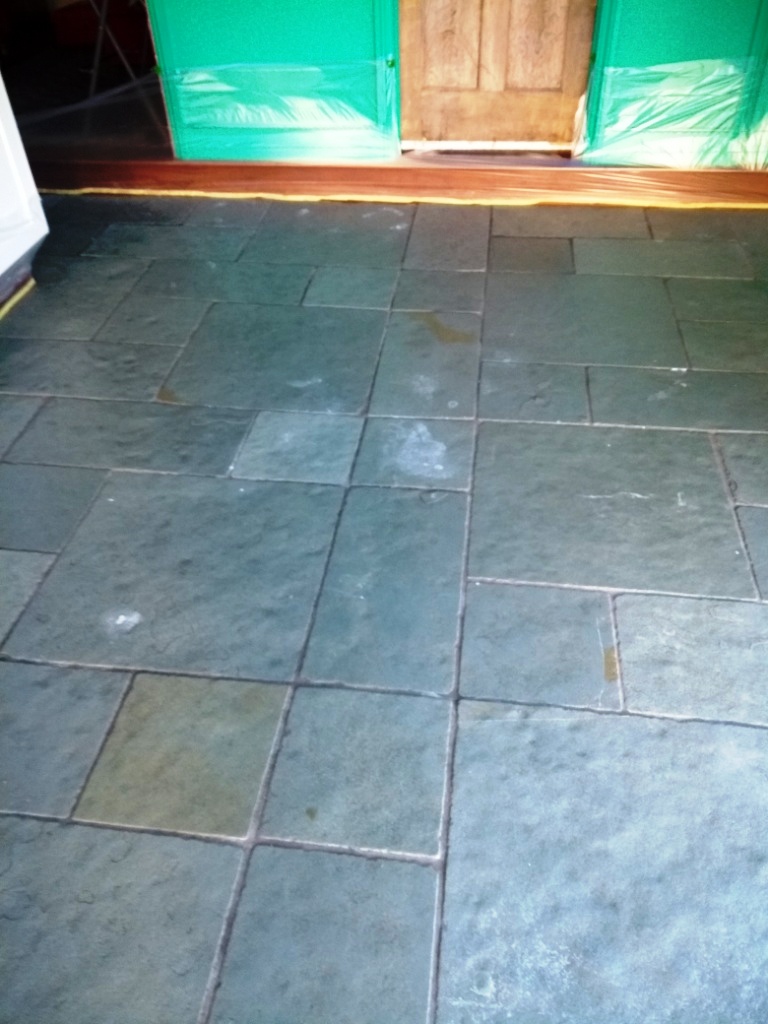
Chinese Slate Hallway Floor Tiles Before Cleaning After Sealing Cirencester

Enhancing a Chinese Slate Tiled Hallway Floor in Cirencester

This client from Cirencester got in contact about his Slate Tiled hallway floor which was now looking dull following renovations to the property by the owner who was a builder. If you have never been I can recommend you pay Cirencester visit, it’s a lovely old market town that dates to the Roman times and is incidentally is the largest town in the Cotswold District.

Chinese Slate Floor Cirencester Before Cleaning
I arrived at the property and could see immediately that the floor had never been sealed properly and so the appearance had just got worse over the few years since it was laid. Dirt had become ingrained in the pores of the slate making it impossible to clean effectively. The client realised that the only way to fix the problem was to have the floor properly treated. We agreed a price for the work and popped a date in the diary to come back.

Chinese Slate Floor Cirencester Before Cleaning Chinese Slate Floor Cirencester Before Cleaning

Cleaning a Chinese Slate Tiled Hallway Floor

As the floor was in the hallway, we needed to protect the stairs and skirting with plastic sheeting before we started. I then started cleaning the tiles with a strong concentration of Tile Doctor Remove and Go, this is a multi-purpose stripper which can remove most coatings and sealers and works best it left to dwell and soak into the stone for a long time before scrubbing it in. This also helps it work on ingrained stains and remove heavy grease build-up. My primary reason for choosing Remove and Go was to remove what was left of the sealer so after applying it to the floor I left it to soak in for ten minutes before being scrubbed it into the tiles with a black pad scrubbing pad fitted to a rotary floor buffer. The dirt soon turned the cleaning solution black and the slurry was extracted using a wet vacuum.

Next, I worked on cleaning up the grout using Tile Doctor Pro-Clean, this is good for neglected and heavily soiled areas and it makes short work of cleaning dirty grout. I had to scrub the grout by hand and once I was happy that the slate and grout was as clean as it could be the floor was given several rinses with water to remove the remaining dirt and remove any traces of cleaning products. Once this was done this completed the cleaning process, I was satisfied with our efforts and the floor was left to dry off overnight.

Sealing a Chinese Slate Tiled Hallway Floor

The next day I checked the moisture level of the stone in several areas with a damp meter to check that the floor was dry. The sealer will not cure if the floor is not properly dried out. I chose a combination of sealers to achieve the look we were after. First, I sealed with one coat of Tile Doctor Colour Grow this is an impregnating sealer that occupies the pores in the stone thereby preventing dirt from becoming ingrained there. It’s also a colour enhancing sealer that works really well on Chinese slate to highlight all the colours. Once this was dry I followed with three coats of Tile Doctor Seal and Go which is water-based blend of acrylic polymers that provides both a stain resistant surface seal and a durable low-sheen finish, which was perfect for finishing this floor.

Chinese Slate Floor Cirencester After Cleaning Chinese Slate Floor Cirencester After Cleaning

The customers response was ‘It never looked as good as that’, and he now realised the importance of sealing the floor correctly! I love the natural patterns in this type of floor, it is one of my favourites.

Chinese Slate Floor Cirencester After Cleaning
 

Professional Restoration of a Chinese Slate Tiled Hallway in Gloucestershire

Enhancing a Chinese Slate Tiled Hallway Floor in Cirencester Read More »

Travertine Kitchen Tiles Before After Polishing Cheltenham

Restoring Polish to a Travertine Tiled Kitchen Floor Cheltenham

These photos are of a Travertine Tiled Floor installed in the Kitchen and Dining area of a property in Cheltenham also known as Cheltenham Spa. The property is situated in a lovely location with Cheltenham being located on the edge of the Cotswolds, which is well known as an ‘Area of Outstanding Natural Beauty’ in Gloucestershire.

The floor which was installed 15 years prior had sadly not been maintained correctly over the years and was not looking its best, any sealer that may have been present on the floor had long since worn off with wear and now dirt had penetrated the pores of the Travertine making it difficult to keep clean and giving it a flat uninteresting appearance. The customer was specifically unhappy with what appeared dull looking marks all over the floor and the grout lines which were heavily ingrained with dirt and had now become black.

Travertine Floor Cheltenham Before Cleaning
Travertine is a natural stone material that has unique colours and features that no other stone can offer. The distinctive designs and natural patterns found within Travertine make it very popular as a flooring material and if treated properly it can look beautiful. I discussed with the client what Tile Doctor could do to improve the appearance of the floor, we agreed the cost and organised a date to get started.

Travertine Floor Cheltenham Before Cleaning

Cleaning Travertine Kitchen Floor Cheltenham

Before starting I protected the wooden skirting and kitchen units with plastic sheeting to ensure they did not get damaged. The floor was then burnished using a set of diamond encrusted burnishing pads of different grits using our usual process of lubricating with water and rinsing between each pad. Working my way through the different pads I started with the coarse 400-grit pad, then the 800-grit and finished on the 1500-grit.

The grout lines were then cleaned with Tile Doctor Remove and Go this is a multi-purpose stripper formulated with a long dwell-time that can clean whilst removing most sealers, coatings, synthetic finishes, adhesives and paints; pretty much most things that could have be left on the floor over 15 years! I then rinsed of the now soiled cleaning solution off the floor with water which was then extracted using the wet vacuum. I then left the floor to dry off fully overnight.

Sealing Travertine Kitchen Floor Cheltenham

On my return the next day I applied the last of the burnishing pads which is an extra fine 3000-grit pad really bring up the polish on the stone. This pad is applied dry with a little water sprayed onto the stone using a method we call a Spray Burnish.

The floor was then sealed with two coats of Tile Doctor Colour Grow, this product is a colour intensifying sealer which enhances the natural colours in the Travertine whilst adding durable stain protection. I highly recommend colour grow for sealing Travertine as it really does bring out the natural brown shades in the stone. The floor was left to dry and then buffed with a soft white buffing pad to bring the shine further.

Travertine Floor Cheltenham After Cleaning
My customer was very impressed with the result and left the following comment on the Tile Doctor feedback system:

“Our travertine floor has been transformed from a dull, impossible to clean surface to one that looks better than it did fifteen years ago. Every time I walk into the kitchen I stop just to look at it. I am delighted with what you have achieved! Thank you.
Laura C. “

Travertine Floor Cheltenham After Cleaning
 

Polishing & Sealing Travertine Kitchen Floor Tiles in Gloucestershire

Restoring Polish to a Travertine Tiled Kitchen Floor Cheltenham Read More »

Victorian Hallway Before After Renovation Gloucester

Victorian Tiled Hallway Gloucester

My customer was renovating their house in Gloucester and discovered this lovely vibrant Victorian tiled floor with blue accents under the carpet and were keen to get it restored and back to its’ former self. Gloucester lies close to the Welsh border, on the River Severn, between the Cotswolds to the east and the Forest of Dean to the southwest.

Victorian Hallway Before Renovation Gloucester
They were delighted to uncover the original floor but unsure if it could be restored asked me to come over and take a look. The tiles were in good physical condition for their age but were ingrained with dirt and had paint splashes, cement and carpet glue on the surface. The property had lots of period features, but this was by far the nicest. Luckily there was very little damage to the floor, so there was no need to source any extra tiles. We discussed what needed to be done and how the process would work, agreed a price and a timescale for the project which was accepted.

Victorian Hallway Before Renovation Gloucester

Deep Cleaning a Victorian Tiled Hallway Floor

The first process was to cover walls and skirting boards with plastic sheeting, I usually do this as a rule but in this case the hallway had just been decorated so we wanted to avoid any dirty splashes from the cleaning process.

Next a solution of tile doctor Tile Doctor Remove and Go was applied to the floor and left to dwell for 20 minutes and then with a buffing machine and black scrubbing pad I set about deep cleaning the floor. Tile Doctor Remove and Go is a strong coatings remover that can deal with old sealers, paint and glue, it’s also safe to use on tile, grout and stone. The floor was then rinsed with water and the now soiled cleaning solution was extracted from the floor with a wet vacuum.

Stubborn stains were spot treated using the same process and once satisfied with the results I gave the floor an acid wash using Tile Doctor Acid Gel. This neutralises any potential salt staining issues that could appear later as the floor dries. This process is known as efflorescence and can be very troublesome on old floors like these which don’t have a damp proof membrane installed. We often find covering old floors like these in a rubber underlay also prevents the floor from breathing which can lead to damp being trapped in the floor.

Sealing a Victorian Tiled Hallway Floor

We left the floor to dry off overnight and then the next day checked for moisture. It’s been a long hot summer, so the tiles had soon dried out. Happy with the results we started sealing the tiles with five coats of Tile Doctor Seal and Go. This is a specially formulated water-based blend of acrylic polymers that provides both a stain resistant surface seal and a durable low-sheen finish that works really well on Victorian tiled floors like this. Additionally, the product allows moisture vapour transmission so will be able to cope with the fact that this floor has not damp-proof membrane.

Victorian Hallway After Renovation Gloucester
As you can see from the photos the sealant left a lovely finish and the customer was very pleased with outcome. The floor is now restored and offers a lovely traditional entrance to their property.

Victorian Hallway After Renovation Gloucester
 

Professional Restoration of a Victorian Tiled Hallway in Gloucestershire

Victorian Tiled Hallway Gloucester Read More »

Polishing Travertine Floor Tiles in Cirencester

Restoring the Appearance of Travertine Kitchen Tiles in Cirencester

This customer from Cirencester was not happy with her look of her Travertine floor tiles; in fact, she had been browsing the Tile Doctor web site and realised how her floor should look and got in touch to have it renovated.

Polished Travertine Cirencester Before Cleaning Polished Travertine Cirencester Before Cleaning

I’m based in Dursley which is West Gloucestershire and have made the journey to Cirencester to the East on several occasions to work on tiled floors there. If you have never been it’s worth a visit; it’s a lovely market town which dates back to Roman times and is situated on the lower slopes of the Cotswold Hills.

Burnishing a Travertine Tiled Floor

To get the best from Travertine it really needs to be burnished which is an abrasive cleaning process that involves the application of several different grades of diamond encrusted pad to the stone lubricated with a small amount of water.

The pads are fitted to a rotary buffer and run over each tile in sequence from coarse to very fine. I started with the first of the four burnishing pads which is a coarse 400 grit pad that designed to grind away the dirt and old sealer on the surface of the floor. After applying the first pad, I moved my way through the medium 800 and fine 1500 grit pads to gradually restore the appearance of the Travertine making sure to rinse the floor with water in between to remove the soiling.

Next, I set about cleaning grout lines with Tile Doctor Remove and Go which was diluted with water and then scrubbed in with a stiff narrow brush. The soiled cleaning solution was then rinsed off with more water and extracted using a wet vacuum.

Polished Travertine Cirencester During Polishing Polished Travertine Cirencester During Polishing

The burnishing and grout cleaning took most of the day and I need the floor to be dry in order to seal it so I left for the day and left the floor to dry off fully overnight.

Sealing a Travertine Tiled Floor

The next day and before sealing the floor I applied the last pad in the set of four which is a 3,000 grit “very fine” burnishing pad. This final pad really builds the final polish on Travertine tile. The pad is applied with the rotary buffer as before but is applied dry with only a fine spray of water using a process we call a “Spray Burnish”

Once I was happy with polish I proceeded to seal the floor using Tile Doctor Ultra Seal which is a natural look sealer the seeps into the pores of the stone protecting it from within but without affecting the look of the stone. The floor was then left to dry for an hour and I finished by giving the Travertine a final buff using a white pad.

Polished Travertine Cirencester After Polishing Polished Travertine Cirencester After Polishing

My customer was delighted and now she has a Travertine tiled floor looking how it should.

Professional Travertine Floor Polishing and Sealing in Gloucestershire

Restoring the Appearance of Travertine Kitchen Tiles in Cirencester Read More »
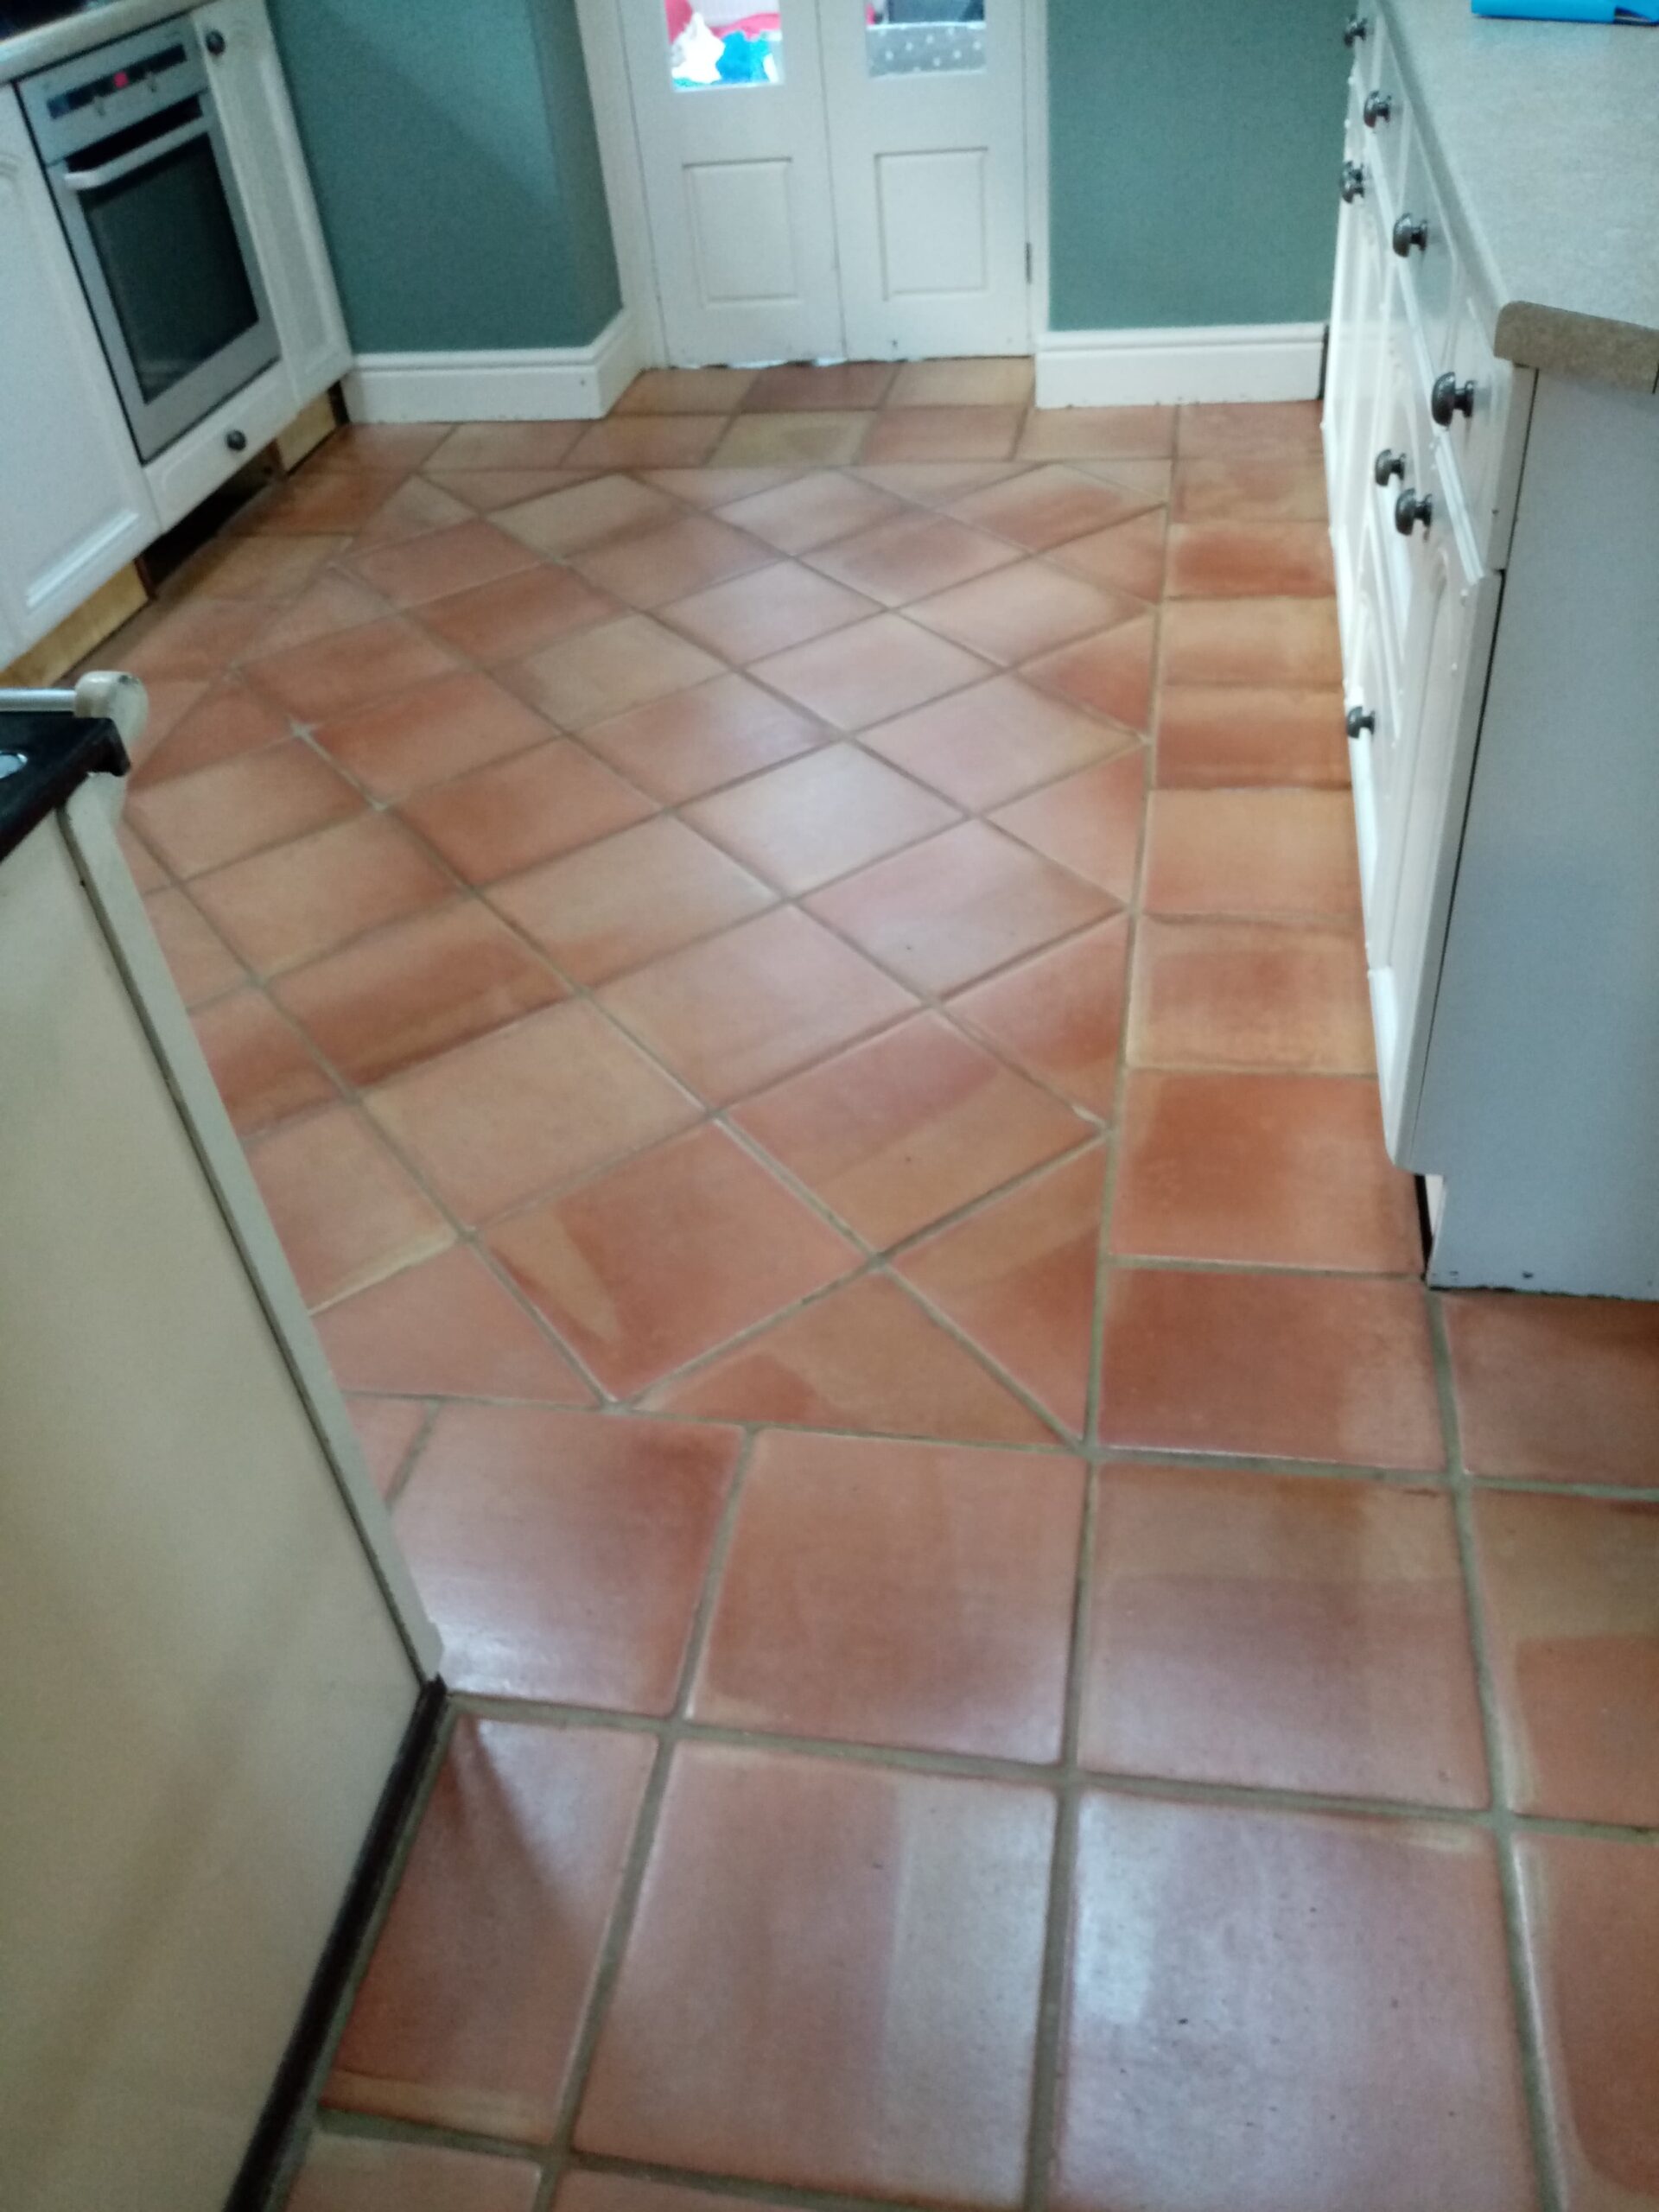
Polished Limestone Tiled Kitchen Floor Before and After Polishing Cheltenham

Restoring the Appearance of a Polished Limestone Tiled Floor in Cheltenham

The photographs below are of a Polished limestone floor that had been installed in the Kitchen of a house in Cheltenham approximately eight years prior. The polish and sealer had worn off over that time allowing dirt to become ingrained into the pores of the stone making it difficult to clean.

This is a common problem with all types of porous stone and tile which need to be sealed to maintain their appearance. Sealers do wear down over time with use however and need to be maintained, this is why Tile Doctor have created a maintenance program whereby we pop by every 12 months to give the floor a light clean and top-up the sealer, it only takes a few hours, but it keeps your sealer in good condition.

Polished Limestone Kitchen Floor Before Cleaning in Cheltenham Polished Limestone Kitchen Floor Before Cleaning in Cheltenham

Cheltenham by the way is a lovely town situated on the edge of the Cotswolds which is an area of Outstanding Natural Beauty. It has a racecourse and is well known for the mineral springs which were discovered here in 1716.

Burnishing a Dull and Dirty Limestone Tiled Floor

My first job was to protect the wooden kitchen units from any splashes by covering them some cotton sheets. Next, I set about restoring the Limestone’s appearance using a set of Burnishing Pads which is a form of polishing which involves the sequential application of four diamond encrusted pads of different grit levels.

The first pad applied is a Coarse 400 grit pad which is applied to the floor with a buffing machine and lubricated with water. This process grinds away the top layer of dirt and staining from the stone, along with any old sealer, the floor is then rinsed to remove the soil that is generated. I then move through the system, applying the Medium and then Fine pads using less and less water as you go but rinsing in-between and extracting the water with a wet-vac machine.

Once I was happy with the stone I scrubbed the grout lines to remove any soiling that the pads had failed to pick up. The floor was then given a final rinse and the wet vacuum used to extract as much moisture as possible. The floor was then left to dry out completely overnight.

Sealing a Limestone Tiled Floor

The next day I gave the floor a polish with the Very Fine 3,000 grit diamond burnishing pad, this is applied using a technique we call a “spray burnish” due to the fact that very little water is used during its application.

The next step was to seal the stone using for which I used Tile Doctor Colour Grow which is an impregnating sealer that protects the stone from within by occupying its pores. Colour Grow also has the added benefit of intensifying the natural colours in the stone. The floor was then left to dry for an hour before I gave it one final dry polish using the Very Fine burnishing pad.

Polished Limestone Kitchen Floor After Cleaning in Cheltenham
My customer was very happy with the final result and made the comment that they thought the floor looked brand new.

Polished Limestone Kitchen Floor After Cleaning in Cheltenham
 

Renovating a Polished Limestone Tiled Floor in Gloucestershire

Restoring the Appearance of a Polished Limestone Tiled Floor in Cheltenham Read More »

Quarry Tiled Kitchen Floor Before and After Restoration in Cheltenham

Poorly Maintained Kitchen Quarry Tiles Rejuvenated in Cheltenham

It’s often quite surprising what condition we find some tiles in when were asked to come out and survey the floor. Case in point being this Quarry tiled kitchen floor I was asked to look at by a customer in Cheltenham, which as you may know is particularly famous for its racecourse and the top-secret GCHQ.

Upon arrival at the property, I found that the floor was not in great condition. For some reason, it had been painted over with red tile paint and then covered with a wax coating which was easily scratched. To Make the situation worse, there were around 20 tiles in the floor with holes in them that had simply been filled with concrete.

Quarry Tiled Floor Cheltenham Before Removing Paint Quarry Tiled Floor Cheltenham Before Removing Paint

Clearly, the tiles had not been maintained properly in the past but fortunately the current owner of the property who was keen to have them restored had called in Tile Doctor and after a demonstration clean I was booked to come back and correct the numerous issues.

Cleaning a Damaged Quarry Tiled Kitchen Floor

On the first day of the restoration, I started by applying a solution of Tile Doctor Remove and Go across the entire floor and leaving the product to dwell for around 30 minutes. Remove and Go is a powerful stripper designed to loosen paint splashes, adhesive stains and many types of urethane and wax coatings so that they can be easily removed.

After leaving the product to dwell, I could use a handheld scrapper to simply remove the wax coating and layer of paint on the floor. This process took about half a day; during the second half of the day, I spent my time removing the damaged tiles and replacing them with new Quarry tiles that had been sourced to match nicely with the existing floor.

Quarry Tiled Floor Cheltenham During
On the second day, any stubborn paint splashes remaining were re-treated and I subsequently deep cleaned the floor using a strong dilution of Tile Doctor Pro-Clean. This strong alkaline cleaning product was worked into the tiles using a 17-inch scrubbing pad fitted to a specialised rotary machine. The resultant soil was extracted off the floor using a wet vacuum and given a rinse with water to neutralise the floor. The wet vacuum was used again to remove the water and extract as much moisture from the tiles as possible to improve the drying time.

Sealing a Quarry Tiled Kitchen Floor

Once the deep clean had been completed, I left the floor dry for two days to allow sufficient time for it to dry thoroughly. Upon returning to the property, I ran a damp test to see if the tiles were dry enough to be sealed. To my surprise, the floor recorded only around 4% moisture even though the property is relatively old and is unlikely to have a damp proof membrane installed.

Nonetheless, this meant I could seal the floor. I did this by using a single coat of our impregnating, colour-intensifying sealer known as Tile Doctor Colour Grow, followed by three coats of Tile Doctor Seal and Go, a water based sealer which provides a high-quality satin finish.

Quarry Tiled Floor Cheltenham After Cleaning and Sealing Quarry Tiled Floor Cheltenham After Cleaning and Sealing

The deep clean, combined with the application of two different sealers, really helped to give these Quarry tiles a new lease of life. The customer was very happy indeed – in fact, had this been an exam, I’m certain I would’ve received top marks and it was certainly a major improvement on how they were before.

Professional Restoration of a Quarry Tiled Kitchen Floor in Gloucestershire

Poorly Maintained Kitchen Quarry Tiles Rejuvenated in Cheltenham Read More »

Terracotta Kitchen Floor Tiles in Bristol Before After Cleaning and Sealing

Stripping Varnish off Terracotta Kitchen Tiles and Resealing in Bristol

Terracotta tiles are always a popular choice for Kitchens but being made from clay they are porous and need to be sealed to prevent dirt from becoming ingrained in the tile. Once sealed though you need to remember Kitchens are high traffic areas, so you can expect the sealer to wear off quicker than it would elsewhere.

I mention this as a customer from Bristol asked me to do a survey on her Varnish Sealed Terracotta Kitchen Tiles where the seal had worn down and were now dull, and the grout had darkened. I surveyed the floor and completed a test clean on a section of the floor which came out well impressing the customer who was happy for me to proceed with cleaning and sealing the floor.

Terracotta Kitchen Floor Tiles in Bristol Before Cleaning Terracotta Kitchen Floor Tiles in Bristol Before Cleaning

Traditionally Terracotta tiled floors have been sealed with a number of products over the years including Wax, Linseed Oil and on this occasion Varnish however all these products have their disadvantages and don’t compare to modern sealers which are designed for the job.

Terracotta Kitchen Floor Tiles Bristol Before Cleaning

Cleaning a Dirty Terracotta Tiled Kitchen Floor

The first day was spent trying to get the Varnish off the floor which somebody had used on the floor as a sealer; Varnish is easily scratched by furniture, so I certainly wouldn’t recommend it. I worked out however that it could be scrubbed off once coated in a combination or Tile Doctor products Pro-Clean, Remove and Go and Nano-Tech HBU which would be left to soak in for a while and then softened with steam.

Mechanical assistance from a buffing machine fitted with a large black scrubbing pad helped reduce the amount of elbow grease that was required and once I was happy the tiles were clean the now soiled solution was rinsed off with water and extracted using a wet vacuum.

The next day and with the floor now clear I was able to see those areas that needed further re-treatment and also turn my attention to the grout which was cleaned using more cleaning solution worked in with a stiff narrow grout brush that gets into the grout lines. Once I was completely happy with the floor its was given a final rinse with water to remove any trace of cleaning products and then dried with a wet vacuum to remove as much moisture as possible.

Terracotta Kitchen Floor Tiles in Bristol After Cleaning

Sealing a Dirty Terracotta Tiled Kitchen Floor

It’s important that the tiles are dry before sealing so I left the floor to dry out for three days before returning to seal them. No Varnish this time of course, Tile Doctor has a range of sealers for every type of situation and what I find works best on Terracotta tiles is a single coat of Tile Doctor Colour Grow topped off with multiple coats of Tile Doctor Seal and Go.

Terracotta Kitchen Floor Tiles in Bristol During Cleaning
Tile Doctor Colour Grow is an impregnating sealer that penetrates into the pores of the clay protecting it from within whilst enhancing colour whilst Seal and Go completes the sealing process and adds a nice sheen to the look of the tile.

Terracotta Kitchen Floor Tiles in Bristol After Cleaning and Sealing Terracotta Kitchen Floor Tiles in Bristol After Cleaning and Sealing

As you can see from the final photographs the floor looked really good and the customer gave me top marks for feedback.

Terracotta Kitchen Floor Tiles in Bristol After Cleaning and Sealing
 

Professional Terracotta Tiled Kitchen Restoration in Gloucestershire

Stripping Varnish off Terracotta Kitchen Tiles and Resealing in Bristol Read More »

Scroll to Top