Cheltenham Tile Cleaning

Cheltenham Tile Cleaning

Welcome to my Work History archive where you will find examples of the cleaning and renovation of tiles carried out in Cheltenham.

Travertine Tiled Floor Renovation Bishops Cleave

Travertine Tiled Floor Renovated in Bishop’s Cleeve

The client in Bishops Cleave contacted me as she was so frustrated with her Travertine tiled floor she was thinking of having it taken up. The tiles had been laid throughout the Hallway and into the Kitchen many years prior. The appearance of the floor had slowly deteriorated over the years to the extent that she was now having real trouble getting it clean.

Travertine Tiled Kitchen Floor before polishing Bishops Cleave

I arranged to visit the property in Bishops Cleave which is a small village between Cheltenham and Tewkesbury. The floor was indeed in need of attention, the sealant had clearly broken down and dirt had become ingrained in the pores of the stone. I discussed with the client what could be done to restore the appearance and demonstrated the cleaning process on part of the floor. She was thrilled with the result and about the possibility of getting the floor restored. Better still she would avoid all the disruption of relaying the floor and of course the cost. We agreed a price to carry out the work and I arranged a suitable date to return and complete the work which would take two days.

Travertine Tiled Kitchen Floor before polishing Bishops Cleave

Renovating a Dirty Travertine Tiled Floor

Returning to the property the first task was to protect the kitchen units and wooden stairs with masking film. I then started cleaning with floor with a coarse 400-grit Diamond burnishing pad fitted to a rotary floor buffer using water to lubricate the abrasive process. The pad is run over each tile a few times and then once the section is completed the floor is rinsed with more water and fine slurry extracted with a wet vacuum.

This process is then repeated with the medium 800-grit pad and fine 1500 grit pads, again rinsing with water and extracting after each pad with the wet vacuum. it’s a slow process but burnishing the floor in this opens the pores in the stone so the dirt can be removed and then closes them up again so restore its appearance.

The grout lines were quite heavily soiled with dirt, so my next task was to scrub them with a strong dilution of Tile Doctor Pro-Clean. The area was then again rinsed, and the soil extracted leaving the floor to dry off overnight.

Sealing a Travertine Tiled Kitchen Floor

Returning the following morning, I then spray burnished the floor with a 3000-grit polishing pad to remove any residue that might have been left behind and to further bring up the polished appearance of the Travertine.

This final pad is applied dry with only a little water, so it leaves the floor nice and dry and ready for sealing. For the sealer I had selected Tile Doctor Ultra Seal which is a no-sheen, penetrating sealer which doesn’t change the appearance of the stone leaving a natural finish. It is formulated to provide maximum stain protection, so is particularly good in kitchens. It is also an excellent grout sealer. The sealer was applied and left to dry for an hour then buffed again with the 3000-grit pad. This gave the floor a lovely finish and the natural beauty of the Travertine was at last able to shine through. I was very pleased with this restoration.

Travertine Tiled Kitchen Floor after polishing Bishops Cleave Travertine Tiled Kitchen Floor after polishing Bishops Cleave

The client was delighted and very pleased the she had contacted Tile Doctor, the floor looked great. She was very happy she had not needed to replace the floor. I suggested to her to maintain the floor she should use Tile Doctor Stone Soap which is a pH balanced product which you dilute. It will ensure the seal is not compromised and will keep the floor in great condition.

Travertine Tiled Kitchen Floor after polishing Bishops Cleave


Professional Restoration of a Travertine Tiled Kitchen in Gloucestershire

Travertine Tiled Floor Renovated in Bishop’s Cleeve Read More »

Black Limestone Patio Before After Renovation Cheltenham

Refinishing a Black Limestone Patio After Installation in Cheltenham

This client called Tile Doctor to see if anything could be done about the colour of their limestone patio which was laid about 6 months prior at their house in Cheltenham. It and had always looked grey rather than the black they had expected and with summer on the way felt it was time to get it resolved.

Black Limestone Patio Before Renovation Cheltenham

I went over to survey the Limestone paving and could see straight away that whoever had installed it had not cleaned off the cement and grout residue afterwards. Add on top of that the green algae and dirt build-up you get over winter and the Patio was now looking very sorry for itself.

I conducted a test clean on a small area to work out the best method for restoring the appearance of the stone. The Limestone responded well to the test and it gave the customer the results he was looking for. Happy with the potential result and my quotation a date was booked for the work, although this was weather dependent. The job would take 3 days to complete.

Black Limestone Patio Before Renovation Cheltenham Black Limestone Patio Before Renovation Cheltenham

Removing Cement and Grout from a Black Limestone Patio

We were quite fortunate with the weather and managed to find a few days without rain. Arriving on day one, the client had moved all the patio furniture out of the way, so we were able to get to work immediately starting with the application of a coarse 200 grit diamond pad fitted to a large buffing machine. The pad is applied to each paving stone in turn and lubricated with plenty of water. This action slightly mills the Limestone to remove all the old cement and grout that had been left of the surface. After rinsing with water and extracting the soil the process was repeated using a 400 and 800-grit burnishing pad to hone the stone and bring up its appearance. The area was quite large, so this took most of the first day.

Returning the following morning, we moved onto cleaning the grout lines using a strong dilution of Tile Doctor Pro-Clean. Then the whole patio was rinsed with water and scrubbed using a wet vacuum to extract all the soil generated. The patio was left overnight to dry out, the weather remained good, so we were able to come back the next day to seal it and complete the job.

Sealing a Black Limestone Tiled Patio

To seal the Limestone and restore colour I selected to use Tile Doctor Stone Oil, this is an easy to apply impregnating sealer, ideal for low porosity stone such as Limestone. Stone Oil is designed to enhance the colour and texture of stone, it also improves mechanical strength once it is cured.

One coat was applied to get the colour back in the stone, giving it the nice rich black it should have been. The stone was left to dry for two hours and then followed up with a coat of Tile Doctor Ultra-Seal to further seal the stone. Ultra-Seal is a no-sheen, natural-look, penetrating sealer formulated to provide maximum stain protection. It is also an excellent grout sealer.

Black Limestone Patio After Renovation Cheltenham

As you can see from the pictures the results were fantastic and the customer was very happy that the patio now looked how they had expected it to when it was installed. The sealant should give it adequate protection from the elements but would need to be reapplied in future years. They were looking forward to making the most of the sunny weather and getting the barbeque out to make use of their lovely newly restored patio.

Black Limestone Patio After Renovation Cheltenham


Professional Restoration of a Black Limestone Tiled Patio in Gloucestershire

Refinishing a Black Limestone Patio After Installation in Cheltenham Read More »

Travertine Kitchen Tiles Before After Polishing Cheltenham

Restoring Polish to a Travertine Tiled Kitchen Floor Cheltenham

These photos are of a Travertine Tiled Floor installed in the Kitchen and Dining area of a property in Cheltenham also known as Cheltenham Spa. The property is situated in a lovely location with Cheltenham being located on the edge of the Cotswolds, which is well known as an ‘Area of Outstanding Natural Beauty’ in Gloucestershire.

The floor which was installed 15 years prior had sadly not been maintained correctly over the years and was not looking its best, any sealer that may have been present on the floor had long since worn off with wear and now dirt had penetrated the pores of the Travertine making it difficult to keep clean and giving it a flat uninteresting appearance. The customer was specifically unhappy with what appeared dull looking marks all over the floor and the grout lines which were heavily ingrained with dirt and had now become black.

Travertine Floor Cheltenham Before Cleaning
Travertine is a natural stone material that has unique colours and features that no other stone can offer. The distinctive designs and natural patterns found within Travertine make it very popular as a flooring material and if treated properly it can look beautiful. I discussed with the client what Tile Doctor could do to improve the appearance of the floor, we agreed the cost and organised a date to get started.

Travertine Floor Cheltenham Before Cleaning

Cleaning Travertine Kitchen Floor Cheltenham

Before starting I protected the wooden skirting and kitchen units with plastic sheeting to ensure they did not get damaged. The floor was then burnished using a set of diamond encrusted burnishing pads of different grits using our usual process of lubricating with water and rinsing between each pad. Working my way through the different pads I started with the coarse 400-grit pad, then the 800-grit and finished on the 1500-grit.

The grout lines were then cleaned with Tile Doctor Remove and Go this is a multi-purpose stripper formulated with a long dwell-time that can clean whilst removing most sealers, coatings, synthetic finishes, adhesives and paints; pretty much most things that could have be left on the floor over 15 years! I then rinsed of the now soiled cleaning solution off the floor with water which was then extracted using the wet vacuum. I then left the floor to dry off fully overnight.

Sealing Travertine Kitchen Floor Cheltenham

On my return the next day I applied the last of the burnishing pads which is an extra fine 3000-grit pad really bring up the polish on the stone. This pad is applied dry with a little water sprayed onto the stone using a method we call a Spray Burnish.

The floor was then sealed with two coats of Tile Doctor Colour Grow, this product is a colour intensifying sealer which enhances the natural colours in the Travertine whilst adding durable stain protection. I highly recommend colour grow for sealing Travertine as it really does bring out the natural brown shades in the stone. The floor was left to dry and then buffed with a soft white buffing pad to bring the shine further.

Travertine Floor Cheltenham After Cleaning
My customer was very impressed with the result and left the following comment on the Tile Doctor feedback system:

“Our travertine floor has been transformed from a dull, impossible to clean surface to one that looks better than it did fifteen years ago. Every time I walk into the kitchen I stop just to look at it. I am delighted with what you have achieved! Thank you.
Laura C. “

Travertine Floor Cheltenham After Cleaning
 

Polishing & Sealing Travertine Kitchen Floor Tiles in Gloucestershire

Restoring Polish to a Travertine Tiled Kitchen Floor Cheltenham Read More »

Polished Limestone Tiled Kitchen Floor Before and After Polishing Cheltenham

Restoring the Appearance of a Polished Limestone Tiled Floor in Cheltenham

The photographs below are of a Polished limestone floor that had been installed in the Kitchen of a house in Cheltenham approximately eight years prior. The polish and sealer had worn off over that time allowing dirt to become ingrained into the pores of the stone making it difficult to clean.

This is a common problem with all types of porous stone and tile which need to be sealed to maintain their appearance. Sealers do wear down over time with use however and need to be maintained, this is why Tile Doctor have created a maintenance program whereby we pop by every 12 months to give the floor a light clean and top-up the sealer, it only takes a few hours, but it keeps your sealer in good condition.

Polished Limestone Kitchen Floor Before Cleaning in Cheltenham Polished Limestone Kitchen Floor Before Cleaning in Cheltenham

Cheltenham by the way is a lovely town situated on the edge of the Cotswolds which is an area of Outstanding Natural Beauty. It has a racecourse and is well known for the mineral springs which were discovered here in 1716.

Burnishing a Dull and Dirty Limestone Tiled Floor

My first job was to protect the wooden kitchen units from any splashes by covering them some cotton sheets. Next, I set about restoring the Limestone’s appearance using a set of Burnishing Pads which is a form of polishing which involves the sequential application of four diamond encrusted pads of different grit levels.

The first pad applied is a Coarse 400 grit pad which is applied to the floor with a buffing machine and lubricated with water. This process grinds away the top layer of dirt and staining from the stone, along with any old sealer, the floor is then rinsed to remove the soil that is generated. I then move through the system, applying the Medium and then Fine pads using less and less water as you go but rinsing in-between and extracting the water with a wet-vac machine.

Once I was happy with the stone I scrubbed the grout lines to remove any soiling that the pads had failed to pick up. The floor was then given a final rinse and the wet vacuum used to extract as much moisture as possible. The floor was then left to dry out completely overnight.

Sealing a Limestone Tiled Floor

The next day I gave the floor a polish with the Very Fine 3,000 grit diamond burnishing pad, this is applied using a technique we call a “spray burnish” due to the fact that very little water is used during its application.

The next step was to seal the stone using for which I used Tile Doctor Colour Grow which is an impregnating sealer that protects the stone from within by occupying its pores. Colour Grow also has the added benefit of intensifying the natural colours in the stone. The floor was then left to dry for an hour before I gave it one final dry polish using the Very Fine burnishing pad.

Polished Limestone Kitchen Floor After Cleaning in Cheltenham
My customer was very happy with the final result and made the comment that they thought the floor looked brand new.

Polished Limestone Kitchen Floor After Cleaning in Cheltenham
 

Renovating a Polished Limestone Tiled Floor in Gloucestershire

Restoring the Appearance of a Polished Limestone Tiled Floor in Cheltenham Read More »

Quarry Tiled Kitchen Floor Before and After Restoration in Cheltenham

Poorly Maintained Kitchen Quarry Tiles Rejuvenated in Cheltenham

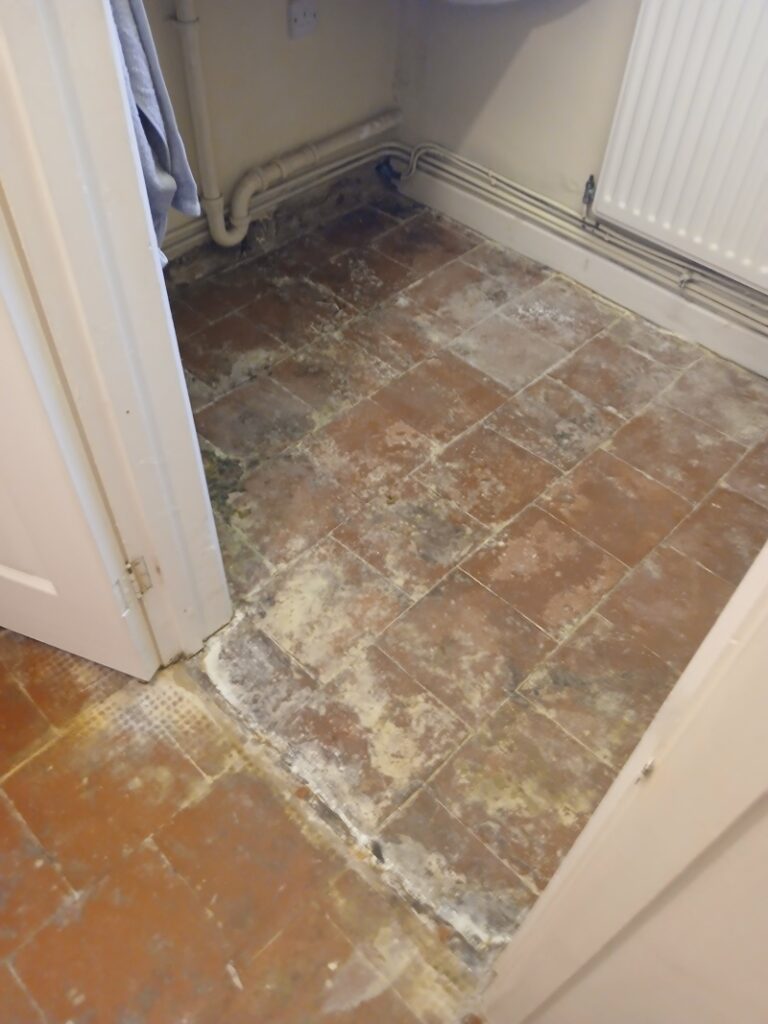
It’s often quite surprising what condition we find some tiles in when were asked to come out and survey the floor. Case in point being this Quarry tiled kitchen floor I was asked to look at by a customer in Cheltenham, which as you may know is particularly famous for its racecourse and the top-secret GCHQ.

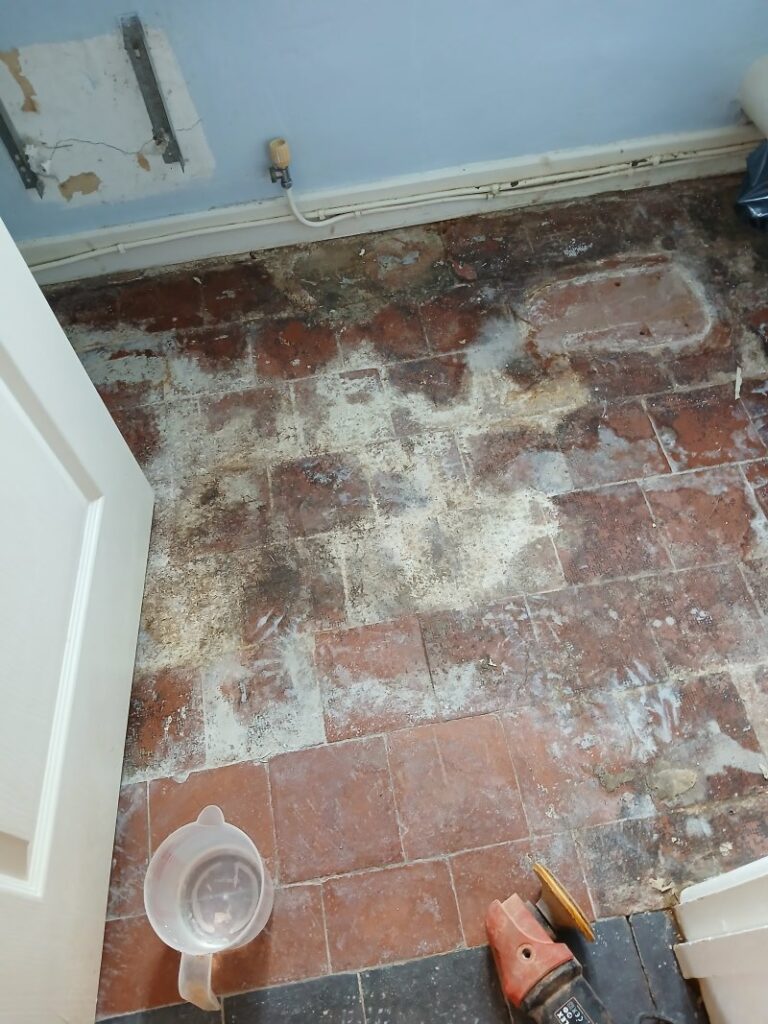
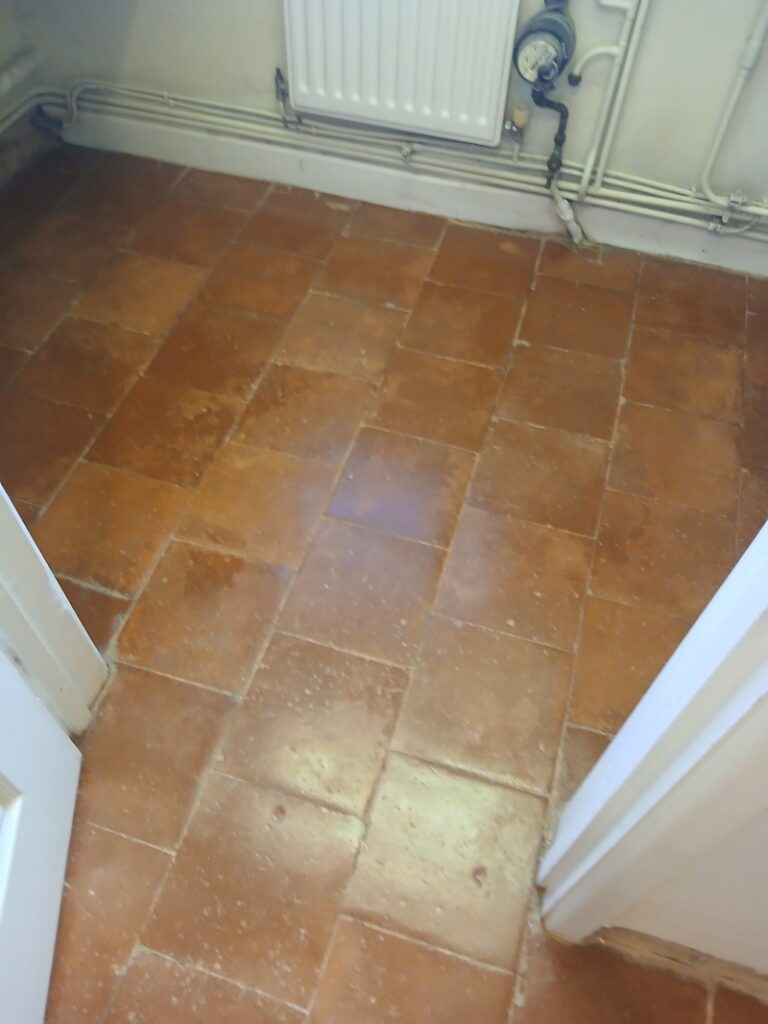
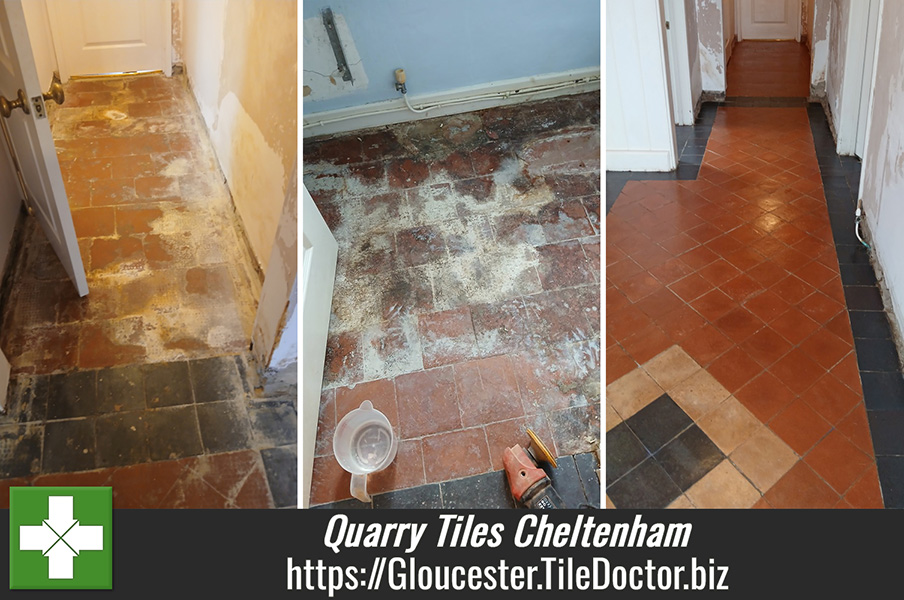
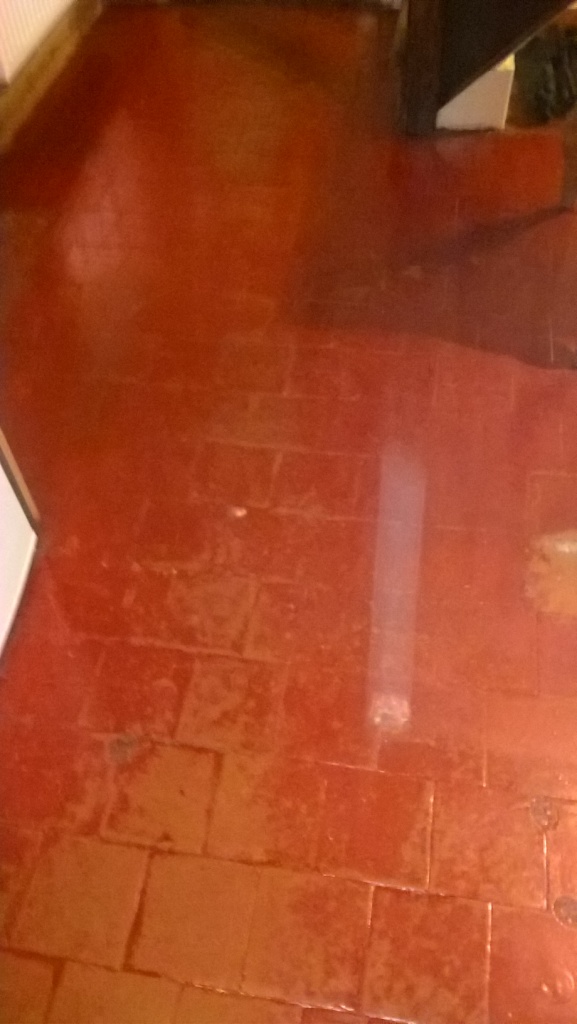
Upon arrival at the property, I found that the floor was not in great condition. For some reason, it had been painted over with red tile paint and then covered with a wax coating which was easily scratched. To Make the situation worse, there were around 20 tiles in the floor with holes in them that had simply been filled with concrete.

Quarry Tiled Floor Cheltenham Before Removing Paint Quarry Tiled Floor Cheltenham Before Removing Paint

Clearly, the tiles had not been maintained properly in the past but fortunately the current owner of the property who was keen to have them restored had called in Tile Doctor and after a demonstration clean I was booked to come back and correct the numerous issues.

Cleaning a Damaged Quarry Tiled Kitchen Floor

On the first day of the restoration, I started by applying a solution of Tile Doctor Remove and Go across the entire floor and leaving the product to dwell for around 30 minutes. Remove and Go is a powerful stripper designed to loosen paint splashes, adhesive stains and many types of urethane and wax coatings so that they can be easily removed.

After leaving the product to dwell, I could use a handheld scrapper to simply remove the wax coating and layer of paint on the floor. This process took about half a day; during the second half of the day, I spent my time removing the damaged tiles and replacing them with new Quarry tiles that had been sourced to match nicely with the existing floor.

Quarry Tiled Floor Cheltenham During
On the second day, any stubborn paint splashes remaining were re-treated and I subsequently deep cleaned the floor using a strong dilution of Tile Doctor Pro-Clean. This strong alkaline cleaning product was worked into the tiles using a 17-inch scrubbing pad fitted to a specialised rotary machine. The resultant soil was extracted off the floor using a wet vacuum and given a rinse with water to neutralise the floor. The wet vacuum was used again to remove the water and extract as much moisture from the tiles as possible to improve the drying time.

Sealing a Quarry Tiled Kitchen Floor

Once the deep clean had been completed, I left the floor dry for two days to allow sufficient time for it to dry thoroughly. Upon returning to the property, I ran a damp test to see if the tiles were dry enough to be sealed. To my surprise, the floor recorded only around 4% moisture even though the property is relatively old and is unlikely to have a damp proof membrane installed.

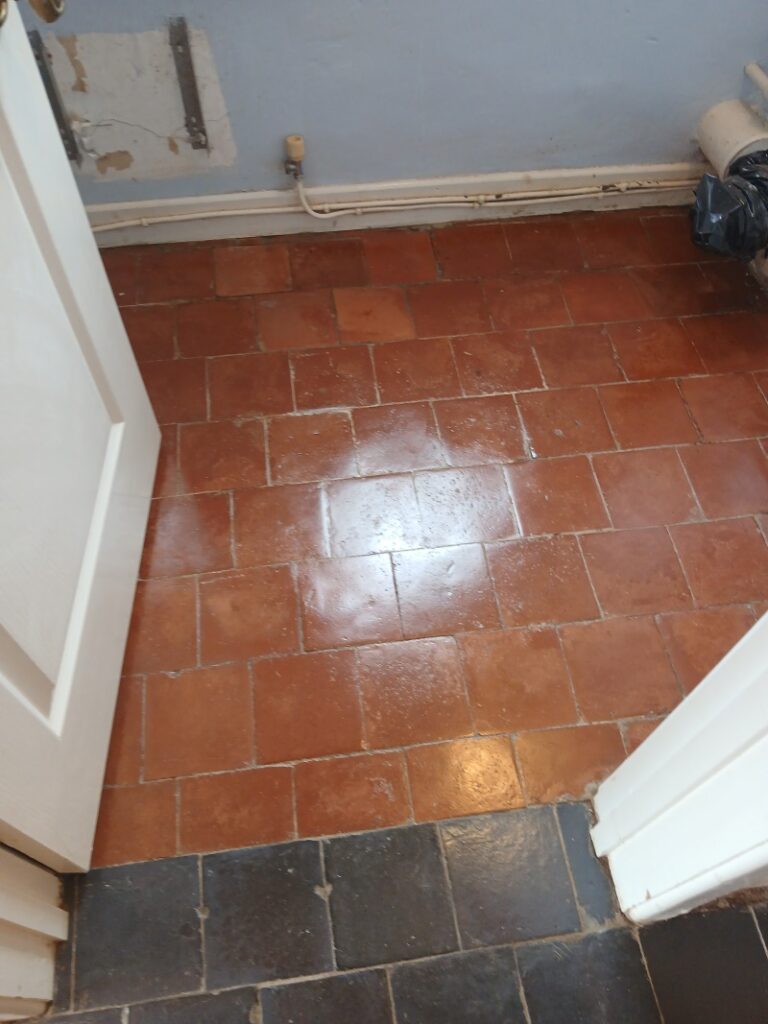
Nonetheless, this meant I could seal the floor. I did this by using a single coat of our impregnating, colour-intensifying sealer known as Tile Doctor Colour Grow, followed by three coats of Tile Doctor Seal and Go, a water based sealer which provides a high-quality satin finish.

Quarry Tiled Floor Cheltenham After Cleaning and Sealing Quarry Tiled Floor Cheltenham After Cleaning and Sealing

The deep clean, combined with the application of two different sealers, really helped to give these Quarry tiles a new lease of life. The customer was very happy indeed – in fact, had this been an exam, I’m certain I would’ve received top marks and it was certainly a major improvement on how they were before.

Professional Restoration of a Quarry Tiled Kitchen Floor in Gloucestershire

Poorly Maintained Kitchen Quarry Tiles Rejuvenated in Cheltenham Read More »

Original Victorian Tiled Floor Before and After Renovation in Cheltenham

Original Victorian Tiled Hallway Repaired, Cleaned and Sealed in Cheltenham

Cheltenham in the county of in Gloucestershire is a recognised area of outstanding beauty, and is known for its various festivals which take place throughout the year. Horse racing is another event that continues to be very popular in Cheltenham, after first gaining popularity during the Victorian period.

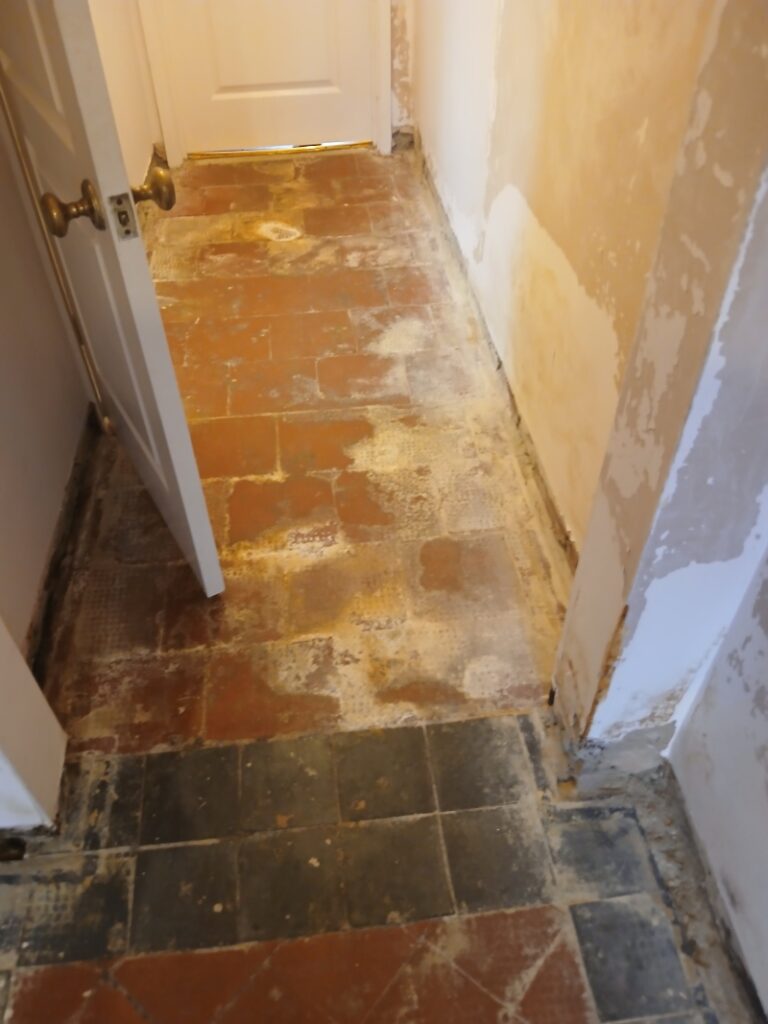
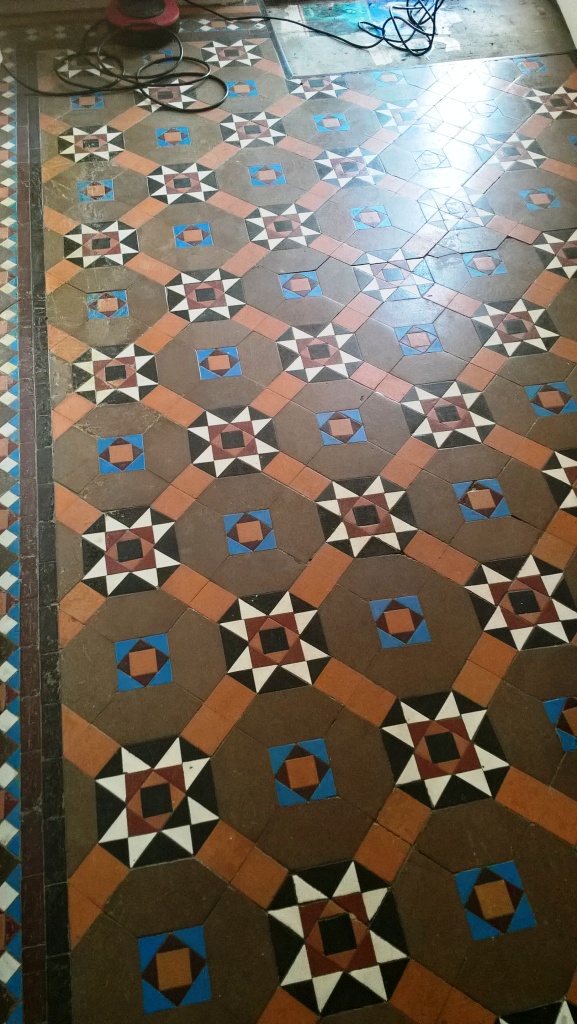
Indeed, lots of people made their homes in the town during this time, and many of the original Victorian properties are still in use to today, complete with original Victorian tiled floors. However, not all of these floors have been kept in great condition over the decades. Lots of them have spent years covered by carpet, while others have become broken or damaged, and simply left to slowly degrade over time.

I found a good example of this at the home of a recent customer of mine. The customer’s Victorian tiled hallway was in poor condition, with some of the tiles around the doorway cracked and in need of replacements. All in all, the floor required repairs, followed by deep clean and a fresh application of sealant.

Victorian Tiles Before Repair Clean and Seal Cheltenham Victorian Tiles Before Repair Clean and Seal Cheltenham

Repairing and Cleaning Original Victorian Tiles

My first job was to source suitable replacement tiles which would be needed to match with the original pattern of the floor. Fortunately Tile Doctor has built up a network of contacts in this area so this proved to be a simple enough task.

When I arrived on site I protected the flooring in the adjacent rooms and staircase carpet with plastic sheeting and made a start on removing the cracked tiles, cleaning up the foundation then fixing and grouting in the replacement tiles.

Victorian Tiles During Repair Cheltenham
Next, I moved on to cleaning the entire hallway starting with an application of Tile Doctor Pro-Clean, an alkaline-based product that is safe to use on Tile and Stone including Victorian tile, for the removal of heavy soil and staining. It can strip away old sealants remaining on the tile which is important to avoid a patchy looking result. The product was diluted with water and applied liberally across the area and left to dwell for roughly 10 minutes before I proceeded to work it into the tiles using a scrubbing pad fitted to a rotary machine.

I used a wet vacuum to remove the soiled cleaning solution, rinsed with water and then spot treated those tiles which needed more work to get them clean.

Once I was happy with the floor was as clean as it could be I left it to dry off overnight.

Sealing Original Victorian Tiles

Upon returning to the property the next day, my first concern was to run some tests to check for any outstanding damp issues. Victorian properties do not typically have damp proof membranes installed, so these tests were essential as an excess of moisture can cloud the sealant and prevent it from performing correctly.

Luckily, there were no major damp issues and I could proceed with sealing the tiles using Tile Doctor Colour Grow, which is an impregnating sealant that penetrates into the pores of the tile enhancing the natural colours and protecting it from with. I find many customers with Victorian Tiles opt for Colour Grow as their sealant because it provides a natural-look matte finish which really compliments the classic characteristics of Victorian tiles.

The customer was absolutely delighted with the outcome of the restoration, which you can see in the photo below. Best of all, he said that he is already getting comments from friends and family on how great the floor looks now.

Victorian Tiles After Repair Clean and Seal Cheltenham Victorian Tiles After Repair Clean and Seal Cheltenham


Professional Renovation of an Original Victorian Tiled Hallway in Gloucestershire

Original Victorian Tiled Hallway Repaired, Cleaned and Sealed in Cheltenham Read More »

Ceramic Tiled Bathroom Refresh in Cheltenham

Ceramic Tiled Bathroom Refresh in Cheltenham

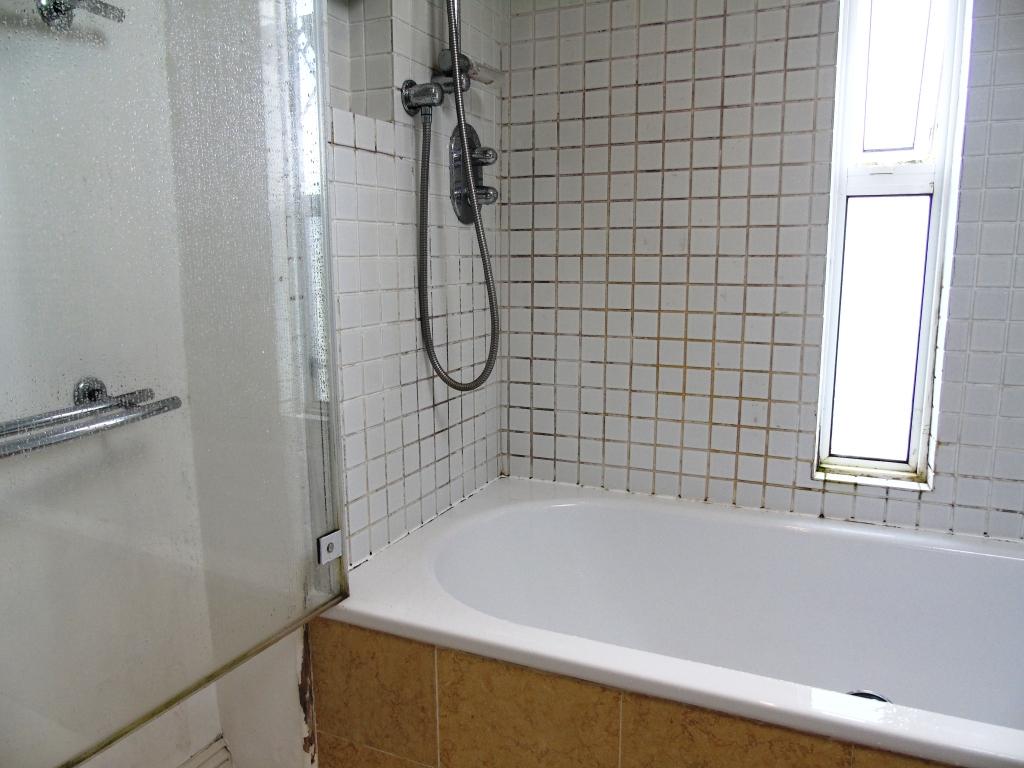
This Ceramic Tiled bathroom was at a house in the historic town of Cheltenham on the edge of the Cotswolds. As you can see from the photograph below the grout between the Ceramic tiles was very stained and had attracted black mould.

Bathroom Tiles Before Cleaning Cheltenham

Refreshing a Ceramic Tiles Bathroom

To get the tile and grout clean I sprayed on Tile Doctor Mould Away and left it to soak in for ten minutes before giving it a scrub with a stiff brush. The resultant slurry was rinsed off and then the process repeated once more.

The Mould Away made a difference to the tile and grout however the grout was still not 100% white, so I recommended applying a grout colourant which I was confident would have the desired effect.

Grout Colouring

Two coats of white Tile Doctor Grout Colourant were then applied; this product is basically painted on top of the existing grout with any excess wiped off the adjacent tile before it dries. It’s an epoxy based formula that becomes a long lasting barrier protecting the grout and also making it much easier to clean, it looks natural and I think you will agree it has made all the difference in fact the customer commented that it looks like a new bathroom.

Bathroom Tiles Before Cleaning Cheltenham
The job was completed in a day and I think you will agree the whole bath area now looks like a new installation.

Refreshing a ceramic tiled bathroom in Gloucestershire

Ceramic Tiled Bathroom Refresh in Cheltenham Read More »

=================================

Gloucester Tile Doctor

================================= Read More »

Scroll to Top