Terracotta Tile Cleaning

Welcome to my Work History archive where you will find detailed examples of the cleaning and renovation of Terracotta tiles carried out in Gloucester

Cleaning and Renovating Terracotta Tiles

Terracotta tiles have been around in certain parts of the world for over two millennia, in fact the word Terracotta means burned earth. The ancient Romans used a variety of terracotta tiles in their villas and palaces for many centuries. Terracotta tiles are thicker than most modern tiles giving them strength and durability.

The one big downside to Terracotta is the fact that it has no glaze on the surface and being very porous can soon pick up and store muck and dirt very quickly. If you have ever owned a Terracotta floor before you will be able to relate to this problem however the answer is to ensure you have the correct sealer in place.

Traditionally Wax was used to protect terracotta tiles however with the advent of modern purpose made sealers we don’t recommend it. Not only is it troublesome to remove but it scratches easily and we have seen situations in kitchens where dirt and oil trapped in the wax turns black and becomes very unsightly.

For sealing Terracotta we actually recommend Tile Doctor Seal and Go which works well on clay tiles such as Terracotta and is also water based so doesn’t give off a smell as it dries. When applying a sealer always make sure the floor is dry first as applying a sealer to a damp floor can lead to inconsistent results. Because of this we typically clean and seal Terracotta floors over two days so we can clean on day one and then apply the sealer on day two having let the floor dry off overnight.

Below you will find detailed examples of work we have carried out in the past, it should give you some idea of what’s involved and what can be achieved with the right techniques and products.


Terracotta Kitchen Floor Renovation Dursley

Maintaining a Terracotta Tiled Kitchen Floor in Dursley

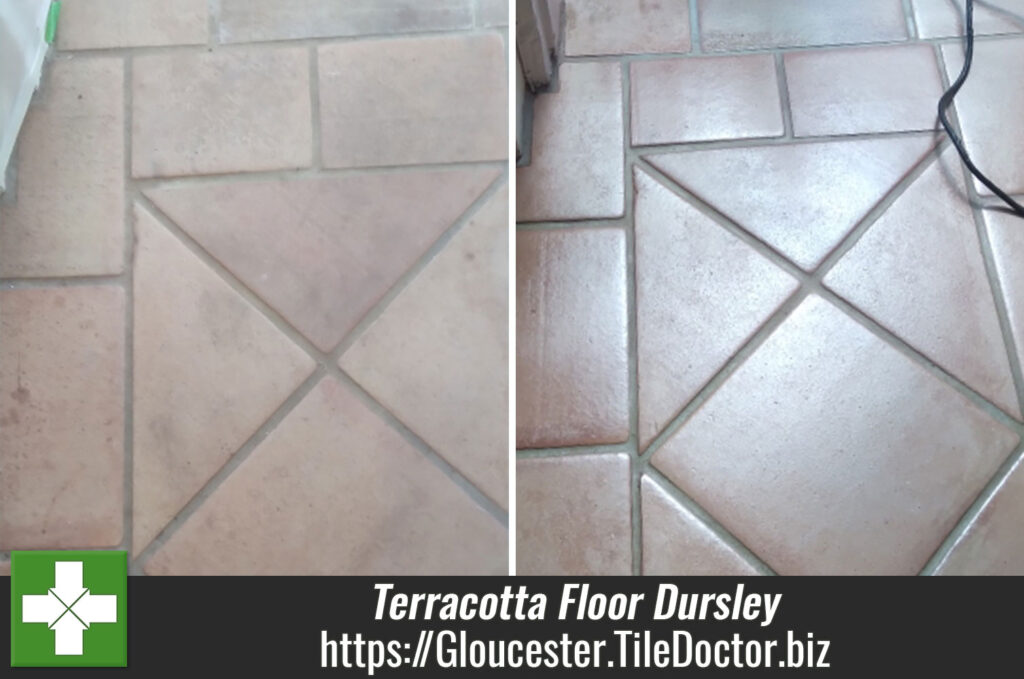
A homeowner in my local town of Dursley got in touch about their Terracotta tiled kitchen floor. The tiles had become dull and lost had lost their appeal, unhappy with the way it looked they booked me into to pop round and take a look.

Being so local it wasn’t long before I was able to pay them a visit and survey the floor. Whilst there I conducted a cleaning test to work out which products would work the best and they were surprised about how well it came up.
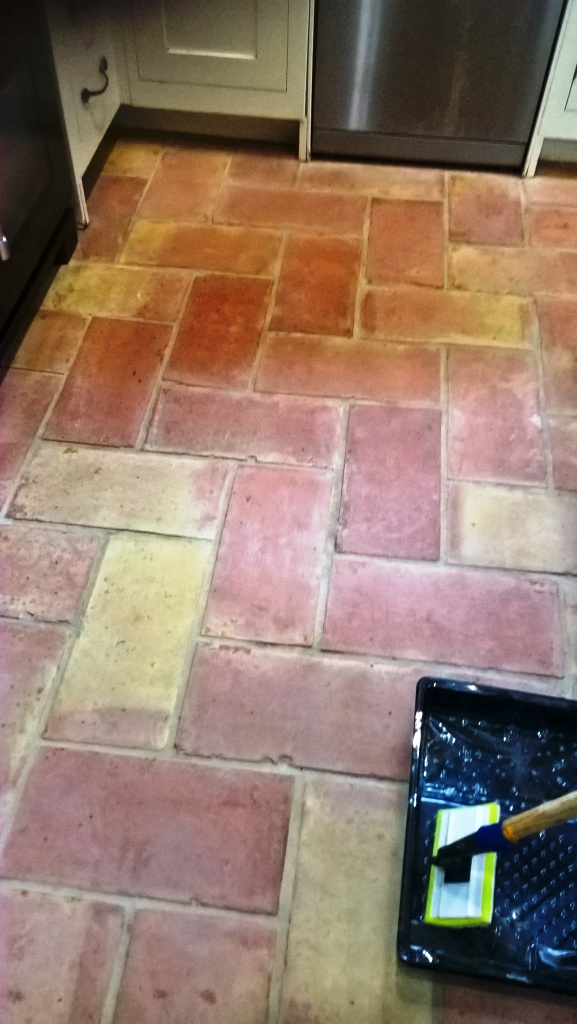
Terracotta Kitchen Floor Before Cleaning Dursley

I diagnosed that the sealer on the Terracotta had been worn away and was not allowing dirt to become ingrained in the tile. I worked out a quote for deep cleaning the tile and then re-sealing it, which they were happy with and I was booked into to do the whole floor.

Deep Cleaning a Terracotta Tiled Kitchen Floor

Prior to my arrival I had worked out which products I would need to renovate the floor and they ordered these directly from Tile Doctor so everything would be ready for work to start.

A lot of water is used during the cleaning process so before starting work protective tape was applied to all the kitchen units and adjacent carpets covered with dust sheets. Then to get the tiles clean a strong dilution of Tile Doctor Pro-Clean was applied to the tiles and left to soak in for fifteen minutes, this gives it time to break down the soils. The floor was then scrubbed with a Black pad fitted to a rotary machine, to lift the dirt out of the tiles. The grout lines were also cleaned using more Pro-Clean and a stiff brush.

The soils were then rinsed off with more water and extracted with a wet vacuum twice but I moved onto giving the floor an acid rinse. This is done with a dilution of Tile Doctor Grout Clean-Up which is brushed into the floor and then extracted. This is a further step to clean the floor but it also neutralises the floor after the use of Pro-Clean which is a strong alkaline cleaner.

After another rinse the floor was dried as much as possible using the wet vacuum and then dried with air blowers prior to covering with dust sheets. The floor needed time to dry out so this will keep the floor clean before I return to apply the sealer.
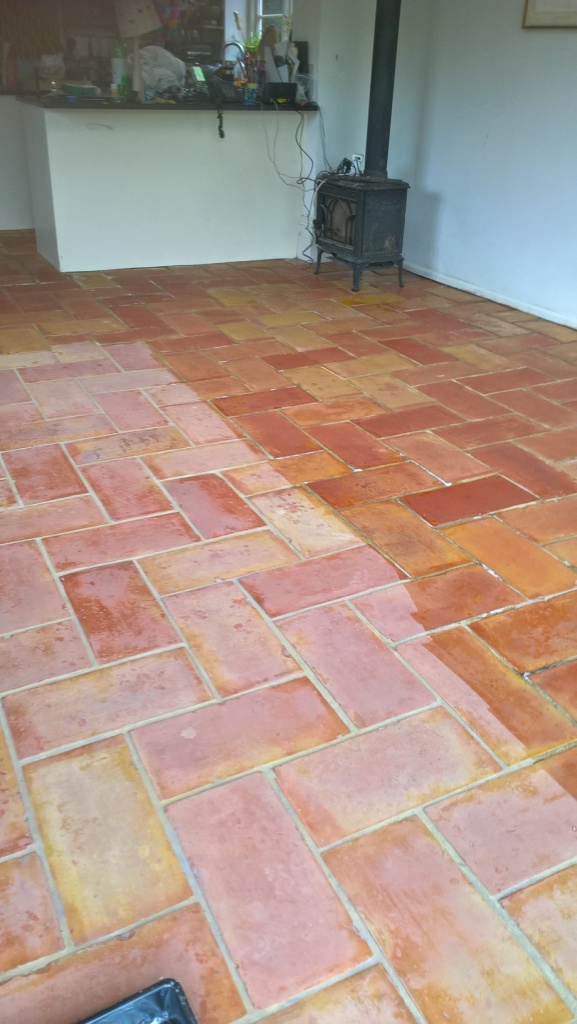
Terracotta Kitchen Floor After Cleaning Dursley

Sealing a Terracotta Tiled Kitchen Floor

A lot of water was used during the cleaning process and Terracotta is notoriously porous so I left the floor to dry out for three days before returning. The dust sheets were removed and the floor given a sweep before starting on the application of the sealer.

Having discussed choice of sealer with the customer earlier we chosen Tile Doctor Seal and Go Extra to seal the floor with, it works really well on Terracotta and adds a nice subtle sheen to the tile. As mentioned, Terracotta is very porous so it took the application of seven coats before I was satisfied the tiles were fully sealed.
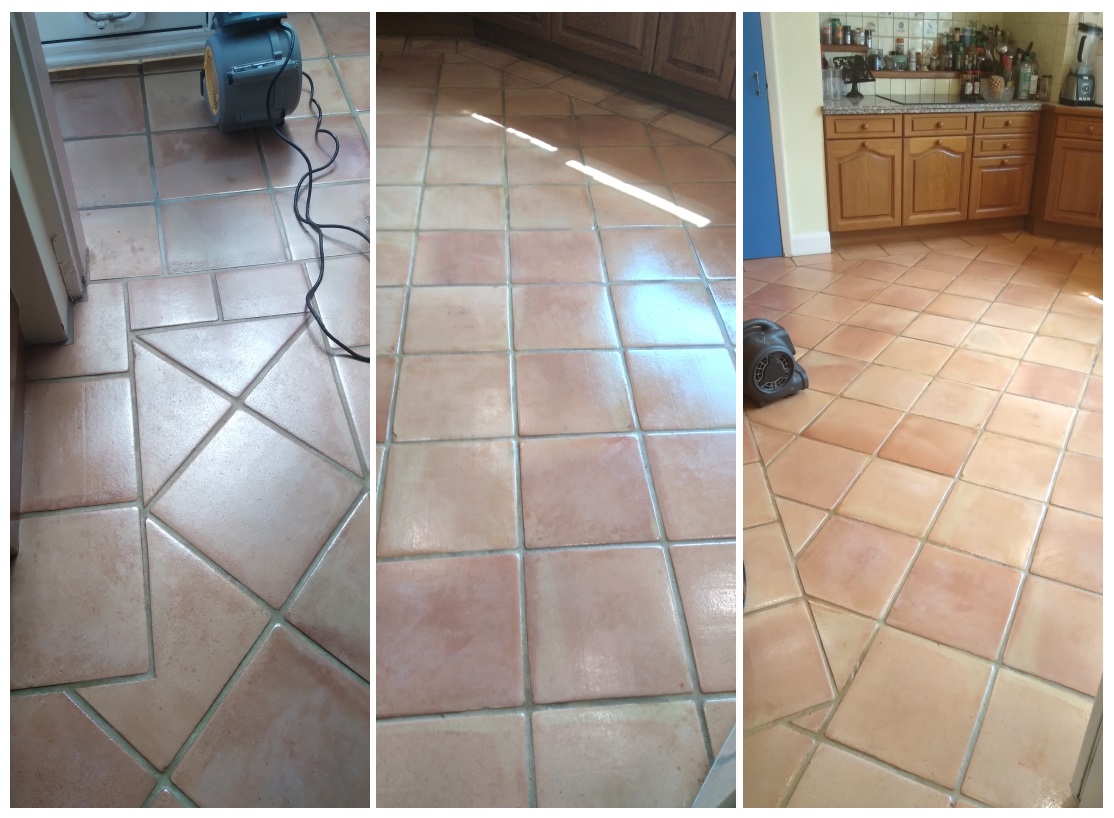
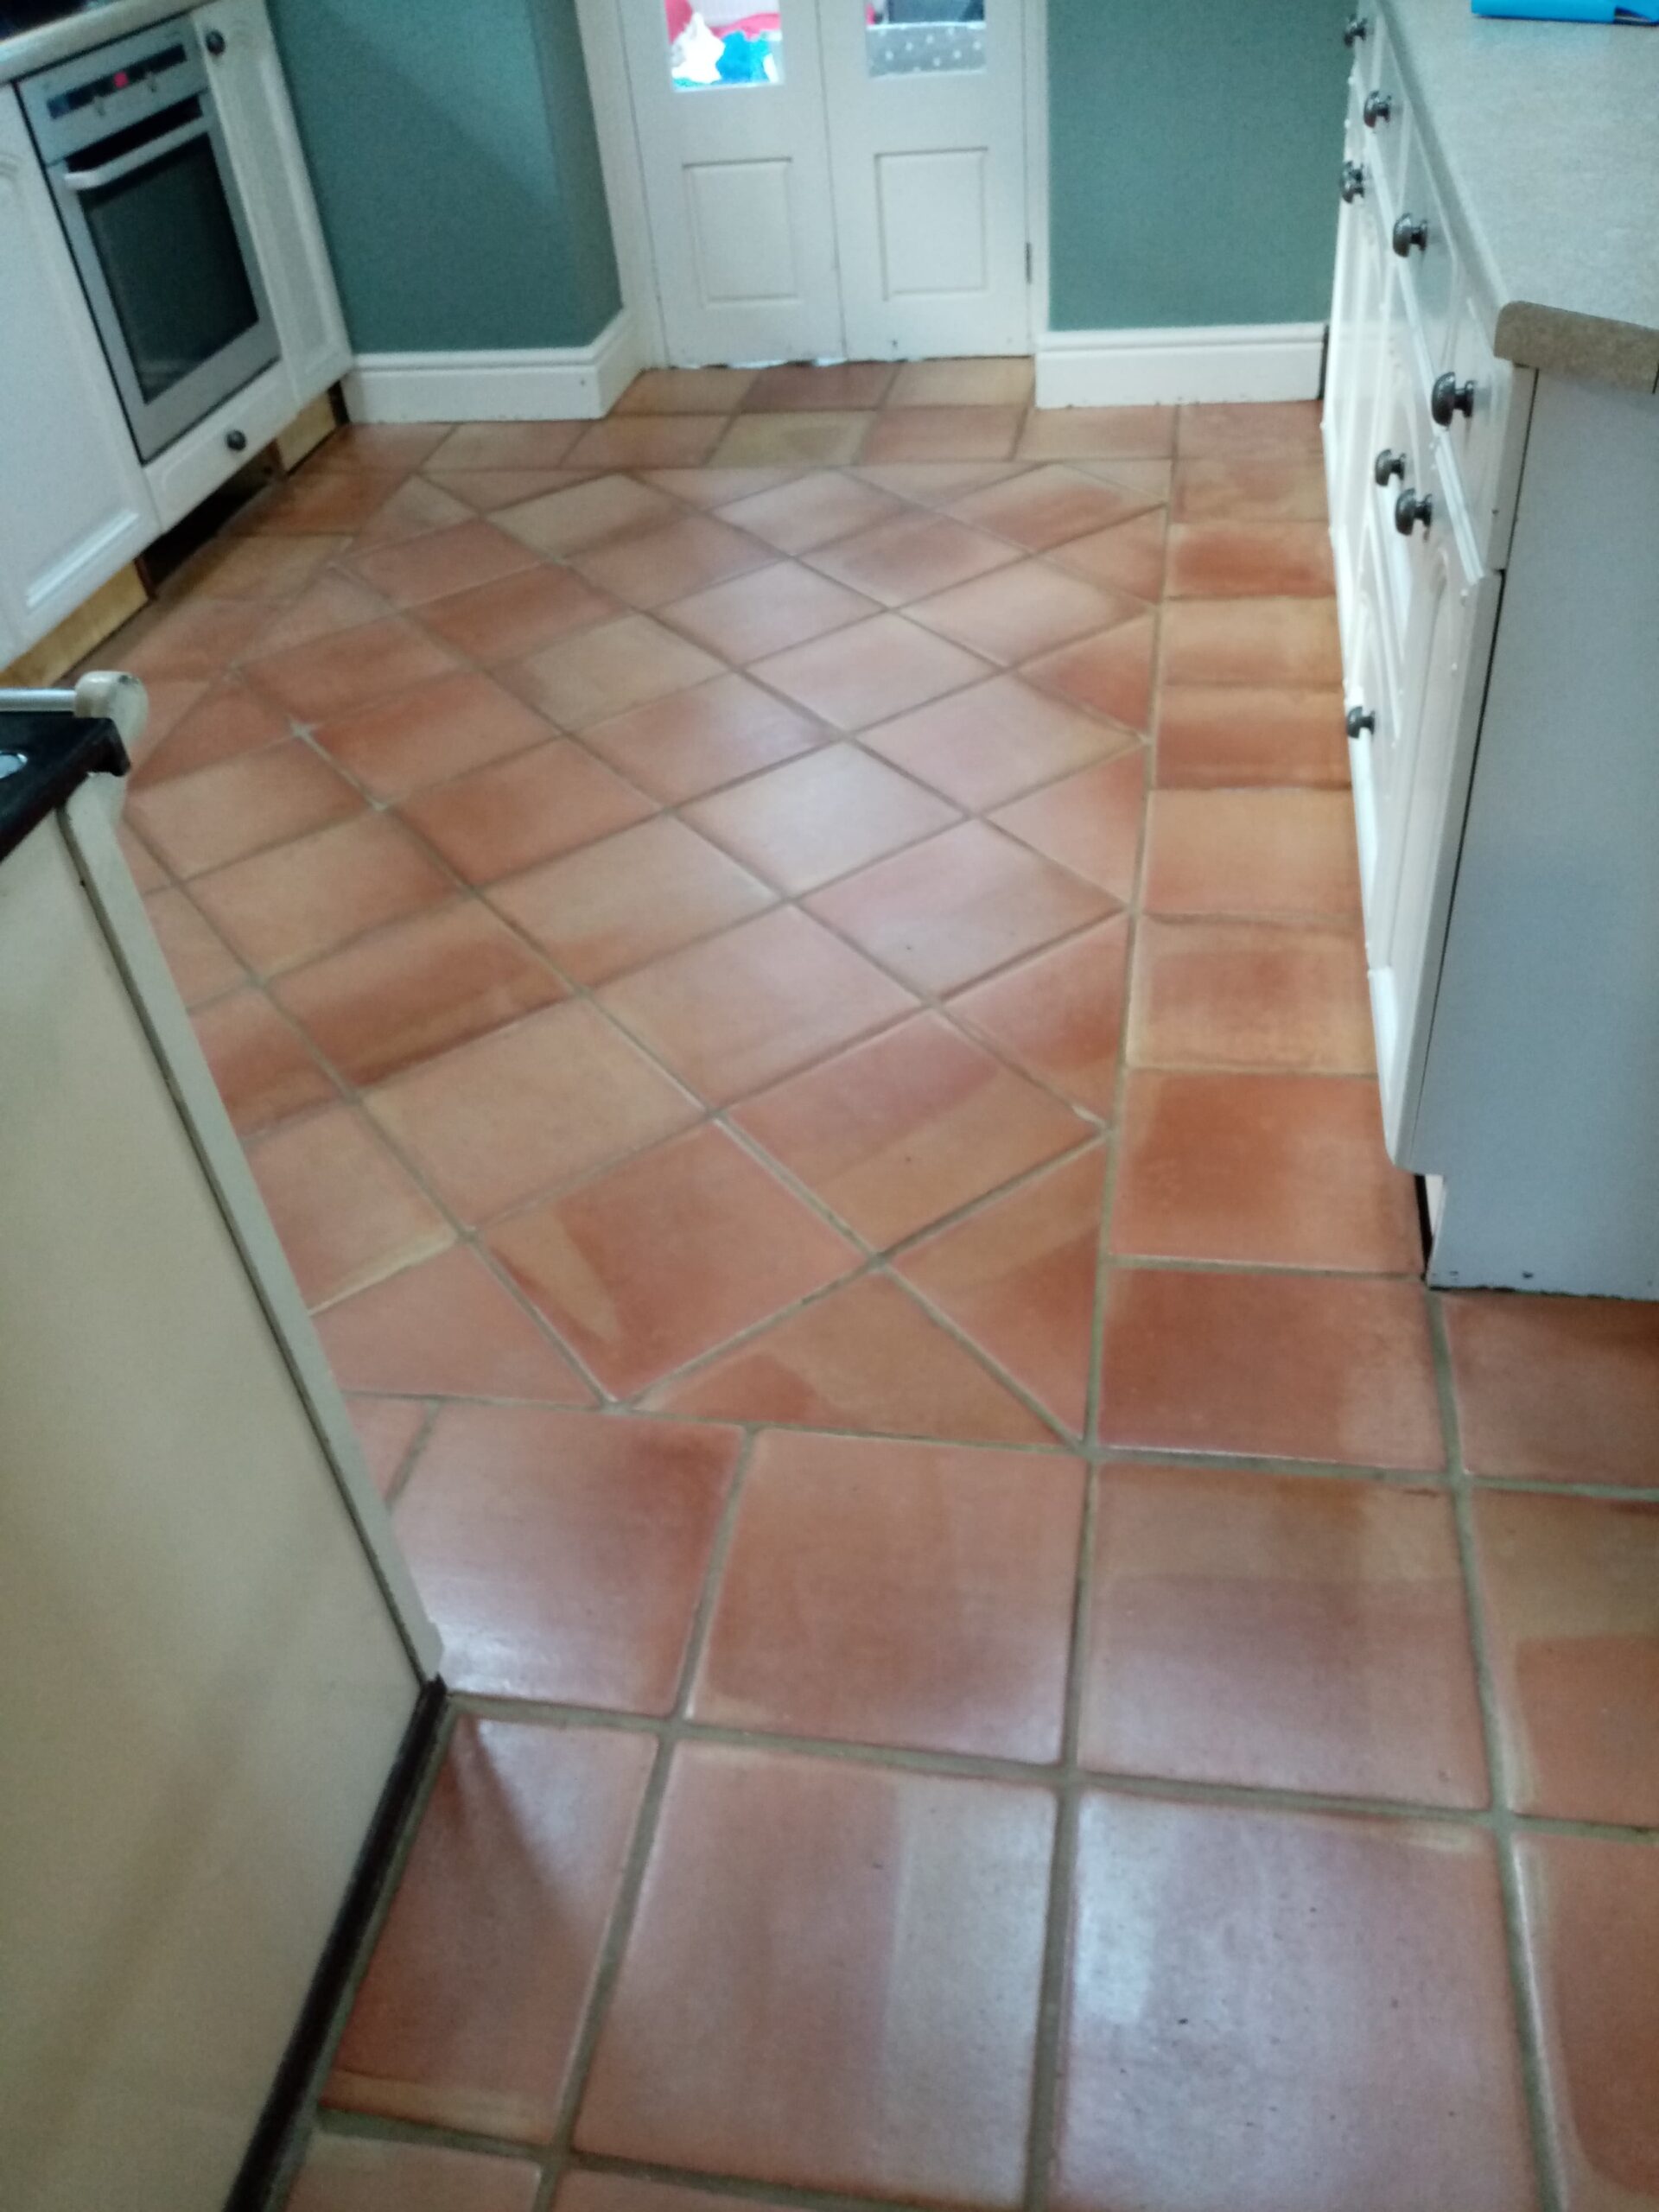
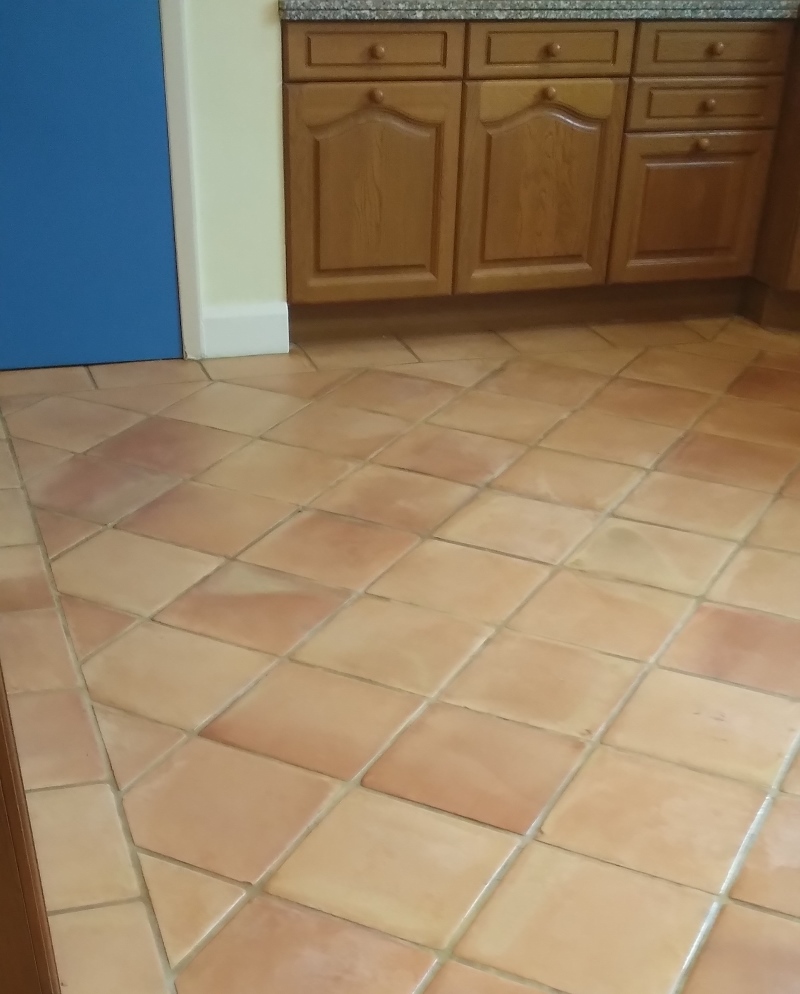
Terracotta Kitchen Floor After Cleaning Sealing Dursley

My customer was delighted with the result and commented it looked like a new floor. I certainly thought so; however, my pictures were not the best this time round and don’t really do the floor justice.

For aftercare I recommended they should use Tile Doctor Neutral Tile Cleaner which is a mild but effective cleaner that’s sealer safe and designed for cleaning sealed tile and stone.


Professional Renovation of a Terracotta Tiled Kitchen in Gloucestershire

Maintaining a Terracotta Tiled Kitchen Floor in Dursley Read More »

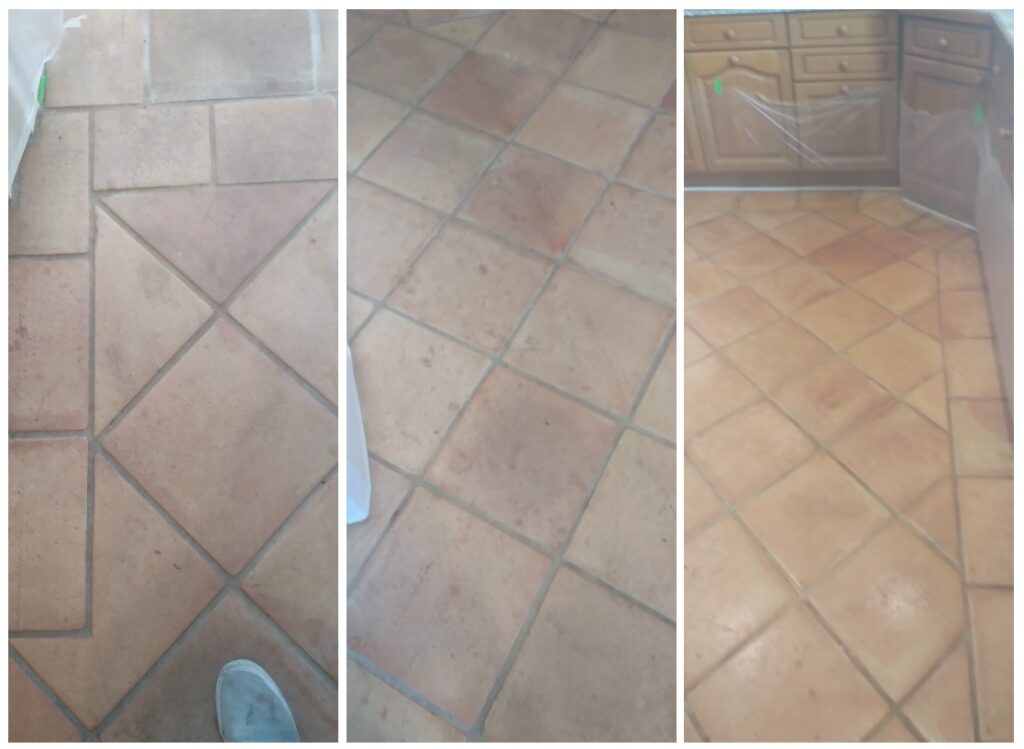
Terracotta Flooring Before After Renovation Dursley

Removing Wax from 30-Year-Old Terracotta Flooring in Dursley

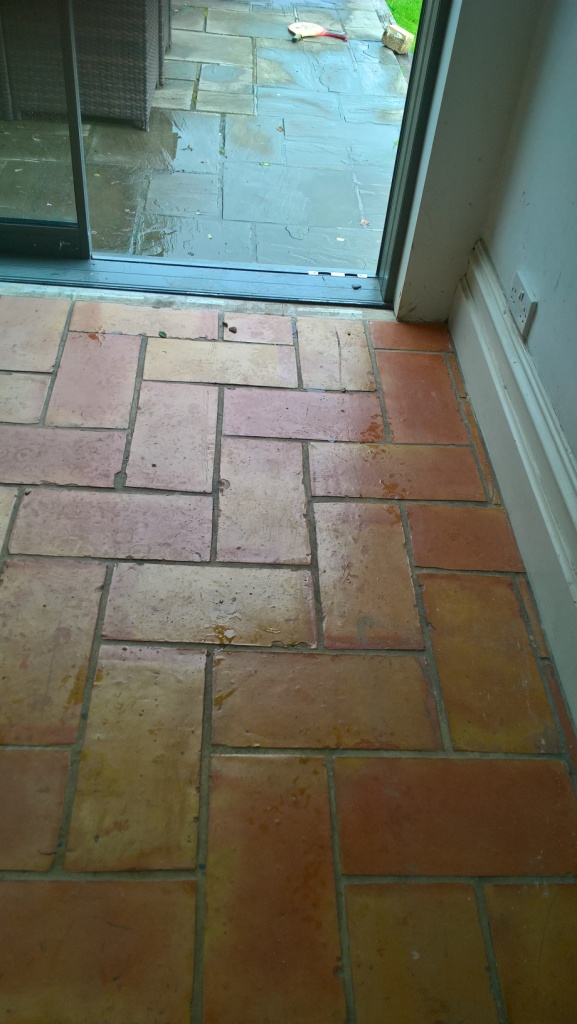
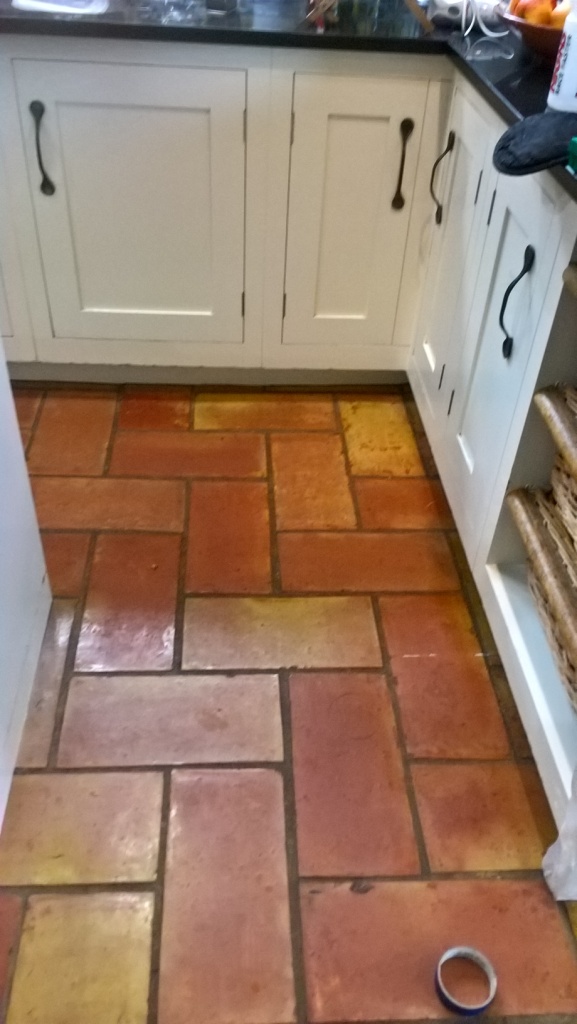
Our client contacted us to find out if anything could be done about his Terracotta tiled floor which has been laid thirty years prior in the Conservatory and Kitchen of his house in Dursley. I went over to survey the floors and conduct a test clean on part of the floor to see what would be needed to renovate it. Fortunately, the customer knew the maintenance history of the floor and had told me for the last thirty years they had been applying wax which can be tricky to remove.

Terracotta Conservatory Floor Dursley Before Cleaning Terracotta Conservatory Floor Dursley Before Cleaning

The test clean went well and he was amazed how clean I managed to get the tile so confident in a good result a date was booked in for us to return to do the whole floor. We find surveying the floor before pricing is the most accurate way to provide a quotation as there are no surprises for all concerned.

Cleaning a Terracotta Tiled Conservatory Floor

On arrival the first task was to cover all the skirting boards, walls, and units to protect them. The floor was really dirty, and I could see we would need to conduct a lot of rinsing with water to remove the soiling. Having been informed about the wax covering from my earlier visit I was able to start stripping off the old layers of wax using a Tile Doctor product called Wax-Away which is made for this type of work. The product was mopped onto the floor, left to soak in for ten minutes and then scrubbed in with a black burnishing pad fitted to a rotary floor buffing machine. The soil was then rinsed away with water and extracted with a wet vacuum.

This process was repeated until I was happy the wax had been removed and then I turned my attention to the grout which was really ingrained with dirt. For this I sprayed on Tile Doctor Remove and Go, left it to dwell for ten minutes as before and then set about scrubbing it clean. Once this was complete and I was happy with the results the floor was washed with fresh water twice to remove any trace of product and the floor dried with the wet vacuum.

The floor was then covered with dust sheets so the customer could carry on using the floor as normal whilst we left it to dry out for three days. Terracotta is very porous and needs to be bone dry before sealing to achieve the best result.

Sealing a Terracotta Tiled Conservatory and Kitchen Floor

On our return 3 days later, I did a moisture test to ensure the floor was dry. The results were good, so I set about sealing the Terracotta with Tile Doctor Seal and Go which was the best sealer for this type of floor. I applied seven coats which takes some time as you need to ensure each coat has dried before applying the next. This sealer leaves a nice sheen but also allows the Orangey/Red colour in the Terracotta to come through.

Terracotta Conservatory Floor Dursley During Sealing Terracotta Kitchen Floor Dursley During Sealing

Once complete it was clear the deep clean and fresh seal had given the rooms a new lease of life and my client could not believe how well it had come up. For aftercare I recommend the use of Tile Doctor Neutral Tile Cleaner which is designed for the day to day cleaning of sealed tiles.

Terracotta Conservatory Floor Dursley After Sealing Terracotta Conservatory Floor Dursley After Sealing


Professional Renovation of a Terracotta Tiled Conservatory and Kitchen Floor in Gloucestershire

Removing Wax from 30-Year-Old Terracotta Flooring in Dursley Read More »
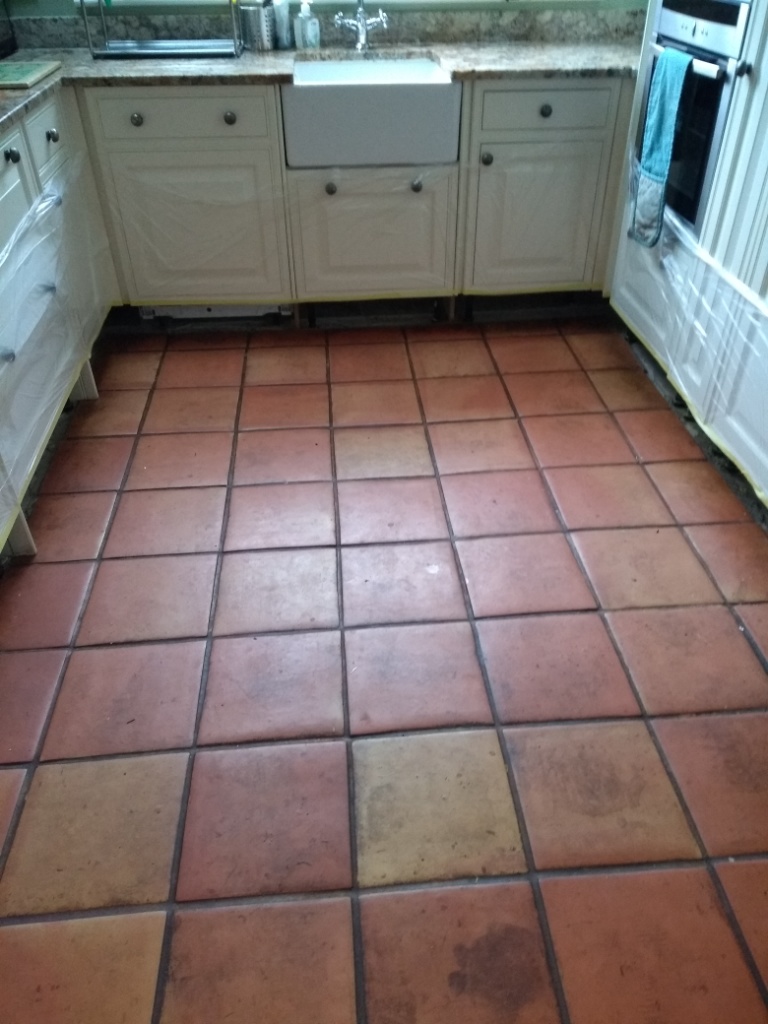
Terracotta Tiled Floor Before and After Renovation Gloucester

Renovating a Flood Stained Terracotta Kitchen Floor in Gloucester

Earlier this year a customer from Gloucester got in touch with Tile Doctor through Home Services following a flood that had affected his Terracotta Kitchen floor. It’s difficult to tell from the pictures but the Terracotta floor was badly stained and marked following the flood, it now looked flat and dull and my customer wanted its appearance restored to the way it looked before.

Flood Stained Terracotta Floor Before Cleaning Gloucester

I visited site to survey the tiles a recommend a was way to improve the appearance of the floor. Although now completely dry the floor was not looking its best, but there was nothing we couldn’t remedy. To resolve, I recommended deep cleaning the floor, stripping off any dirt and what was left of old sealers and then applying a new sealer. I gave them a formal quote which they could pass on to their insurance company and a not long after we received a call to say they were able to go ahead with the work.

Deep Cleaning a Terracotta Tiled Kitchen Floor

My first job was to prepare the floor for cleaning by removing the kickboards under the kitchen units and sweeping away any grit. Next the floor was deep cleaned using a strong dilution of Tile Doctor Pro-Clean which was left to soak into the Terracotta tiles for ten minutes. This gives time for the Pro-Clean to get to work breaking down the old sealers and dirt trapped in the pores of the tile. The Pro-Clean was then scrubbed into the tile using a black buffing pad fitted to a rotary machine.

After scrubbing the floor soiled cleaning solution was rinsed away with water and extracted from the floor using a wet vacuum. The tiles were then inspected to see if more work was required, there were a few areas I was not happy with, so the process was repeated where needed.

I then turned my attention to the grout lines which were really ingrained with dirt. I cleaned these with Tile Doctor Remove and Go which is a stronger product that is really designed for removing stubborn sealers but is also a powerful cleaning agent in its own right. Again, I left the product to soak into the grout for ten minutes before scrubbing it by hand with a stiff brush to really get the grout clean.

After rinsing and extracting one more time the Terracotta and Grout were as clean as they could be, and I left the floor to dry off fully for four days. Terracotta is very porous, so it absorbs the water and takes longer to dry than other tiles.

Flood Stained Terracotta Floor After Cleaning Gloucester

Sealing a Terracotta Tiled Kitchen Floor

On my return I first checked the floor for moisture using a damp meter taking several readings around the floor to satisfy myself it was dry. Applying a sealer to a damp tile would lead to an inconsistent result so it’s always best to be sure.

Eight coats of sealer were needed to ensure the floor was fully sealed, again Terracotta is very porous, and it can really drink the sealer. For this floor I chose Tile Doctor Seal and Go which works really well on Terracotta it added a nice subtle shine to the tiles and will ensure the floor is protected going forward. It’s also water based so you don’t get a smell as it dries.

Flood Stained Terracotta Floor After Cleaning Sealing Gloucester

Afterwards the floor looked great and the customer was very happy. They are just hoping there will not be a repeat of the floods that caused the previous damage.


Professional Restoration of a Terracotta Tiled Kitchen in Gloucestershire

Renovating a Flood Stained Terracotta Kitchen Floor in Gloucester Read More »
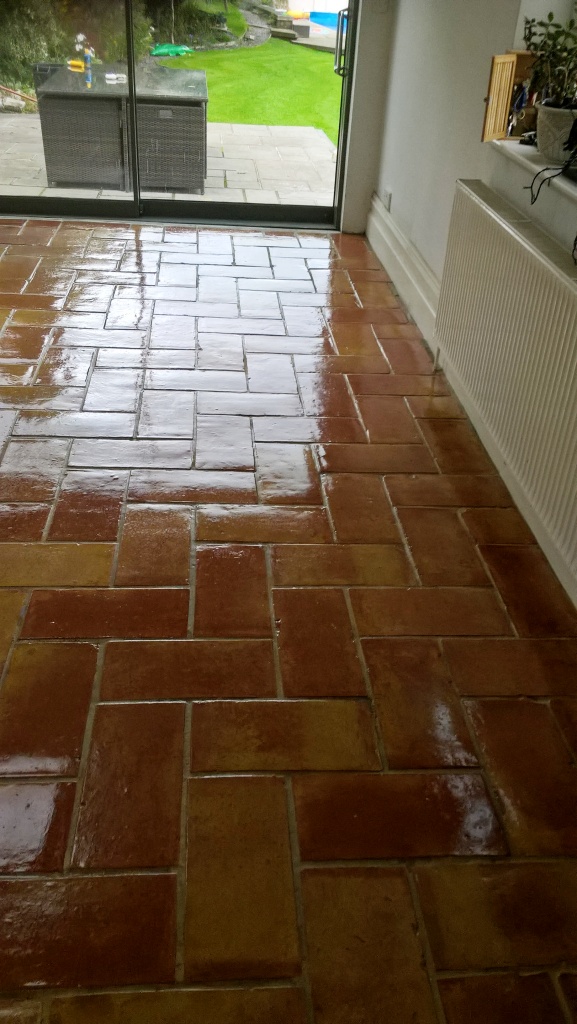
Mexican Terracotta Tiled Floor Before and After Renovation Stroud

Wax Sealed Mexican Terracotta Floor Stroud

We were called by a customer with a Mexican Terracotta floor who was looking at having it taken it up and replaced but before doing wondered what it would cost to have it renovated. I visited the property in the nearby market town of Stroud in the centre of Gloucestershire to survey the floor and advise on options. Stroud by the way is a lovely part of the county and sits within the Cotswolds which is an area of outstanding beauty.

Wax Sealed Mexican Terracotta Tile Before Cleaning Stroud
The customer had this floor laid thought the ground floor just five years earlier and had been was advised to seal it with wax. After three months the wax had broken down and started collecting dirt as you can see from the pictures. Unfortunately, he had not been advised the correct way to look after his floor and was now fed up with its appearance. Help was at hand and I was confident I could restore the floor for a lot less than replacing it, I explained what could be done, agreed a price which was accepted and agreed a date for carrying out the work.

Wax Sealed Mexican Terracotta Tile Before Cleaning Stroud

Stripping Wax Off Mexican Terracotta Tiles

So, the first job was to strip the layers of wax and sealant off using Tile Doctor Pro-Clean and Remove and Go. I combined the products together to make a very effective cleaner and coatings remover and left them to soak into the Terracotta tiles for ten minutes, before scrubbing them in with a black pad fitted to a rotary floor machine. This process released a lot of dirt and waxes from the floor which I extracted with a wet vacuum and then retreated areas that needed more work until I was happy it was as clean as it could be.

After the floor was clean I set about on grout lines these were also in a bad state, they needed a lot of manual scrubbing with Pro-Clean which was worked in with a narrow stiff brush to get them clean.

Wax Sealed Mexican Terracotta Tile After Cleaning Before Sealing Stroud
Afterwards, happy with the result, I rinsed the floor three times with water to remove any trace of the cleaning products and soil from the floor. Because I had to use so much water and cleaning products to achieve a good result I left the floor for nearly a week, so it could thoroughly dry out. Mexican terracotta is very porous, and it would need to be dry before sealing so I figured five days should be enough time.

Sealing Mexican Terracotta Tiled Floor

I returned after five days and checked that moisture levels of the floor were satisfactory with my moisture meter. Once I was satisfied I was good to go ahead with the sealing. I decided to use two different types of sealant on this job. For the first coat I used Tile Doctor Colour Grow which is an impregnator that soaks into the pores of the clay tile protecting it from with and enhancing the natural colours in the process. I then applied six coats of Tile Doctor Seal and Go letting it dry in between coats. Seal and Go is a water-based blend of acrylic polymers that provides both a stain resistant seal and a durable low-sheen finish, which the customer had requested on this job.

Wax Sealed Mexican Terracotta Tile After Cleaning Sealing Stroud
The customer was pleased with the result, he never expected it to look so good and had thought he was going to have to put a new floor down. Not only had we completed a great job for them, they had been saved significant expense too.


Professional Restoration of Mexican Terracotta Tiles in Gloucestershire

Wax Sealed Mexican Terracotta Floor Stroud Read More »

Stripping Varnish off Terracotta Kitchen Tiles and Resealing in Bristol

Stripping Varnish off Terracotta Kitchen Tiles and Resealing in Bristol

Terracotta tiles are always a popular choice for Kitchens but being made from clay they are porous and need to be sealed to prevent dirt from becoming ingrained in the tile. Once sealed though you need to remember Kitchens are high traffic areas, so you can expect the sealer to wear off quicker than it would elsewhere.

I mention this as a customer from Bristol asked me to do a survey on her Varnish Sealed Terracotta Kitchen Tiles where the seal had worn down and were now dull, and the grout had darkened. I surveyed the floor and completed a test clean on a section of the floor which came out well impressing the customer who was happy for me to proceed with cleaning and sealing the floor.

Terracotta Kitchen Floor Tiles in Bristol Before Cleaning Terracotta Kitchen Floor Tiles in Bristol Before Cleaning

Traditionally Terracotta tiled floors have been sealed with a number of products over the years including Wax, Linseed Oil and on this occasion Varnish however all these products have their disadvantages and don’t compare to modern sealers which are designed for the job.

Terracotta Kitchen Floor Tiles Bristol Before Cleaning

Cleaning a Dirty Terracotta Tiled Kitchen Floor

The first day was spent trying to get the Varnish off the floor which somebody had used on the floor as a sealer; Varnish is easily scratched by furniture, so I certainly wouldn’t recommend it. I worked out however that it could be scrubbed off once coated in a combination or Tile Doctor products Pro-Clean, Remove and Go and Nano-Tech HBU which would be left to soak in for a while and then softened with steam.

Mechanical assistance from a buffing machine fitted with a large black scrubbing pad helped reduce the amount of elbow grease that was required and once I was happy the tiles were clean the now soiled solution was rinsed off with water and extracted using a wet vacuum.

The next day and with the floor now clear I was able to see those areas that needed further re-treatment and also turn my attention to the grout which was cleaned using more cleaning solution worked in with a stiff narrow grout brush that gets into the grout lines. Once I was completely happy with the floor its was given a final rinse with water to remove any trace of cleaning products and then dried with a wet vacuum to remove as much moisture as possible.

Terracotta Kitchen Floor Tiles in Bristol After Cleaning

Sealing a Dirty Terracotta Tiled Kitchen Floor

It’s important that the tiles are dry before sealing so I left the floor to dry out for three days before returning to seal them. No Varnish this time of course, Tile Doctor has a range of sealers for every type of situation and what I find works best on Terracotta tiles is a single coat of Tile Doctor Colour Grow topped off with multiple coats of Tile Doctor Seal and Go.

Terracotta Kitchen Floor Tiles in Bristol During Cleaning
Tile Doctor Colour Grow is an impregnating sealer that penetrates into the pores of the clay protecting it from within whilst enhancing colour whilst Seal and Go completes the sealing process and adds a nice sheen to the look of the tile.

Terracotta Kitchen Floor Tiles in Bristol After Cleaning and Sealing Terracotta Kitchen Floor Tiles in Bristol After Cleaning and Sealing

As you can see from the final photographs the floor looked really good and the customer gave me top marks for feedback.

Terracotta Kitchen Floor Tiles in Bristol After Cleaning and Sealing
 

Professional Terracotta Tiled Kitchen Restoration in Gloucestershire

Stripping Varnish off Terracotta Kitchen Tiles and Resealing in Bristol Read More »

=================================

Gloucester Tile Doctor

================================= Read More »

Scroll to Top