Original Victorian Tiled Hallway Repaired, Cleaned and Sealed in Cheltenham
Cheltenham in the county of in Gloucestershire is a recognised area of outstanding beauty, and is known for its various festivals which take place throughout the year. Horse racing is another event that continues to be very popular in Cheltenham, after first gaining popularity during the Victorian period.
Indeed, lots of people made their homes in the town during this time, and many of the original Victorian properties are still in use to today, complete with original Victorian tiled floors. However, not all of these floors have been kept in great condition over the decades. Lots of them have spent years covered by carpet, while others have become broken or damaged, and simply left to slowly degrade over time.
I found a good example of this at the home of a recent customer of mine. The customer’s Victorian tiled hallway was in poor condition, with some of the tiles around the doorway cracked and in need of replacements. All in all, the floor required repairs, followed by deep clean and a fresh application of sealant.
 |
 |
Repairing and Cleaning Original Victorian Tiles
My first job was to source suitable replacement tiles which would be needed to match with the original pattern of the floor. Fortunately Tile Doctor has built up a network of contacts in this area so this proved to be a simple enough task.
When I arrived on site I protected the flooring in the adjacent rooms and staircase carpet with plastic sheeting and made a start on removing the cracked tiles, cleaning up the foundation then fixing and grouting in the replacement tiles.

I used a wet vacuum to remove the soiled cleaning solution, rinsed with water and then spot treated those tiles which needed more work to get them clean.
Once I was happy with the floor was as clean as it could be I left it to dry off overnight.
Sealing Original Victorian Tiles
Upon returning to the property the next day, my first concern was to run some tests to check for any outstanding damp issues. Victorian properties do not typically have damp proof membranes installed, so these tests were essential as an excess of moisture can cloud the sealant and prevent it from performing correctly.
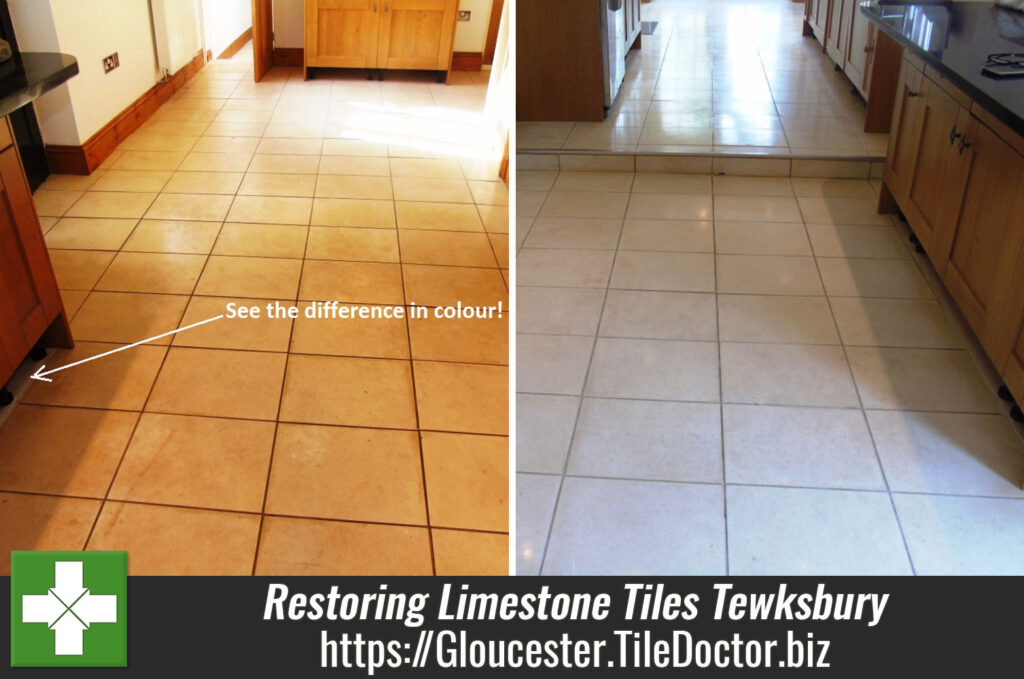
Luckily, there were no major damp issues and I could proceed with sealing the tiles using Tile Doctor Colour Grow, which is an impregnating sealant that penetrates into the pores of the tile enhancing the natural colours and protecting it from with. I find many customers with Victorian Tiles opt for Colour Grow as their sealant because it provides a natural-look matte finish which really compliments the classic characteristics of Victorian tiles.
The customer was absolutely delighted with the outcome of the restoration, which you can see in the photo below. Best of all, he said that he is already getting comments from friends and family on how great the floor looks now.
 |
 |
Professional Renovation of an Original Victorian Tiled Hallway in Gloucestershire
Original Victorian Tiled Hallway Repaired, Cleaned and Sealed in Cheltenham Read More »